Using the brush tool in photoshop I drew out the McLaren drivers which I was going to use for my poster but decided against this in the end. Instead, I decided that I would sell these as posters separately to McLaren fans as collectables. I really enjoyed making these and expanding my skills with the brush tool and also the Wacom tablet which I used to draw these. I finished these off by writing the names of the drivers on the side and writing their driver numbers along with the signatures which tied the drawings together. This was my finished product of this.
Author / Amy D
(A2) Tickets for McLaren Rebrand RESUBMISSION
For the tickets in my McLaren rebranding, I wanted to introduce more colour and graphics to the F1 tickets, they are the first thing a person sees before they go to the event so making a great first impression is essential.
My initial idea was to use different concepts depending on race I would be designing special edition tickets for a small number of races in the season. This included races like Monaco where I would do vintage-style tickets because of the numerous years it has been on the F1 calendar and Silverstone as it was the first F1 race to exist.
I began by making a mood board full of different ideas and other tickets that graphic designers have made for inspiration and to refer back to. I also included current F1 tickets for things I will need to put in my tickets such as the date and areas people are allowed.
I decided to design my tickets in Illustrator in case I wanted o use the pen tool I did end up using so this was a good decision for me. I began by drawing the helmets for my tickets as I knew they were something I wanted to include I decided to make my tickets access all areas for the McLaren garage, these were going to be VIP tickets. I did these in separate files in illustrator and when finished drawing them saved them as PNGs ad brought them back into my ticket file. I then split my ticket to a place where I could have a barcode strip for each day which I took inspiration from my mood board. In these I included the date, what was happening on that date and the barcode that could be scanned, I did this for the 4 different days. Instead of keeping the background for this white, I decided to add striped coming from the bottom left corner to which I used the colours from the helmet at a lower opacity to fill these. This then gave me inspiration on how to fill the rest of my ticket, using the pen tool I made blobs around the ticket which I could then fill with different shades of orange and some light blue at a low opacity so the text could still be seen. I did different shades of orange to match the McLaren theme and h blue to match when I featured it in my other touchpoints. For the name, access and ticket reference, I used a san serif font to make it differ and stand out from the rest because it is the most important part of the ticket, I used hierarchy to differ what would be in the larger font and what would be smaller, I made ADULT largest as it deciphers what kind of ticket it is and then accesses all areas so it can be easily seen when walking around the paddock. I put a white box behind this so it could be easily seen above the colour in the background of my ticket and put the text in black to contrast with this so I would stand out and be more readable from a distance. I then added the F1 logo and race in the corner using the original style that is normally seen in F1 tickets so mine would look more realistic and didn’t believe needed remaking as it already worked like this. I also added my McLaren logo into the white box to show that his ticket was directed only at McLaren’s personal and VIP fans. Finally, I added in the legal stuff below my white box just like I had seen n all the other F1 tickets, it again made them look more realistic and professional.
I love how my tickets came out, in the beginning, I was struggling with what I was going to do with them and how to design them, but in the end, my mood board helped me and with plenty of experimentation they came out exactly how I wanted them to.
Something I would change in the future is also to make my tickets able to go in lanyards or make lanyard versions of these which people are seen to be wearing on the paddock all the time to get in.
(A2) Revaluation on Project Gantt Chart RESUBMISSION
Going back to the Gantt chart that I made at the beginning of the project I am doing an overview at the end of my project to see if I stayed on track with my Gantt chart throughout the project.
Now I have finished my McLaren rebranding project I’m doing an overview of whether this Gantt chart worked for me and if I stuck to it. I did stick to researching throughout my project, I was always looking for images and inspiration and in some areas also looking at data, this was in my merchandise section where I wanted to know what colours people did and didn’t like wearing. My development did run over by a couple of days as I spent longer than I should’ve on my pitch work and creating mood boards which meant I had less of the assigned time to do my designing. My designing is what took me the longest amount of time in this project, there were some touchpoints that I spent too much time on which meant I had less time for other touchpoints and other things within my course, so management on this needs to be sorted out by me as it also started to eat into my evaluation time. When this happened I became very stressed and overwhelmed as I felt like I had so many things going on at once, in future, I need to stick to the assigned time I have given myself to prevent overwhelming myself, downsizing projects and only doing extra stuff to them if I have the time. Because of all of this I had less time o evaluate which meant I had to do a resubmission as I ran out of time to do all of my evaluations with my projects which shows the severity of the situation and that this really needs to be improved on by me.
So overall did the Gantt chart work for me? The short answer is no because I didn’t stick to it, I would try using it again in the future and being more strict on myself about when to stop and move on to the next thing and then I believe I would be able to work well with this management technique.
(A2) Merchandise for McLaren Rebrand RESUBMISSION
For the merchandise section in the redesign with the chosen theme of colour and similar style to the racing suits, I would like to create multiple examples of merchandise for McLaren that fans of the team will be able to wear. This could include special edition merch to brand collaborations. The clothing brand will be made from sustainable materials in an attempt to appear to a larger audience rather than just fans of the sport and attempt to keep the prices of the merch at a reasonable price.
I made a mood board looking at merchandise that already exists and the price range that McLaren sells their clothes for and seeing what the most popular things were within the McLaren fanbase.
I found that the price range for their clothing is quite high, and a lot of their merchandise isn’t affordable to fans who would still like to openly support the team but do not have the funds to do so, this is something I would like to change. As well as this I also found that the McLaren hoodies appeared to be the items that sold out most often compared to everything else, something I will take into consideration when creating my own. They keep their style simple without it being over excessive and I think this works however sometimes I do think their items are overpriced, a hoodie being sold for £60 and only having ‘Miami’ written on it isn’t something I would spend my money on.
I began by making the hoodie, with the time I had left for this project it became clear that I would not have the time to do a range of clothing items so I decided to go with the item that was most popular to the public.
I began by doing a little research about what colours are most and least favoured to wear and I found these results:
Conclusion to Color Preferences by Gender
- Blue is the most popular colour for both men and women.
- The most unpopular colour for men is brown.
- The most unpopular colour for women is orange.
With this I decided not to use the colour orange for my hoodies even though it is the main colour of McLaren, I would add some orange into the hoodie but it would not be its main colour. Instead, I would use a cyan/ turquoise colour as it still links into the theming as the colour is included in the suits and in the research found that blue is the most popular colour for women and men.
With this, I found a mockup I could use to begin my design, using the colour bar I was able to make a refreshing cyan colour when finding the colour I constantly had the thought of whether people would actually wear this colour or not. Although my target audience for my merchandise is McLaren fans who are young adults I also want my merch to be something that all people can appreciate and find appealing, making it a tacky bright colour would not do this. When happy with the colour I had chosen, I added the McLaren logo I had created onto the front of the hoodie so that when worn it would be on the top left. I wanted to add more to the hoodie than this to make it worth buying for the customer so I added the driver number and name onto the back of the hoodie where it would take up most of the room with the driver number being the largest, there would be 2 versions of this for each driver. I used an outlined font so the inside of the letters would be the same colour as the hoodie keeping a more clean and organised look to the back. Even after this I still feel like my hoodie didn’t have anything that made it original so I tried adding a bit more orange into it by making the hoodie half and half, I did this by editing the layer mask on the mockup. I added a few stripes onto the orange side also to make it more eyecatching from the back to passersby. It is important for people to see my hoodie as in a way it is like a walking advertisement, if people see my hoodie and like it and would like to know where it is from or what it means, by looking at the back they would see Ricciardo and google this and they would reach McLaren where they could be inclined to buy stuff themselves and begin to support the team.

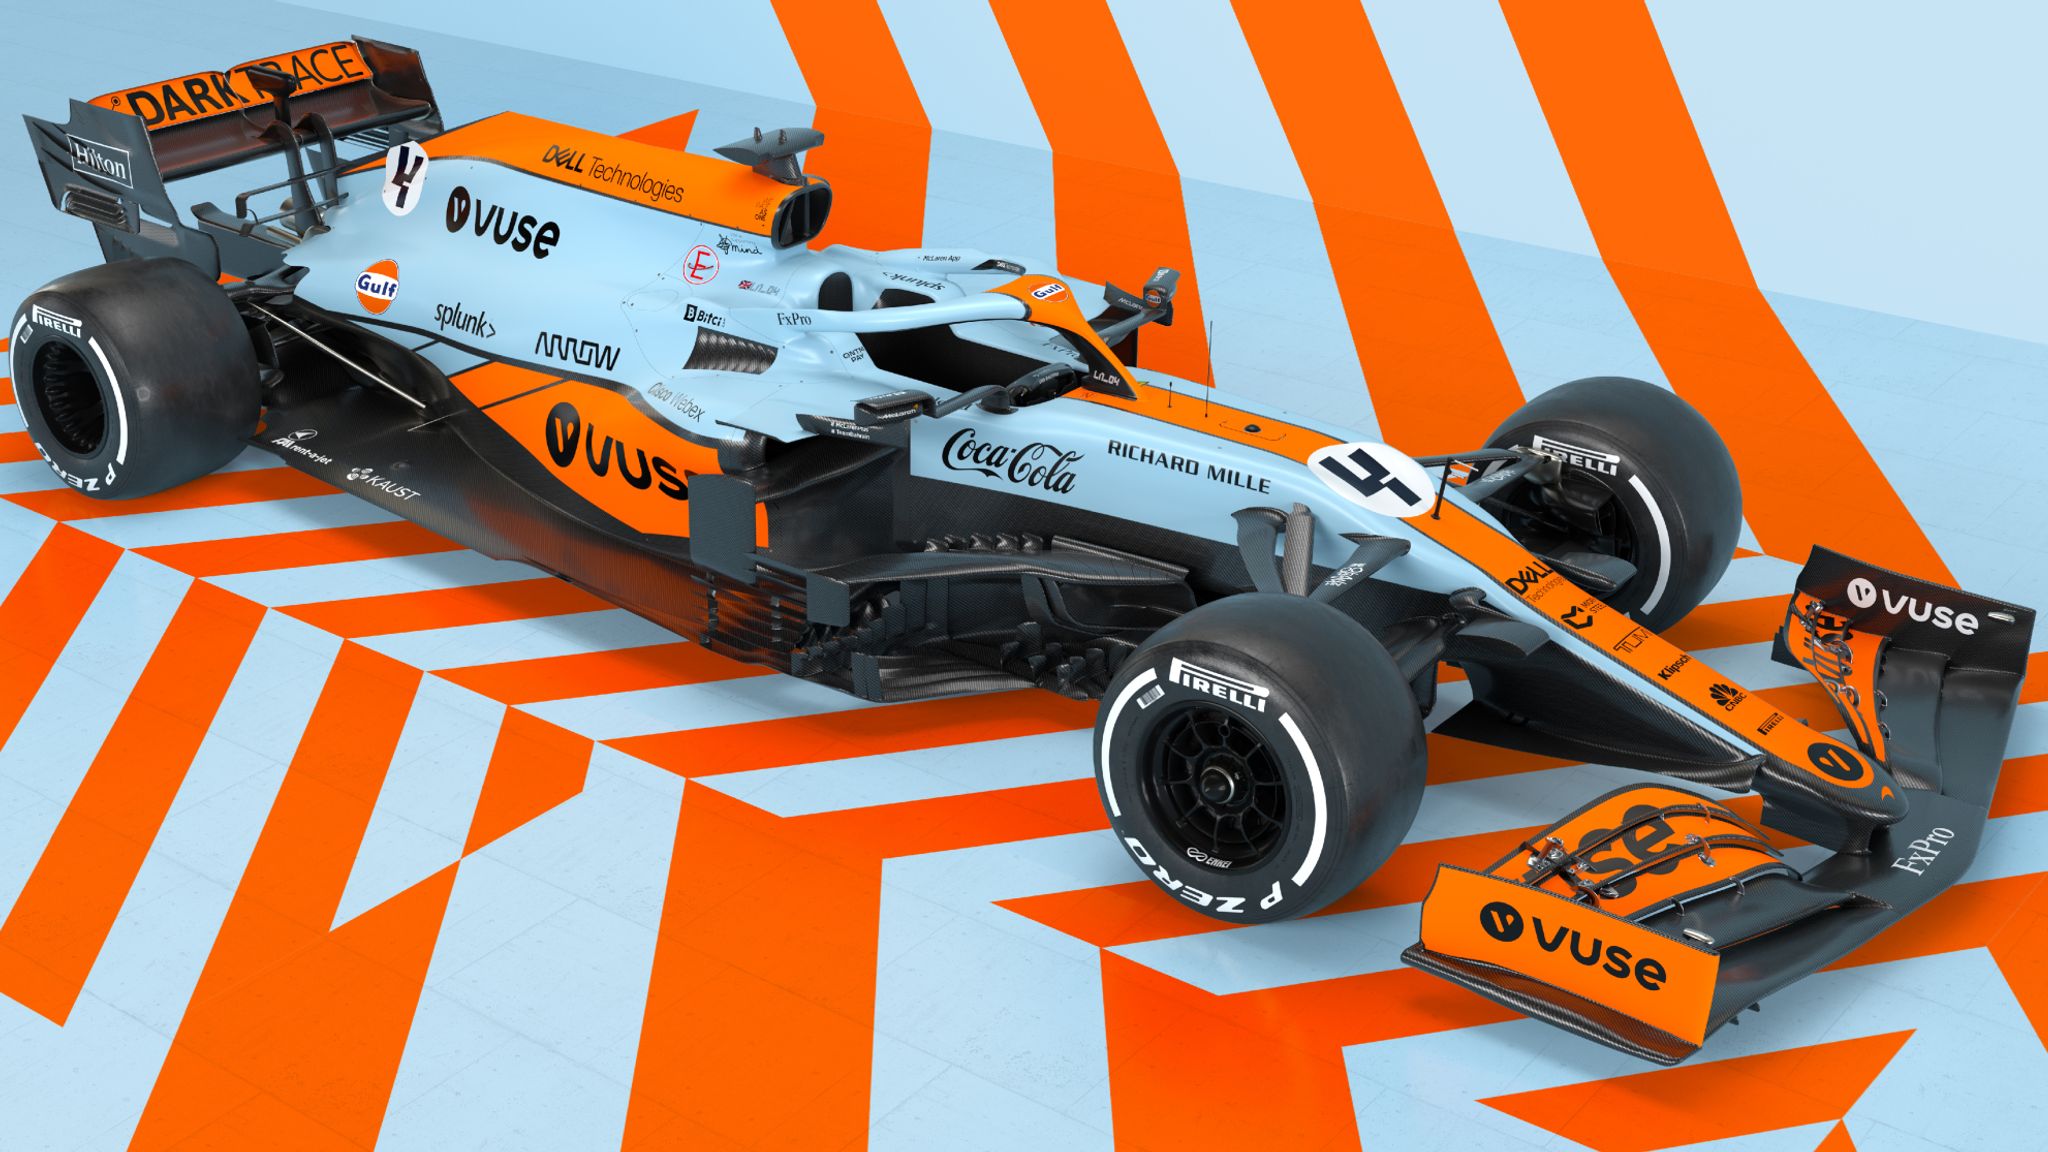
What I love about my hoodie design is making the most out of the space I had on the hoodie without making it look tacky and unfashionable. It doesn’t have the team plastered all over it so I believe anyone beyond a McLaren fan could wear this and appreciate this hoodie.
Something I would improve or would have liked to have done is made another version of this for the second driver where I could have experimented with different colours for the hoodie and changed the name and number on the back to 4 and ‘NORRIS’.
I would charge £50 for this hoodie, I wouldn’t be able to take this price lower as sustainable fabrics are more expensive to work with however I believe this is more affordable and worth the money because of the amount of design there is. I would also add 10% off to new buyers on the McLaren website.
In addition to the hoodies, I made caps for the fans to buy where I used similar colours that can be seen on the racing suits.
Making orange the most visible colour with the cyan next to it with elements of red across the end almost matches up to the suit design which will look fitting when the drivers wear it and make McLaren fans stand out when walking around in either public or on F1 camera footage at races in the crowds.
I would charge £20 for the caps.
With the cap mockups, there was also a package that came as part of the mockup which I took advantage of and designed which is what any items that are sold would be shipped in. Again I kept to the similar theme of cyan and orange to make everything link together with a nice message on the side to add a more personal touch to the buyer which could make them feel more inclined to buy from McLaren again because they feel special.
Finally, to go with whatever the customer buys, they receive a free sticker from their driver (they will be asked this when they reach the checkout on the website) which again makes the product more worthy to buy. With mass production of these stickers, there is no loss of profit because of how cheap they are to make.
To create the stickers I simply used the pen tool to outline an already existing image of both drivers and created a simple drawing of them both. I decided not to add facial features as I believe it looks better without, making them look cleaner and more cartoon-like.
Celebrate 2022
End of Year Reflections
How has this year gone?
This last year has been a bit of a rollercoaster for me, in the middle of the year I moved class groups for confidential reasons however the support from tutors has been amazing. I feel as though I have grown in confidence not only in my skills in graphic design but also in meeting new people and how I present myself which was one of my targets at the beginning of the year.
Are you happy with the progress you have made?
I am happy with the progress I have made, looking back on my work from the beginning of the year I can see how much my style and skill have changed for the better.
What could you have done better?
Something I could have done better is to keep up to date with blog work and try and do as much as possible in the lesson to save it from all piling up towards the end of the assignment and being left with loads to do at the last minute.
What do you personally want to improve on for year 2?
I want to improve on my time management as currently, I believe I am giving myself too much work and planning too big at the beginning of a project which sometimes I cannot all do so I tend to fall behind on blog work. In future, I need to plan a little more precisely and realistically.
(A2) Poster Design RESUBMISSION
Taking inspiration from posters made by numerous artists for races aimed at different teams. I researched different styles and approaches for the different posters as I begin to make my own, I made a mood board to collage my ideas.
I gathered numerous amounts of posters all consisting of different styles in the attempt to maybe use these styles in my poster.
I decided to base my poster on the race in Monaco and use the pen tool to simplify the image of Monaco, this is the image I used to trace over with the pen tool.
Using the ink dropper tool I filled in the shapes I had drawn with the pen tool to keep the colours similar to the original. I copy and pasted the shapes of the buildings and the tracks and made them a lighter colour to create the impression of shadows.
I then used the pen tool to create the outline of the car and to have it on the track, I used an image of the 2022 F1 McLaren car for this and did find it a bit of a challenge using the pen tool to outline this because of all the different components in the car.
After looking at the different fonts on the other posters I decided I wanted a san serif font which looks quite artistic and interesting. I made the ‘Monaco’ the largest piece of writing on my poster using hierarchy to show it was the most important part of the poster as it is the location. I made the colour a bright orange to link to the McLaren colour but also to give off summery connotations. Under this, I then wrote the date of the event underneath this in the same font but smaller and in a lighter tone than the orange I used before. Finally for the fonts, following the theme of the other Monaco posters I put what number Grand Prix the Monaco race was, I placed this at the top in a different font to add variety and also because this is another theme seen in the other posters.
I finished the design of my poster by adding my McLaren logo in the bottom corner to show that this was a poster mainly aimed at McLaren fans and to tie all my work together.
Overall, I was quite happy with the outcome of my poster, I really like my choice of font and I believe it can be very easily recognised as Monaco.
Something that I would change is making my poster brighter at the bottom as it appears quite dark in comparison to the top where it is very bright. As well as this, something that I ran into was my mistake in drawing the car where I had used the pen tool in the wrong places meaning I couldn’t fill it with colour as the colour would spread to places I didn’t want it to however I did not have the time to spend any more time on this touchpoint to correct it.
(A2) Suit Design for McLaren Rebrand RESUBMISSION
For the redesign of the racing suits, I did research around different patterns, colours and features on the suit. For the colours I was still torn between using the gulf livery colours and the original McLaren colours red and white so to fix this frustration I did some research into past McLaren suits that have been used from 1970 to now.
For the racing suits my idea was to take an element for each suit there has been and make one complete suit out of all of those elements, I got a template off of the internet for this that I could work on and brought this into illustrator. I used the pen tool to make the blocks of colour in each part of the suit, by doing this I actually improved my skills with the pen tool because of the tight areas I was working with with the template and this meant I had to be more precise with the pen tool. As I was incorporating each part from the suits into mine I was trying to be very wary that colours wouldn’t clash and make the suit look tacky and disorganised. I decided to use the black spread across the chest as it was a theme in the suits that existed for 5 years, I also liked it as it kept the chest area simple and not too overcrowded as well as providing an area for me to put my sponsors. I added an element of the 1970s suit to the sleeves with a red strip using the same colour as the original by using the ink dropper tool. I used elements from the most up-to-date suit down the sides of the legs with the blue and papaya orange, it was important to me that there were more orange highlights in the suit than any other colour apart from the grey as it keeps the McLaren brand still recognisable with the orange being what they stand out most through now. Although not shown in my mood board, I also took inspiration from the 1970s suit for the back of my suit, having it red and instead of the Malboro logo which is not allowed anymore in F1, I placed the driver’s number there instead. I decided to only use these elements and not anymore from the timeline I had created, this is because I had peer feedback that using that much may make the suit look overwhelming which I agreed with so decided to leave the suit how it was.
I decided to keep the same sponsors that the team already has as I found this would save me more time so I could spend more time on my other touchpoints as this one was already taking up a lot of my time, additionally keeping the sponsors that already exist make the suit look more realistic with familiar sponsors.
What I like about my suit is how even with the numerous colours used the whole suit comes together as one and blends instead of colours looking like they have been patched randomly across the suit. Although I didn’t use all of the suits to make this one after receiving peer feedback that it looks overwhelming, I still think it works really well in taking a snapshot of history. Following on from that I also like how I have managed to keep all parts of the suit the same no matter the angle so it doesn’t look odd.
Something I would improve on is placing this suit onto a mockup, although I did try this I found it really complicated to work with as the mockup was 3D, I could’ve fixed this by making my own mockup by using an existing image of a driver if I had more time. Time is also something else I needed to work on as I spent more time than I should’ve making these suits which made my original timeline plan go off track.
(A2) Smart Targets Week 34 RESUBMISSION
(A2) Peer Feedback RESUBMISSION
Why Is Feedback Important As A Graphic Designer?
It is important to receive feedback as other people may see things in your work that can be improved that a designer may not be able to see because they have become familiar with their work and are less likely to spot things. A different perspective can help you unlock your own and helps you become used to criticism and how to use it positively.
Peer Feedback On My Work
With the feedback given, I decided not to use all of the suits to make my own because it looked overwhelming and instead as my peer advised only used elements from three of the suits from the past. I found the feedback really helpful and isn’t something I would’ve recognised myself so is definitely something I will be doing for my other touchpoints and again in the future.
Before the feedback, the idea was to include an element from every suit on this board, however, with the feedback given from my peer I will minimise it down to 3 in this lesson.
After making adjustments and deleting some things my suit looks a lot cleaner and organised than it would’ve been with other things incorporated into it.
(A2) 3D Logos In After Effects RESUBMISSION
Task- Convert vector imagery into 3D designs
To make my 3D design I did not need to create a logo for this task as I already created one for my rebranding project and decided to use this one to possibly use it in my actual finishing product.
I imported this into after effects as a composition so it will break the design into its AI layers. My idea was to have my logo rotating around so all angles of it could be seen so to do this I had to enable cinema 4D which I did by clicking composition settings and then the renderer, I then extruded the logo to add depth and thickness to my shape. Instead of having my logo rotating, I decided to instead have a light rotating around it as if it were in the spotlight, I added this in by layer-new-light which abled me to add this. To then animate the movement of the light surrounding my shape I used the timeline and keyframes, each time I would move the light around my shape I would save the keyframe. This was the finished result of the process.
Overall I am happy with the outcome of my animation and I like how it looks like the light is continuously spinning around my logo which I have done by aligning my beginning and ending keyframe at the same point in my timeline.
Something I would change for the future is to also experiment with having y logo spinning at the same time as the light spinning to really challenge my skills. This is inspired by the warner bros where we see it fly onto the screen which allows us to see it from other angles before the light glows over it.
I learnt a lot in this lesson and found it easier to use after effects than I did before for example I did not know how to use the 4D tool before this which I think will be really useful in the future.
(A2) Re Evaluating Gantt Chart RESUBMISSION
Going back to the Gantt chart that I made at the beginning of the project I am doing an overview of where I’m at and if I’m staying on track.
I should be reaching the end of my design process now however due to taking extra time on touchpoints I have fallen a bit behind and this is now beginning to eat into my professional practice and evaluation time, I will try and sort this by shortening my touchpoints and minimising the ideas and beginning my evaluations at home on touchpoints that have been finished and doing the design work in class.
SMART Target: Finish my poster design by the end of the 2-hour lesson.
(A2) Health and Safety Poster
With my branding and advertising project for the rebrand of the McLaren Formula 1 Racing Team, I also needed to create a health and safety poster to present the rules and caution that should be taken around the trach to guests. As this is an event that hundreds of thousands of people attend it is crucial that safety is a priority for both drivers and fans therefore in my poster I want to make rules that apply to both around the pitlane and around the stands.
I began by looking at other health and safety posters for inspiration but found that a lot of them were overcrowded with words.
Posters like these are good in working environments like offices where people have time to read them and be up close to them however in an environment like an F1 race people are not going to have time to read something like that because of how small the words are not everybody is going to be able to see this, they are not going to care too much as there are more exciting things going on around them than reading a page filled with words and is also rather guidance than rules so not everybody would follow this.
For my health and safety poster, I wanted to keep it as simple as possible and make sure everything stands out so it can be read from a distance. I used a dark grey background below a large white font in san serif so it can be easily seen and read with nothing fancy around it. To separate the rules between the pitlane and around the track I used the Monaco track so it shows the rule sheet is specifically designated to F1 and people may also be more inclined to look at it. Additionally, to also stop my poster from looking too boring, in the places where there is no text I have included colour gradients for example in the trach and in the cars I placed them around the corner of the poster to again keep it from looking bland and uninviting to look at.
(A2) Alex Trochut Case Study
Alex Trochut
Alex Trochut is a Spanish artist, graphic designer, illustrator, and typographer born in Barcelona in 1981. He completed his studies at Elisava Escola Superior de Disseny in Barcelona and worked in Spanish design studios before he established his own design studio and relocated to New York City.
He has developed his own intuitive way of working through his design, illustration and typographic practices. His typography functions on two hierarchical levels, the first being the world we see and reading comes second. As a designer Alex focuses on the potential of language as a medium, pushing language to its limits so that seeing and reading become the same action and text and image become one united expression.
He has worked for multiple clients ranging from Katy Pery, Coca-Cola, BBC, New York Times, British Airways and many more.
Some of his work
What I like about Alex’s work is his creativity, with his design with Puma he has used the laces to write his words and the colours on the shoes are associated with the colours of the flags in those countries. He has done a similar thing to his work with McDonald’s for the big mac, using the colour that should be the beef patty with a ribbon effect to write the words where the beef patty should be so you are looking at the image whilst also reading it which I think is really genius.
(A2) Smart Targets Week 33 RESUBMISSION
Did I complete my targets?
I completed my suits this lesson although I did run over the time of 45 minutes by 15 minutes, this ran into my time for designing my posters. I had the top parts of my suit to finish which I did manage to do.
This was the result after I had finished this.
I then moved on to designing my poster, I began by finding an image I could use to draw over with the pen tool and began drawing and continued this for the rest of the lesson.
(A2) Smart Target/ Project Update RESUBMISSION
Going back to the Gantt chart that I made at the beginning of the project I am doing an overview of where I’m at and if I’m staying on track.
Looking back at the Gantt chart I said I would spend 2 weeks on development which I have however I should be moving on to design now however due to changing ideas and spending too much time making mood boards and my pitch I am starting to eat into my design time. I am going to try and fix this by doing some extra work outside of college hours and completing my pitch so I can move on to designing for my branding and advertising.
Smart Target for today: Complete merchandise mood board and poster mood board and put these into the pitch with annotations by the end of the 1-hour lesson.
(A2) The Best So Far RESUBMISSION
1. Magazine Cover and Spread
I believe this is the best piece of work I have produced because of how sophisticated my magazine looks. As well as this I experimented with many tools in InDesign, including text wrap which I really enjoyed using and used throughout my magazine. I love how clean the magazine appears and all the colours near collaborate with each other, especially on my front cover.
2. Playing Cards
I believe the playing cards are my second best piece of work as they all follow a glitched theme and I put a lot of thought into this project. I wanted to make a set of cards that had an old-themed style but looked like they were being taken over by a newer more futuristic style. I drew the characters from the nightmare before Christmas in pencil to give off a more old-fashioned style instead of more digital and they used created a glitch effect to juxtapose this and make it more digital looking.
3. Tshirt Design
I believe the T-shirt design was also one of the other best pieces of work I’ve made because of the number of attempts I had in making my shirt look perfect, although I haven’t included this. I wanted to create a funky and fresh feel like a graffiti style which I believe I achieved, as well as this I also made my own packaging and logo to make it look like this was an actual real brand as this is what would be needed when making an actual clothing brand so I wanted to cover all areas in that assignment.
Social Media Marketing
Social media is a prime way of companies to reach a wide range of potential consumers with relative ease. Algorithms are manipulated to with hashtags being used to ensure that posts can reach the widest range as possible.
The power of social media has seen it become the main stay with activism. Again notable hashtags trend on sites such as Twitter, garnering mass attention from the range of users these sites have.
Coming Soon Poster
For my coming soon poster I had the idea of being secretive with shadows and not giving anything away. I wanted to use a captivating line to address the audience my poster would be reaching but also make it personal so I came up with ‘We Are Your Team’. With this, the audience feels more included and therefore more captivated by the poster. I used shadows of the divers which I made by using the blending option on the layers in photoshop and changed the angle so they would be facing upwards within the corners of my poster. I believed this kept more with the hidden theme of the poster rather than showing the faces of the drivers, I also used images of the drivers in celebratory poses to remind fans of the great times of the F1 team. For the background of my poster, I decided to keep it simple, using a gradient to mix boh the blue and orange together that are seen next to each other in the suits I created.
What I like about my poster is how little it gives away, it lets the audience know that something new is coming but does not give any hints away so they are left in suspense, I also like the personal touches I added with the line and the driver shadows.
What I would change in future is making sure everything is in line with each other and maybe try and add more to my poster as it looks quite empty.

When looking at other coming soon posters you can see that they use up all the room they have, I also like the 3D effect they have added to their text, something I would use on my work in the future.
(A2) Kingdom and Sparrow Case Study
![]()
Kingdom and Sparrow are a branding design agency based in Falmouth, Cornwall in the UK. They pride themselves on being unique and using that to make them stand out in the market.
Founded in 2012, they have now grown to be one of the largest branding agencies in Cornwall with 2019 being its biggest year to date.
They are regularly nominated for awards, in particular the World Branding Design Awards.
They have worked with brands such as Maison Du Vin, 58 and Co, 8Track Spiced Rum, Mission Coffee Works, Alt Co and many more.
They are a branding and advertising company that mainly aim towards adults which can be seen through their numerous clients being with alcohol companies and having their design worm being very adult orientated.
In the cans they have used different tones dependent on the flavour of the drink keeping a clean and sleek look. They also keep their showcase of their products sticking to the theme of the product they have branded with for example with alcholic drinks company has been presented with lemons and sunglasses with a yellow stand to keep a summery theme and uplifting.
What I like about the design that Kingdom and Sparrow do is each design is different depending on the brand. Some have a more retro design and some more modern, some more fun and some more classy. I also really like their way of advertising for example in the photos included where we see the monsters holding the cookies as that is the character of the brand.
Looking at other rebrands similar to this I looked up other drinks bevergages that have had a rebrand and I found Sound.
This rebrand caught my eye because of the drastic change in colour between the old and new. In their rebrand they have completey changed everything, which in my opinion was very much needed because of how dull it was before. When comparing this rebrand to ones of Kingdom and Sparrows we can see they put in some more effort into the showcase of their products which can make a very big difference to if people will buy the product. Although I really like the redesign of this product I believe that Kingdom and Sparrow do advertise their products better.
(A2) Studio Case Study RESUBMISSION
Wolff Olins
Founded in 1965 they have worked in technology, culture, retail, energy and utilities, media and non-profit. They are based in London, New York City and San Fransisco and founded in Camden Town, London by designer Michael Wolff and advertising executive Wally Olins.
It is a British advertising agency and corporate identity consultancy that has worked with brands such as GSK, Google Workspace, TikTok, Uber, McKinsey and Company, and Tesco. They help create transformative brands that move business, people and the world forward. Wolff Ollins work closely with brands to reach the result that both are happy with which they have their strategy for.
Through this you can see how they have worked with so many brands, they build great relationships between themselves and the client to achieve exactly what is asked.
Some of their Branding Work

They have worked with a vast variety of companies and each brand has a different design and approach to it which I like as they all have their independent styles.
Branding and Advertising Case Study
One of the brands the company has worked with is Tik Tok which I am going to be doing further research into. The target audience of this brand is teenagers t young adults who we see mostly using this app.
In their rebranding, they use a simplistic style where they place the creators same in the centre of the page with an image of the person behind this. They have used this throughout all of their advertisements using consistency so the brand of ‘TikTok’ doesn’t need to be written because it can simply be recognised through the syle after seeing it so much which is very smart advertising.
What I like about the branding examples is that the advertisements aren’t overwhelming and arent covered in writing they are simple phrases with a preview of the video with the brands’ colours in the background. When an advertisement is covered in words someone is less likely to read it but with something like this it gets the point across swiftly and grabs attention.
Something I don’t like about this branding example is it doesn’t work on something that isn’t digital, on all the examples that have been displayed by the brand they have either been on a digital billboard or a phone, these wouldn’t work on posters or paper billboards and these are not digital so I do not know how the brand would approach this.
The final pieces are showcased on the app and on billboards around the country which is something I could use for advertising, for example, displaying my work on an Instagram page or my posters on a digital board however I would also want to animate them to grab peoples attention further.
Comparing this rebrand to another one on the internet we can see this ad is a still image with still few words but has a more graphic, stylistic look to it using different tones and shadows. In my opinion, this is an ad which would and has caught my eye more because of the expansion of colour and futuristic look to it, it still isn’t in your face and by simply clicking see the report you give yourself your own choice to read more instead of being forced to. You can also imagine how this could be made to digitally move like the tik tok brand which would also work in his brand’s favour.

(A2) Use of Textures RESUBMISSION
What is a Texture?
Noun: The feel, appearance or consistency of a surface or substance
Verb: To give something a rough or uneven texture
They are a great way to add additional details to designs and make them look more interesting. Key elements that are used when using textures in photoshop are blending modes and clipping masks.
Blending mode: An effect you can add to a layer to change how the colours blend with colours on lower layers.
Clipping masks: They are a great way in which you can tell a layer above to only affect the layer it is clipped to, thus giving you more control.
To make my textures, I used the website texturelabs.org and picked out three different textures to experiment with, I wanted to use ones that were completely different so I could also experiment with the colours of my shapes.
I used the clipping mask tool to add the textures onto my shapes which I did by importing my texture into photoshop and right-clicking on the texture layer and clicking clipping mask which then made my textures visible within my shapes.
After applying different textures to my shapes experimented with different blending modes to see what would happen, here I used the linear dodge blending mode and I found that the colours of my shape then attached to the textures which I found would be great to use if you were doing a design where you still wanted to see the colour in your image with a texture.

After trying using textures on shapes I wanted to try and use it on work I had created, using a paper texture I used this on a drawing I had created.
I really like how this came out and it makes look like this was hand-drawn instead of digitally which I think is really cool.
Overall, I believe textures are a quick and easy way to make what could be boring imagery into something fun or just an easy way to add more to your image. In future, I would like to incorporate textures into my designs and experiment more with the different blending modes.
(A2) Pixel Styles in Graphic Design RESUBMISSION
What Is Pixelation?
Pixelation is caused by displaying or interpreting bitmap imagery at an increased scale so that the entire area gets converted into large, simple coloured squares. It is the oldest style of digital design and has zero negative space and is overwhelmed with colour.
This can be done with artistic/ stylistic intent or in some cases to censor any elements that clients may not want to be easily seen.
Cristian Zuzungaga Pixel Style

Converting Images Into Pixels
All imagery in Photoshop is comprised of pixels & colour values, but we can use filters & effects to alter how the pixels merge together, creating larger stylised blocks of colour.
After sending my image into photoshop I used the Mosaic tool to pixelate my image, I could choose the cell size of these pixels and how distorted I wanted it to look.
Creating Pixel Patterns
I created a new pattern similar to creating the impression of lego bricks, I did this by using the pattern tool, a new pattern, and using the shape and text tool to make the lego pattern. Then by messing around with the settings you can choose how many pixels you want in your image which will alter how many of your patterns you will see in your image.
I liked experimenting with pixelation and although I would not use this in the current branding and advertising project I am doing I would use it in future as I really like the blurred effect it can give to an image whilst it is also being mildly visible.
(A2) Rebranding McLaren Logo
For my rebrand one of my touchpoints is to make a new logo for McLaren, however, I don’t want to just make any new logo for the team as the idea behind my rebrand is to try and bring back some of the iconic McLaren from the past that has got lost along the way.
To help with this I created a mood board consisting of each logo that has ever existed for the team.
After making this I began to sample ideas that could work together, what worked best with new and old. I tried using new fonts but found that it looked wrong and wouldn’t work well with fans as it would have lost the iconic look it has carried for years. I decided to try and stem my new logo right back to the beginning with the look of the kiwi as there is an important reason why it was a kiwi for the logo in the first place.
The first McLaren logo was designed in 1964 by Michael Turner, it was centred on a Kiwi, the national symbol of Bruce McLaren’s homeland, New Zealand. From here we have seen drastic changes but then however in 1981 they have kept to the same theme of font and 1991 saw the beginning of the evolution of the corner symbol in the McLaren logo that the brand is recognized for.
With this I used the 1967 adaptation of the kiwi with the modern font to see what this would look like with the papaya orange that is used in McLaren today, I believe this to be the perfect mix of new and old.
With my rebranding of the logo, I thought not to use the whole of the word McLaren as the ‘M’ works alone because of the trademarked font to McLaren so it is only recognisable to them. The line underneath the 1967 rendition of the logo I made to cover both the letter and the symbol so it all ties into one so the logo didn’t look strange just standing alone. The papaya orange keeps the modern McLaren still in the loop and really makes the logo pop.
What I like about my rebrand of the logo is how I believe I have successfully taken a snapshot from both new and old and tied it into one, the logo is both recognisable with new and old fans and I believe will be further appreciated by old fans to see the old logo they would’ve one known been brought back to life and maybe even bring older fans back into following the sport which is the most important thing and shows a successful branding strategy.
(A2) Landor Case Study RESUBMISSION

Who are they?
Landor is a global brand transformation company founded in 1941 by Walter Landor. He was a German immigrant along with his wife when they founded the company, his intent to ‘concentrate on designing everyday products that would make life more pleasant and more beautiful’
They aim to make an extraordinary difference for clients, employees and the world around them. They work together to go beyond people’s expectations in 20 countries. They have worked with popular brands such as Apple, Band and Olufsen, BP, Kellogg’s, Lego, Microsoft, Nike, Procter and Gamble and Singtel. It is a member of the Young and Rubicam group network within WWP plc, the world’s largest advertising company in revenues.
When working with Volvic, Landor rebranded the water company’s logo and what it stood for, they took what the brand had and gave it a new vibe. Volvic is the only brand in the world that can claim ownership of such a dynamic source of water, the brand took advantage of this and created a new backdrop behind the brand’s name in their logo using a mix of paint and the image of the mountain.
BMW
BMW is a German multinational corporate manufacturer of luxury vehicles and motorcycles headquartered in Munich, Bavaria, Germany. It targets customers of the upper-class margin as they are the people BMW is affordable to, they have positioned themselves as a symbol of quality, luxury, and high-performance automobile brand.
Kellogg’s
Kellogg’s has been a staple found on breakfast tables across the world for over 100 years, they are the worlds leading cereal brand and a leading producer of convenience foods.
The target audience of this brand is younger children which can be identified through the cartoon figurines on the packaging of the Kellogg’s cereal along with the bright colours which easily catch a child’s eye. Despite the target audience Kellogg’s can be enjoyed by a person of any age which it is by people who used to enjoy it as kids and have since gotten older.
In Landor’s rebrand of Kellogg’s, they wanted to make the appearance of the cereal more up-to-date whilst also keeping the recognisable attributes that make the brand so iconic. They kept the packaging simple keeping up with the modern-day trends and new eye-catching playful colours, no doubt the idea of what would stand out most to children would have also been the main factor in what colours were chosen for the packaging. The portfolio is now visually brighter, with a wider and more cohesive palette that makes packages stand out dramatically on the shelf. ‘Research results showed that nearly 70 percent of consumers were able to find the new packs on the shelf more easily, and the new designs increased purchase intent by almost 50 percent.’
In Landor’s rebrand, we can see the simplistic theme, in each individual cereal, they have an assigned colour in which everything in the package will be revolved around to keep the packaging looking clean. In these examples, for example, the purple Fruit’n Fibre we can see the different tones of purple and purple fruits or colours that blend with this, by doing this everything looks really organised and simple which I really like.
What I like about this rebrand is the modern twist and the individual colours each cereal has, they stand out and show that they all link together making them more identifiable to customers, a crucial thing in marketing.
One thing I don’t like is the retro, classic Kelloggs that has been lost, although the packaging looks more up-to-date, one of the missions in this rebrand was to keep it looking iconic and apart from keeping the logo the same, I believe a part of this has been lost in the rebrand.
To present this brand they have used a simple backdrop coordinating to the specific cereal apart from where they have showcased all the cereals together and used a neutral background against all the vibrant colours to make them stand out futher. I believe this works with this specific rebrand however this may not work with all showcases for a product, for example with my McLaren rebrand I am using a lot of colour so using neutrals as well may not showcase my product in the way I originally imagined.
Looking at rebrands similar to this I found the rebranding of LIDLs cereal, here we see the approach of taking away the cartoons on the front of their packaging which moves their target audience away from children. This was a result of the new government on junk food marketing regulations, by taking away the cartoons to stop children pestering for unhealthy cereals. As well as this we see a new more modern font, it has been enlarged to take up the room from where the cartoon once was and has been put in a striking white and red colour to grab attention in front of the dark blue behind it. I believe that although I don’t agree with th governments regulations as it takes the fun out of the packaging, with the restrictions given the graphic designers have worked well still making the packaging look appealing and eye catching.
(A2) Vector Realism Using Illustrator RESUBMISSION
What is Realism?
Realism uses accurate shapes and sharp edges which makes it not generally attributed to vector illustrations, however, it is still possible to get realistic-looking results.
Tyler Stout Poster Realism

In Tyler Stout’s designs you tend to find heavy black lines outlining the characters to give the comic effect, he sticks to a colour theme for the poster depending on who the centre character is. In this poster, we can see it is Iron Man who is in the centre so the poster has been based on the colour red, however, he does not overwhelm us with colour and he keeps some of the poster greys so where red is used it stands out more which I think is really clever. He adds highlights onto the character’s faces to give them dimension and makes it look like the characters have been snapshotted from different points in their movies and placed into the poster, not every character is at the same angle so it keeps the poster looking interesting.
Vector Art
This is the process of creating any type of art with vector paths, this normally consists of drawing paths & shapes that combine to create a larger image using fills/gradients.
Vector Portraits
This is when artists use vector paths to create a portrait of a person, sampling & tracing from an image of them. These can take a long time to make.
Making my Own Realism Vector
To create my vector I began by opening Illustrator and importing my image into the page, I also duplicated this image to the side of the page for colour references.
I then began tracing over my image with the pen tool, I began by tracing the main blue body section of the suit and then moving on to the rest. To stay organised and easier to arrange my layers I arranged them into groups in the layers section and named these layers.
Doing this is helpful because it then means you can hide and lock layers after you have finished constructing that shape. After I had finished drawing my image I filled the different sections with a colour, using the eyedropper tool on the reference image to get as close to the original colour as possible.
Using the effects tool which I got to by path-effect I added a drop shadow behind my image to add dimension so the image looks less flattened. Finally, using the ellipse and gradient tool I added a background in which I wanted to reflect a city in the nighttime, with light at the bottom from the streetlights and dark at the top because of the late-night sky.
I am very happy with the outcome of my vector image and believe it looks very similar to the original image in shape and colour.
In future, I would develop my image by placing a pattern into it similar to the scales that appear on the actual suit in the original image.
I would definitely use this skill again in the future and will most likely bring this into my rebranding project to draw out my drivers using this technique.
(A2) Social Issues/ Interactive Branding Design RESUBMISSION
Task- Create a mood board/brief collection of imagery and posters associated with just one of the social issues you listed.
Different Design Studios Approach To Social Issues


This approach to homelessness is really interesting and eyecatching as they make it appear as if the people are falling when actually they are lying on the pavement. It’s really clever as when you first look you have a completely different idea of what the campaign is about than when you actually take time to properly look at the poster.
Task- Create a poster with a message to raise awareness on a social issue
For my poster, I wanted to make something hard-hitting that grabbed attention so using the pen and ellipse tool I made an image of the world, half normal and half on fire. I used punch phrases under these so when people read it they will feel hard hit and hopefully come to the realisation of what is happening so I made the image quite graphic.
What I like about my poster are the phrases I have used and how I have spaced out my poster so the first thing a person will see is the earth on fire, grabbing their attention and making them read the rest of the poster to find out why it is on fire.
In future, I would also add to my poster what people are doing to the earth to make it catch fire as I believe this would make the poster even more grasping.
(A2) Project Development RESUBMISSION
What is my focus on the A2 assignment right now?
My focus on the A2 assignment right now is to finish my pitch and present it to the class.
What touchpoints am I creating?
Logo recreation, new team racing suits, merchandise, posters and tickets for races.
Moodboards

A mood board (or inspiration board) is a physical or digital collage of ideas. Mood boards help to build a foundation during the early stages of design.
Mindmaps

A diagram in which information is represented visually, usually with a central idea placed in the middle and associated ideas arranged around it.
Other examples of idea generation techniques are: storyboarding, group sketching and brain writing.


Making my own mood board and mindmaps
To get a more visual idea and for inspiration, for each of my touchpoints I have made a mood board with annotations, it consists f stuff I’d maybe like to incorporate into my project but also research into prices and what is most popular to customers.
I made a mindmap to brainstorm ideas and quickly get them written down, mindmaps are not a technique I would usually use as mood boards are usually the go-to for me however it helped me visualise my ideas for my touchpoints and what I wanted, how I would do it and what software I would use for this.
(A2) Researching Colous and Fonts RESUBMISSION
McLaren Rebrand Colour Pallete

#ffc100, #ff9a00, #ff7400, #ff4d00, #ff0000
With my colour palette, I wanted to find different shades of orange I could use to add variation to my project as I will be using a lot of oranges, and using the same colour might makae it appear to be boring. I also made a colour palette of other colours I would like to use in my touchpoints.
Fonts
I used https://www.dafont.com/ to get my fonts, I searched for mainly san serif fonts except one where I want to have some serif font on my tickets. I wanted the fonts to look futuristic as that is what F1 and McLaren are so they need to represent the brand well.
(A2) Pitch Powerpoint
(A2) Project Development RESUBMISSION
What touchpoints am I creating?
- Merchandise
- Car Livery
- Posters
- Drivers Racing Suits
- Tickets for Races
(A2) Image Consistency RESUBMISSION
When creating a campaign, or multiple iterations, of images it is important to make sure they visually match each other – this is where subtle colour grading can come in handy.
You can use colour grading to create different moods & tones, once you have your image how you like it you can then carry those settings over to other relevant imagery.
I started colour grading my image by bringing it into photoshop, it’s a dark image which I want to make lighter and add an effect to make it look like she is looking at a sunset. 
On photoshop I used the half-circle icon and clicked on it where I was given a list of options and effects I could add but for this, I only needed curves at this point. After this I had to limit the outer gates, each s different per image so you have to make sure that low and high start at either part of the graph. After this, I used the curves and dragged down the RGB to make changes to the lighting in my images but not too much as I want to keep it subtle. I then created fill layers to add different colours to the image, added red and orange to add the sunset tone and lowered the opacity of these to 5% with the blending mode set to colour burn. I then grouped the colour fill and curves layers together in a folder so I could re-use them in other images which I could simply do by copying and pasting it into the other photoshop file I would be using with the other image. This was the result of these changes.
I am very happy with the outcome of my image and believe it gives off the sunset vibe I was going for.
In future I would try and make the lighting in certain parts of the image different as in my example they all look the same brightness.
I think colour grading is a great skill to know and can be used in photos that a designer may take or one they have got off the internet which they may want to manipulate the lighting. I will use this skill again in the future as I found it easy to learn and use.
(A2) Dark Side to Branding RESUBMISSION
What Do You Think The Dark Side Of Branding Means?
Hiding the truth behind graphics, making something look better/ more innocent than it actually is. Disguising the truth.
An example of this is Kelloggs’ cereal brands, on the front of their packaging we see vibrant colours, bold text and happy-looking mascots to entice children to want this cereal and make their parents buy it, increasing the sales. The dark side of this is for example Kellogg’s Frosties cereal contains more sugar than a single sugar ring doughnut.
Greenwashing
This is where a company or brand will use ‘eco-friendly’ packaging in an attempt to increase sales to fit in with trends and make a person feel better about themselves making them believe they are helping save the planet. This can be done through the colour theory of green or using nature or eco signs and plastering it across their packaging, but greenwashing is when brands do all this but it is actually false, their products aren’t recyclable or what they are writing about their product is false. Factors of this include recyclable, non-toxic, cruelty-free, eco-friendly, biodegradable and sustainable.

What To Look Out For
Sustainable
There is no consistent definition of what it means for a product to be sustainable. What makes it sustainable? Under what authority and by what legislation is it sustainable?
Recyclable
Many items are not practically recyclable even though they will have recycling-friendly plastered on the packaging. Some plastics can only be recycled at one centre in the entirety of the UK.
Biodegradable
Most items that are labelled as biodegradable even though they will decompose will take a very long time for them to do so, therefore will end up doing harm to the environment in the meantime as it decomposes.
Cruelty-Free
Cruelty-free is not legally defined so anyone can claim that their product is on their label. Look for legitimate certifications such as the Leaping Bunny.
Non-Toxic
Non-toxic is an unregulated term therefore it has no legal definition when used on a product label. Green and non-toxic household cleaners often have potentially dangerous chemicals included in them.
Eco-Friendly/Environmentally Friendly
We don’t actually know if the process of making the products is environmentally friendly so it is a meaningless term to have unless explained in concrete terms.
Task- Create a poster to advertise Coca-Cola as a ‘new zero’ manufacturer
To create my poster I first started by adding a green background as this colour in colour theory is linked to nature and recycling which is what everyone thinks when they see the colour green. I then used DaFontt to find a pen-like font for the Coca-Cola label and used a different style of writing style for ‘on the planet’s side’ underneath this. I did this to make the can appear more personal and to make it look like more care had been put into it when in real life it would have been made on the same production line as the rest of the cans. I made a tagline to grab the consumer more when they read it on the shelf making them want to buy it so they are also on the planet’s side. Finally, I also made sure to put eco-friendly and biodegradable in the top left corner to add more to the greenwashing false advertisement.
What I like about my poster is that I didn’t use the original Coca-Cola font or red colour which will make it stand out on the shelf and make people pick it up and look at it wondering why it is different and after reading it will want to buy it to be better for the planet.
What I would change or improve on for the future is also include recycling icons or other icons that are used in greenwashing.
Exclusionary Marketing
What Do We Mean By Exclusionary Or Targeted Marketing?
This is where products are based solely on the target audience which most of the time can be discriminatory to the people who the product isn’t aimed towards.
Target audiences are made through data some of the time, if you find out 70% of people who buy your product are female then you target them and ignore the rest. What happens to the other 30% by purposely excluding them they’re missing out on a large, growing chunk of the market.
Examples of the exclusionary market include Yorkie in the 2000s who stated on their chocolate bars that their chocolate was only for men.
Exclusionary marketing is done in very subtle ways nowadays unlike the Yorkie campaign from the 2000s but still keeps gender roles alive and strong.
Task- Create a poster for Chupa Chups sugar-free lollies that is non-exclusionary and aimed at both parents.
To create my poster I began by making my background which I used the gradient tool, I decided to do a light blue to dark blue to represent the sky as I wanted to have a cloud-like font and also because the colours are bright and will catch children’s attention. For the font, I then found my cloud font and wrote New Sugar-Free so when the child gets the adult’s attention the adult will immediately see they are sugar-free and feel more inclined to buy them. To make my packet non-exclusionary I put to give all parents peace of mind but made sure to put ‘all parents’ in a larger font than the rest of the sentence so that that would be seen first within the sentence. I then added the final touches like the Chupa Chups logo and the flavours and added some more about the lollies being sugar-free and good for the kids which finished my poster.
What I like about my poster is how I have made it that everything I want to be seen is what immediately draws attention first like the lollies being sugar-free and that all parents at peace of mind.
What I would change about my poster is in future I would draw out my own icons of the fruit with the pen tool and add highlights to make the poster more personalised to the brand.
(A2) Pitch Development RESUBMISSION
What is Primary and Secondary Research?
Why are they important?
Primary Research– Instead of relying on data collected from previous studies, primary research aims to collect data directly. This method allows researchers to analyze the data in order to identify areas of concern.
Primary research is important as it can give a second-hand view of your work, people telling you what looks good and maybe what doesn’t which is good because designers may not see what doesn’t look good as their eyes have become so familiar with what they are working with. As well as this, if you require some data for your project, using primary research will look better to the client as it shows the care you are putting into the project.
Secondary Research– This method involves gathering and analyzing existing data. The data collected is then summarized and analyzed to improve the overall effectiveness of the study.
Secondary research is important as it allows the designer to do research into their client and get to know them before working with them, there may be things about them or that they have done which may mean the designer will not want to work with them or it may just mean you will be able to communicate better with them.
Current idea for Branding and Advertising
My current idea is rebranding the McLaren Formula 1 Team
What do I need to do in this lesson?
I need to begin working on my pitch for my branding and advertising idea to present to my class.
How long do I expect to work on different elements
I expect to spend about 45 minutes researching each of my touchpoints and making a mood board to then go into my pitch.
(A2) Word Branding RESUBMISSION
Task – Using a random word generator design a logo wth the word given in Adobe Illustrator
Adjective- Many
When I was given the word ‘many’ the first thing I thought of was a collective of things so I did a stack of circles to begin with using the ellipse tool. From this I thought that the logo needed a colourful background to make it stand out and less bland rather than white shapes being on a white background. To do this I used the pen tool and drew out random shaped blobs which I then filled with different shaddes of blue and lowered the opacity to 60% before sending these to the back of the page so the circles sat on top of the blobs. I then wrote down the word I was given under these shapes in a san serif font to make it appear less boring as to many people maths is boring. There was still something missing in the logo as the circles looked quite empty so I came up with a catchphrase where I could put each word in the circle, I decided to make this logo represent a maths tutoring company.
Noun- News
With the word news I immediately thought of the world because of he events that happen all over it. With this using the ellipse tool I drew the eart and using the pen tool drew rough drawings of each country. I made the background blaack for space but also because it would make my colours pop more. Because each event that happens is important I drew out explanation marks to be coming out of each part in the world to represent different things going off at once like seen in the news.
Designing a brand with word generator
Adjective+Noun- Thirsty Midnight
For the words thirsty midnight I took the adjective thirsty and thoughts of a drinks company but more specifically an alchohol drinks company because of the noun midnight which makes me think of clubs in the nightime. I kept the background of the can dark to stick with the theming of midnight and it being dark wihi the night and used the graphite pen tool to create the impression of stars. I used a serif font to make the brand look more luxury persona on the can.
What I have taken from this lesson is being innovative and fast thinking when given words, this will also come into use when working with clients and they want logos being created just from words.
(A2) Project Management RESUBMISSION
What are the 5 types of fire extinguishers?
| Colour | Substance | Fire Type |
| Red | Water | Organic Materials |
| Cream | Foam | Flammable Liquids, organic materials |
| Blue | Dry Powder | Flammable liquids, gases, metals and electrical equipment |
| Black | CO2 | Flammable liquids, electrical equipment |
| Yellow | Wet Chemical | Organic materials, cooking oils |
A graphic designer has to know how to manage their time to get projects finished in time to please clients whilst also making sure their work is top standard. Normally time is managed between research, idea development, design, and redesign if needed. Because of the course, I will also be fitting my evaluations into this as well.
A way graphic designers can manage their time is with Gantt charts which is something I have also made to help manage my time for this assignment.
This is what some Gantt charts can look like for professionals in the business with busy schedules, mine will be a lot simpler than this as I only have 5 tasks to be working towards but I wanted to do some research on how to present my Gantt chart before making it.
![]()
My Gantt Chart
The research covers all the weeks in my Gantt chart as I will constantly be looking for inspiration or statistics to back up my projects even towards the end of my designs or in my evaluations so research is always needed. Development should take me around a week but maybe a bit more which is why I have stretched it to 2 weeks but the design is also overlapping with it as I may start designing in the middle of the week, this will include collecting images and making mood boards/sketches. I have put design for 3 weeks as it gives me enough time to perfect all my work so I do not have to go back and redesign, I don’t believe the professional practice will take me long and will be done in less than a week. I have put evaluations for 2 weeks overlapping on top professional practice as it will take me a bit longer to do the write-ups to all my touchpoints but where it has taken me less of the week to do professional practice I can fill this with time doing my evaluation.
(A2) Branding and Adverising Week 1 RESUBMISSION
A1 Feedback
| CRITERIA | TARGET GRADE | ACHIEVED |
| Informing Ideas | D | D |
| Problem Solving | D | D |
| Technical Skills | D | D |
| Professional Practice | D | D |
| Communication | D | D |
Points recieved for A1: 15
To achieve my target grade for th year I will need to achieve 8 more points, fo distinction star I will need 14 more points.
Research into possible branding and advertising projects
I really like the idea of rebranding a Formula 1 team as I love the sport I believe I could do a lot with this. I would want to use a team that has a lot of history like McLaren or Ferrari, this could include posters, merchandise and advertisements.


(A2) Milky Moo Shakey Shakes RESUBMISSION
Two Types of Research
Primary and Secondary
Primary Research– Instead of relying on data collected from previous studies, primary research aims to collect data directly. This method allows researchers to analyze the data in order to identify areas of concern.
Secondary Research– This method involves gathering and analyzing existing data. The data collected is then summarized and analyzed to improve the overall effectiveness of the study.
Brand– A business and marketing concept that helps people identify a particular company, product or individual. https://www.investopedia.com/terms/b/brand.asp
Brand Identity– The visual elements of a brand including colour, design and the logo that identify and distinguish a brand. It is the outward expression of the brand and is what is most important to grab the attention of the customer.
Intangibles– Intangible asset is an asset that is not physical, this includes examples of brand recognition, goodwill and intellectual property such as patents, trademarks and copyrights. It is often difficult to assign value to and is incapable of being touched.
Logo– Images, texts or shapes that depict the name and purpose of a business. It is a brand’s most important and recognisable signifier.
https://www.tailorbrands.com/logo-maker/what-is-a-logo
Mission Statement- Describes the organization’s purpose and its overall intention.
Task-
Find out three things through secondary research
Identify– Which flavours of milkshakes are popular
Explain– Pick 3 countries to market your milkshake brand to and say why you chose them
Analyze- Choose colours you believe would sell the best when creating a brand of milkshake for the flavours you chose and say what is positive/negative messages of those colours are in colour psychology.
Identify
In a survey conducted by RTA Outdoor Living, it was found that the strawberry milkshake was the most favoured flavour of all.
The chocolate milkshake is the second most favoured flavour and other flavours like oreo and vanilla follow this.
Explain
3 countries that I have chosen to market my milkshake to are the US, the UK and Japan.
I have chosen these countries because of the different artistic capabilities I can use on my packaging when advertising in Japan, it is a theme you see when looking at products there, they are full of colour sometimes characters and look more like art compared to any other average drink packaging.
I have also chosen the US and UK as the general public seems to be joining into this trend and is open to trying new flavours, in supermarkets now it looks like a competitive battle for best graphics and not best flavour as seen on the Lucozade bottles on the image below.

Analyze
I believe the colour mint would sell well on the milkshakes as in colour psychology it is seen as a refreshing colour.

The colour pink is also a colour I believe would sell well as colour phycology says it is a loving and kind colour since this is a milk brand this can be linked to that the cows are looked after.

Finally a colour I believe would sell best is lime, in colour psychology, it is thought to promote liveliness, freshness and confidence something a person would want to feel.

Task- Find out three things through primary research of as many people as possible
Q- What would make a great logo?
A- Something that stands out on a shelf and links to the audience it is trying to reach.
Q- What colour should you use for a logo?
A- Something that links into the colour of the drink, apple drinks seem to be centred around the colour green because that is the colour of the juice.
Q- What should be included in a logo?
A- What’s included in the drink or maybe a mascot for the drink.
Creating a Logo for Milky Moo Shakey Shakes
To make my logo I used the pen tool and ellipse tool to make the shapes, I used pink mint and lime to match the colours I had previously researched. I used a more child-like cartoon font as that is who my target audience is to give children more calcium. To add to this I also made cartoon cows because of my primary research where one of the answers was that there should be mascots in a logo so I drew cos with the pen tool to go on top of my logo for this.
What I like about my logo is how all the colours blend with each other and the innocent feel it has to it for a child. I like how it isn’t overcrowded and simple but yet is still full of colour and fun.
Something I would work on for the future is adding flavour ingredients on the front of my packaging which there is room for at the bottom.
I did find it a bit easier to work with clients’ wishes in mind because it gives you limits but more guidance to what you can and can’t do so you can spend more time on designing what you know needs to be in there.
Shape Builder Tool

What I really like about this design is the imaginative aspect behind it, using inspiration from the colours of the fruit and adding well-known cartoon characters onto these fruits.
Shape Builder- An alternative to the pathfinder when you are wanting to use smaller shapes and paths to create larger, harder-to-draw imagery.


By using the shape builder tool I was able to recreate the image of the pear. I found using the shape builder tool quite hard as sometimes it didn’t go the way I would want and would become frustrated with this. After using different tools within illustrator I have found that I am most confident with the pen tool and would’ve been able to make this image look a lot better by using that tool.
Plain White Tee Final Work


Target Review
Did I Achieve my Targets?
Character
Beginning of the first Term:
“I want to feel more comfortable in my new surroundings as I am not the best to handle change, meet new friends and become confident through this”
Now:
I can truly say I have made great friends and have grown more confident in myself since writing my targets back at the begging of my first term, I settled quickly in my new surroundings thanks to the great friends I made.
Black Panthers
Who were the Black Panthers?
The Black Panthers were formed in California in 1966 and they played a short but important part in the civil rights movement. They did not believe that Martin Luther’s peacefully protesting ways had made any lifestyle changes to the black community and using the ‘traditional’ civil rights movement, would take too long to be implemented or simply not introduced.
When were they prominent?
The party was founded on 15 October 1966, Oakland, California, United States
The party disbanded in 1982
What were they fighting against?
The Black Panther Party (BPP) had four desires: equality in education, housing, employment, and civil rights.
What events reflect the Black Panther Party today?
The unification of people after the events of George Floyd and the BLM movement.
Other Facts about the Black Panthers
The group would prepare 20,000 meals a week for schoolchildren in poor neighbourhoods for free as they started the free school meal regime.
Adobe After Effects: Compositing and Video Manipulation
Colour Keying:
It is the act of selecting a specific colour value in a shot and then making any pixels with that value (or similar values) transparent.
When filming/ photographing content with a keying screen, lighting is the most important factor.
Lighting the Subject
You need to make sure that the person/ object is lit well so that you can see it, you need to contrast to key effectively.
Lighting the Screen
Once the subject is lit how you want, use separate lights focussed on just the green screen, to remove all shadows and make it as consistent colour as possible.
If the screen isn’t clean enough, or there isn’t enough contrast the green screen effect won’t be as effective.
Colour Correction:
The act of improving the look of a photograph by adjusting the levels of particular colours within it.
Colour Compositing
Once you have your footage & it is imported into your software, you can then start to apply effects onto your layers to composite your images together.
Keying and Masking
These are techniques used to remove parts of imagery:
- Keying tools remove colours (Keylight Effect)
- Masks remove user-defined areas(Pen / Shape Tools)
Colour Correction
Once you have your final clips & effects, you then have to start altering the colours of your layers so that they match & look like they belong together naturally.
CREATING A NEW COMPOSITION
- Importing everything in through clicking on files highlighting everything and dragging it into after effects
APPLYING THE KEYLIGHT EFFECT
- I added the background by dragging the image into my composition.
APPLYING COLOUR EFFECTS TO CORRECT THE IMAGERY
AE Project Management and Rendering
RGB VS CMYK
RGB- Red Green Blue– These are the three primary colours in the colour wheel A light source within a device creates any colour you need by mixing red, green and blue and varying their intensity.
CMYK- Cyan Magenta Yellow Key- These are used in colour printing and is also used to describe the printing process itself.
Importing from Illustrator into After Effects
Some find it more beneficial to create assets in other pieces of software and then import this over to after effects, this is what I did today with illustrator.
In illustrator when opening it to create a new file you are greeted with a set of presets, when using this software to later bring your work into after effects you would want to click o the film and video option and click on HDV/HDTV 1080 as this is the normal setting which works with any computer.
Interpreting A Design Brief
What is a Design Brief?
A design brief outlines any key components for a project including its budget, timeframe and scale of the project. It will be made to suit and to help you understand your client/ customer in a better manner and avoid misunderstandings. A well-written brief helps you identify any problems that may arise in the future and helps with the development process.
Ident- Final Design
For my ident, I used the tv company Adult Swim and 2 characters Rick and Morty that feature in a show on the channel. To begin with, I found an image online to help me begin with imagining my idea.
Original Idea
The idea I originally had for my ident was for the characters to begin with them both being against each other and moving away from each other and coming back towards each other and clash to make them merge. From this, they would separate from each other and only have half of their heads, this is where the ‘ADULT SWIM’ would come in as it would slowly be revealed whilst the characters move apart.
Bringing the Idea to Life
To begin with, I brought the original image of Rick and Morty on top of each other into photoshop so I could erase the middle and make them separate.

As well as this, I also needed to create versions of the characters cut in half so when they separate in half their faces merge together as it will be 50/50. By using the layer mask tool, I could cover half of the faces of my characters and get rid of what I didn’t want without losing information.
This is the result I had after making these adjustments, this made it easier for me to move the characters in after effects and make them independent so they fit in with my design idea.
When opening after-effects I selected new composition where I was met with a settings screen where I can choose how long to make my composition.
I set the time to 6 seconds as I believed this would be long enough to include everything I wanted but still be short enough to be viewed as an ident. From this, I imported all the images I would need into after effects and dragged them down to the ‘new composition’ tool that would place my images into the composition.
From here, I began to animate my characters, I aligned them to the middle of the composition and marked this so I would always know where the middle is throughout the process, this also helped with keeping the composition consistent and not having the characters moving all over the place and keeping them on an equal level. When beginning to move my characters, I clicked ‘P’ on the keyboard, which means position, so it would know where my character starts and by moving the time needle I can then tell after effect where I want the movement to end.
Treintayseis Design Case Study
Treintayseis is the graphic design studio of Nina Sans and Rafa Goicoechea. They are based in Barcelona. They specialise in Typography, Editorial Design and Illustration. Their ethos is believing in Visual Communication based on strong concepts and in custom languages for every project. They focus their work on creating brands and visual identities, art direction, type design and tailored graphic solutions.
Examples of their work:
36 Days Project:
Research Methods
What are Research Methods and Why Do We Use Them?
Primary Research-
The methodology that is used by researchers to collect data within the moment and not from the past means they then ‘own’ the data instead of using somebody else’s.
Ways of collecting Primary Research:
- Interviews- A great way to gather a large amount of information, they take the form of a one-to-one or small group question and answer session. An advantage of using interviews is there interviewer can judge the verbal response as well as the non-verbal response of the respondent for example their body language. A disadvantage to this type of research is it can because of biases. For example, the respondent’s answers can be affected by their reaction to the interviewer’s race, class, age or physical appearance. This type of research is highly personal and is an example of qualitative research.
- Surveys- Most frequently conducted online, questions are pre-written, offering the respondent little flexibility if their answer doesn’t fit. An advantage of using surveys is they are a practical way to gather information about something specific; can target them to a demographic of your choice. A disadvantage is surveys struggle to convey the emotion of the participant to the questions asked, there is always a risk they may provide dishonest answers and you would not know of this. Surveys are an example of quantitative research.
Secondary Research-
This is research that uses already concluded data, this can be from public libraries, websites and data obtained from already filled in surveys. It is more cost-effective as it makes use of already obtained data, unlike primary research where companies will hire a third party to gather data.
Quantitative Research-
Quantitive research can be used to find patterns and averages by collecting and analyzing numerical data. It is used widely in the natural and social sciences: biology, chemistry, psychology, economics, sociology and marketing. Advantages of quantitative research include studies that can be repeated because of standardized data collection protocols and tangible definitions of abstract concepts. Another is the ability to work with large samples as they can be processed and analyzed using reliable and consistent procedures through quantitative data analysis. Some disadvantages of this type of research include it having a narrow focus; predetermined variables and measurement procedures can mean that you ignore other relevant observations.
Qualitative Research-
Qualitative research can be used to find concepts, opinions and experiences by using closed questions. It is used commonly in the humanities and social sciences, in subjects such as anthropology, sociology, education, health sciences, history, etc. Methods of qualitative research include; observations, interviews, focus groups, surveys and secondary research. Advantages of using qualitative research are having natural settings, by this, you can get more accurate answers by catching people off guard and getting the most truthful answers out of people. Another advantage is the flexibility, patterns in responses can always change and not be rigidly decided beforehand. However, there are also disadvantages in contrast including, the real-world setting often making qualitative research unreliable because of uncontrolled factors that affect the data.
Both qualitative and quantitative data can be shown through an infographic.
Layout Experimentation
Why is layout important?
Good layout design is both dynamic and clear, creating visual points of interest that guide the reader through a piece of content without overshadowing its message.
When youre deciding how to layout your magazine spread, there are some things to consider.
PURPOSE
What is the purpose of the magazine/spread you’re working on?
Is it image base, story based, formal, funny?
BALANCE
Is your content evenly distributed over the spread?
Overloading a page with content is prime way of losing your readers interest.
HIERARCHY
Do the right pieces of information stand out?
Establish importance of the information by indicate this visually.
READABILITY
Is the text easy to read?
Your choice of typeface, size, spacing, position/orientation all play a part in how readable something is.
This is the intended reading pattern for the reader.
Task- Quickly brainstorm potential ideas for an article
On paper, create 3-5 thumbnail sketches of potential layouts for a single page of a magazine spread.
Indesign Overloading Print
When designing anything visual, especially when it contains text, you need to make sure that you are organising your words and paragraphs so they are manageable to read.
Keep the text as incorporated into the design as possible and not stand out too much, whilst ensuring that the colours and shapes used throughout your work aren’t overwhelming.
A Bad Example- Too much text, no break, very similar
A Good Example- Breaks, size/hierarchy, colour aid
When creating pieces of work containing lots of information they become busy, this can be seen on magazine spreads or websites. When doing this you need to make sure you keep your reader’s attention and have it where you want it, when you do use large shapes, specific colours or imagery will help to draw in the reader’s attention. Once you know where they are looking you can then give them the best journey through the design possibilities with the previous techniques.
Portfolio Gallery
I have chosen these 10 pictures out of the 50 given because of the different skills they portray through the work which shows off the person best to the client.
Ranking Mini Briefs From this Year
1= Best
8= Requires Improvement
- Magazine Cover
- Tshirt Design
- Soda Can
- Playing Cards
- Album Redesign
- Typography Poster
- Ident
- Digital Illustration
Descriptions of each Mini Brief
Magazine Cover
What we were asked to do- Develop skills in InDesign, learn how to make and break a grid system to incorporate graphics, text, photos and more into a page spread and magazine cover.
How I approached it- I approached this task already educated about how to use InDesign so I had an advantage in this brief however I did learn extra skills throughout this brief like how to scale and use the grids.
Tshirt Design
What we were asked to do- Develop your skills further in Photoshop and Illustrator to create at least one design after some consumer/market research. Create wearable graphics for specific target audiences and demographics.
How I approached it- I approached this brief with many ideas about what I wanted to produce, however, I was also unaware of the research that came with doing this and learning about the audience demographic I would have.
Soda Can
Wix and Web Design Introduction
Wix is an online resource that allows users to design and create their own websites, it has been designed to be easy to learn and simple to use no matter the project.
It encourages you to utilise and create your own website with it, there are loads of presets that you can utilise, these can be either for inspiration or as a starting point for your final portfolio design.
If you want a preset template from Wix, Squarespace or any other similar resource, it is important you change the template enough to make it your own, your portfolio should represent you and by using an already made template s clients may recognise it from other people also using it. This could put them off if they recognise the use of one.
Task- Create your own Wix website from a template
In the early stages of using Wix, I am finding it really easy to work around and use. I love the way it presents my work and the website looks like a professional one which forwards my work even better. I still need to add all the extra work that went with my brief and do little explanations to do with these as well.
I have used a template that has given me the option to have different sections to show off the work of the different parts of my briefs, so far I have only completed the digital illustration part of this and am yet to add explanations to my images.
Graphic Design Trends 2022
Pass- Generally competent selection and manipulation, some awareness
Merit- Effective selection, mostly consistent technical competence
Distinction- Accomplished selection, skillfully application, technical competence sustained.
5 Synonyms for Trendy:
- Chic
- Fashionable
- Stylish
- Popular
- Designer
2022 Pantone Colour of The Year
“Very Peri exudes a good-natured warmth” – Pantone
“Happiest and warmest of all the blue hues”
“Blends the faithfulness and constancy of blue with the energy and excitement of red”
3 Design Trends of 2022 in Graphic Design:
- Mixed Media Design- Mixed media art involves mixing different creative mediums to create work that incorporates two or more art forms.
-
Authentic Hand-Drawn Elements-
Disruptive Type
Disruptive type is an experimental use of typefaces to make work stand out from others, some making their work harder to read to make readers stop and think about what it says. 
For my experimentation of disruptive type, I have turned my letters into familiar objects for example turning the A in my name into a triangle, as it still follows a similar shape layout it can still be distinguished as an A. As well as this I turned the D in my name into a smiley and the X and O interlinking making the O look like a warning sign. I like that in my recreation you can still clearly see what it says whilst also making it look busy but something I would improve on for the future is making the two parts of my name at separate levels so I have more choice to make the link of the letters in my name link.
References:
https://www.format.com/magazine/resources/art/beginners-guide-mixed-media-art
Creative Resume
A CV (also known as a Curriculum Vitae, or resume) is a written overview of your skills, education and work experience.
Creative CVs are a way to get the information down in a way that can allow your personality to shine through.
Examples of Creative CVs

Web Accessibility
Accessibility- The quality of being able to be reached or entered.
This can be related to web design through making a website accessible to the consumer, this can be through making it easy to use and find what the person is looking for through your website, this relating to the topic your website is based around.
It is the inclusive practice of ensuring there are no barriers that prevent interaction with, or access to websites.
Disabilities that may require people to need the help of accessibility features:
- Blind or with low vision- This can impact people by not being able to see, read or have basic independence. Blindness can really damage a person’s mental health as the disability takes away their mobility to do basic tasks such as boiling a kettle. By making a website accessible to this disability not only are you bringing in more people to your website by making it able to use by the blind you are showing to be all-inclusive and not making a disability a reason for people not to come to your website. Blindness and low vision can be catered for by using the text to speech function where users hear the writing on the screen to them as it is read out to them rather than reading it. Other features, like high-contrast themes and enlarged cursors, make it easier for users with limited vision to see the screen.
- Dyslexia- A learning disorder that involves difficulty reading due to problems identifying speech sounds and learning how they relate to letters and words. In the daily life of someone with dyslexia, a person may have trouble with their memory, timekeeping, organisation, communication, multitasking and most commonly known, reading. By making your website accessible to people with this disability you are making it readable by paying close attention to your layouts and fonts, this may also come in handy with people without this disability as your website becomes easier to read also to people without dyslexia. A way to make your website accessible for dyslexia is using multiple pictures as they offer context, making sentences simple and direct to the point, using san-serif fonts as using ‘hooks’ on letters can become a distraction when reading and offering the option to change the colour of the background of the screen as it can help the individual focus better.
Considering the needs of those who have special needs links falls in line with tolerance and mutual respect, one of the British values.
Portfolio UI/UX (RESUBMISSION)
The Five Dimensions of Framework
Interaction design is an important design component within the giant umbrella of user experience design.
1D Design-
Words encompass text, which helps convey the right amount of information to users. Words especially those used in interactions, like button labels, should be meaningful and simple to understand. They should communicate information to users without overwhelming them with too many details. This dimension represents the semantics and the character of a user’s interactions. Phrases are powerful, as we are able to process them speedily, implicitly but they have an effect on us profoundly. A singular word incorporates widespread meaning, and words are open to interpretation. For that reason, the terminology we use needs to be familiar to our supposed users, accurately constitute the actions they denote, conveyed in a tone this is suitable for the placing and used continuously for the duration of the product.
2D Visual representations-
Visual representations include typography, icons and other graphics with which users interact. Visual representations usually supplement the words used to communicate information to users. This dimension refers back to the factors that aren’t phrases inside a product, including the typography, diagrams, icons, and different graphics. These factors aren’t any much less effective than phrases, as we’re able to process imagery simply as fast and extract meaning within a split second.
3D Physical objects or space-
Physical objects are a medium through which users interact with the product or service. For instance, a user interacts with computers and a mouse while sitting on a desk in an office space. Means of control, such as a computer keyboard, mouse, touchscreen, joystick, games controller, and keypad.
4D Time-
Time helps users understand visual changes in a UI; it also helps users track their progress. The time where the user interacts with and makes use of the primary three dimensions, and, as an example, where they’re able to test the development of those interactions. 4D Time also encompasses sound, film and animation, each representing another way of conveying information and improving the user experience in flip.
5D Behaviour-
Behaviour includes both action and reaction. Behaviour is what describes the mechanism of an interaction with a product. Interaction designers should utilize all five dimensions to consider the interactions between a user and a product in a realistic way.
Case Study- Timothee Roussilhe and Ben Mingo
David William Baum is an experienced venture capital standard partner with twenty-one years in the information technology enterprise, including twelve years in generation finance and 9 years in entrepreneurial working control roles.
On the website on opening, you are greeted by a single image however with a slight movement of the mouse an array of different pictures spreads across the page in seconds.
The website includes multiple images each included in different themes that are shown when hovering over an image, I decided to click on one called personal.
From here you can click on this image and move through the other pictures included in this picture file all relating to this topic.
The target audience for this website seems to aim towards young adults, it keeps up with trends of modern-day, retro cameras, perfumes, partying, travelling and much more all of these which are the main interests of young adults. It is a place of inspiration and a clever way to show the images too. Unlike sites like Pinterest where people can be scrolling it can become tiresome to the eye with the same layout over and over, with this website it is a new and refreshing way to display images and almost feels like the pictures are aid out in front of you on a table giving it that more authentic feel.
The Pinterest layout compared to the David William Baum website layout
Vs
Portfolio Website-Week 1
UI- User Interface is what makes a website interactive by using code. It includes just about everything from touchscreens, screens, sounds and keyboards.
UX- User Experience is the process of making physical products that are easy and efficient to use. Having a bad UX would drive someone off your website.
Adaptive UI Design- When the user interface adapts and changes for different screen sizes. When someone makes a webpage it must be able to function on different screen sizes.
Navigation- This is the act of looking through a website, using different pages for people to go to via one website this may be through buttons or sliders, not all information has to be crammed on one page.
Wireframe- A black and white two-dimensional drawing of what a webpage will look like.
Prototype- This is the test of your product to see if it is functional, it highlights the positives and the negatives of your products and allows you to change them before you publish your finished product.
After looking through 4 different layout styles today through different websites
Portfolio UI/UX
Navigation Tree for Portfolio Website
My navigation tree gives a brief idea of what my website will look like and how it will all link in together. It shows what leads to what by clicking on different things on the page, this will make it easier when it comes to making my website as I have already planned on what will go where.
What is Behance?
Behance is a social media website which is run by Adobe, it is the leading online platform to showcase & discover creative work. It is a place for creators to showcase their work, it is one of the most effective ways to show your talent and to get it recognised as it is one of the most popular websites for this. A benefit for using Behance is it is extremely easy to use, there is no time wasting using coding and can be navigated straightforwardly simply through making an account on the platform. As well as this, you can look at other people’s work as other people look at yours, this is a great way to make connections to other people and praise them for their work or even talk about working together on something, the possibilities are endless.
You can create project posts where you can give a blurb of the work and show the development stages of themed work.
What is Dribble?
Dribble is owned by Dribble Holdings Ltd, it is a social networking platform for creators and digital designers to promote their work. It serves as a design portfolio platform, jobs and recruiting site and is one of the largest platforms for designers to share their work online. The benefit of this website is people can display their best work in the hope to be found by employers and vice versa employers can use this website to find the employees that best suit their business needs through their work.
Is Dribble Pro Beneficial To Your Career?
For people that are looking to get employed rather than showcasing their work for the entertainment side of things, dribble pro is worth it as there are more add ons with this subscription such as receiving their daily freelance design jobs newsletter.
Behance or Dribble?
In my opinion, I prefer Behance because of its links to Adobe, you can see how people have created their work and take inspiration through this whist using the Adobe software so you can experiment with the tools and tricks they have used to make their piece.
Multi Formatting
UI/ User Interface
User interfaces the user interface is the graphical layout of an application. I.E buttons, the text, images, sliders, and anything the user interacts with. This includes screen layout, transitions… everything.
UX/ User Experience
A user’s experience of the app is determined by how they interact with it. Is the experience smooth and intuitive or clunky and confusing? Does navigating the app feel logical or does it feel arbitrary?
Ranking of Websites 0-5 Stars
Paradise Drinking Water- 2/5
This website appears very boring, it doesn’t have anything ordinary in it just a white website with hints of blue here and there with some old-fashioned cheesy pictures of people smiling which makes her user experience next to none. Aside from this, the website is interactive and where words are underlined it is clear that these are links to other parts of the website which makes it easier to navigate around, it also has the contact information in bold at the top making it easy to see, it shows they have at least thought of the use of hierarchy in this website.
Headhunter Hairstyling- 4/5
This website was really easy to navigate around and if you did want to know something about this website eg the prices you would be able to find it in seconds. They have kept their homepage both minimalistic but also kept it stylish with the moving image in between the page of their building and the colour theming in the page to match the website, something like this makes you trust the website more as it appears less sketchy, unlike the Paradise Drinking Water. Something I would change about this website is the quality of the photos that they use, the website includes a gallery where there are pictures of past clients, the idea is great as it shows future clients coming to the website the abilities of the hairdressers, however, the quality of the photos makes part of the website look a bit tackier. As well as this I would also experiment with the layout of these images, using different sized images and presenting them differently instead of the same size grid layout they have used.
Airbnb
Ident Brief- Background Research
What Is An Ident?
An Ident– A short sequence shown on television between programs to identify the channel.
Task- Brainstorm a list of channels you regularly view content
TV Channels
ITV
MTV
BBC
Channel 4
Channel 5
Nickelodeon
Adult Swim
Cartoon Network
Film 4
Dave
Background Infomation on Channels
MTV
The channel began as a 24-hour platform for music videos and debuted at midnight on August 1st 1981 with the broadcast of “Video Killed the Radio Star” by the Buggles. It became so popular in the 80s, 90s and 20s that if a song was played on MTV it was almost guaranteed to become a hit for the artist. Its most popular video to air on the channel was Michael Jackson’s Thriller in 1983 which was a breakthrough as the channel in its early days faced criticism for an almost complete shutout of Black artists. Its target audience is older teens to young adults as it mainly plays the songs that are trending at the moment which also mainly aims toward young adults as well. After its success in the music industry, in its later years, MTV also started broadcasting reality TV shows which also seemed to become a hit with its most popular show being MTV cribs where celebrities would give tours around their house giving them an insight into their lives to the public.
00aeef , ed008c , fff000 , 000000
Adult Swim
The channel frequently airs adult animation features, mockumentaries, sketch comedies and pilots. It was first launched in 2001 as an alternative channel at night when the primary audience of the cartoon network, younger children, would go to sleep and the new target audience became adults. Adult Swim is known for its sexual themes, nudity, strong language and graphic violence and has created popular shows such as Robot Chicken, The Eric Andre Show and Rick and Morty.
0af167, ee70a6 , 520099 , 39eafd , 39eafd , 0d0735 , f5f5f5
Channel 4
Created in 1982 Channel 4 is the UK’s biggest streaming service and stands out from other channels through its purpose of representing unheard voices, challenging with purpose and reinventing entertainment. Its purpose was to provide a fourth television service to Britain in addition to licensed BBC one and two and the singular channel of ITV. In 2010 the channel was extended to Walesa and became a UK-Wide television channel. The channel grew so vastly it became cooperation and created more channels consisting of; Film4, E4, More4, 4Music and 4seven. The Box Plus Network. They have said themselves that their target audience is 16-34-year old’s. The most popular shows made on channel 4 is The Inbetweeners, Peep Show, Gogglebox, Skin, Fresh Meat and the IT Crowd.
2e1f54 , 52057f , bf033b , f00a36 , ed3b21 , ff6908 , ffc719 , 598c14 , 335238 , 4a8594 , 051736 , 000000 , 706357 , b0a696 , dbe0e3 , dbeede
My Chosen Company
For my chosen company I will be doing adult swim as I would like to use popular characters from their programmes such as Rick and Morty and have these characters ripped in half to reveal the name adult swim.
Health and Safety
Chemicals that are used in the Graphic Design Process
What are they used for?
Isopropanol –
This chemical has a wide range of uses, a solvent, an antiseptic, a cleaning agent, an astringent and muscle aches. As a solvent, it is used in a range of industries from printmaking to laboratory reagents. It dissolves a wide range of compounds and evaporates quickly, unlike ethanol it is relatively non-toxic making it safer to use. As well as this isopropanol can be mixed with most solvents including water, ethanol and chloroform therefore it is widely used as a solvent. When mixed with water it creates rubbing alcohol, more commonly known as surgical spirit, when turned into this form the chemical has a wide range of home-based uses from cleaning surfaces to cleaning and disinfecting wounds. As industrial solvent isopropanol has a number of different uses including; stripping paint, equipment cleaning in printmaking and dilation and extraction in laboratory chemicals. This would help a designer in their work for cleaning the equipment they have used to make it last longer and so they can use it for their next piece of work. However the chemical doe has its risks, repeated high exposure to it can cause headaches, dizziness, confusion, loss of coordination, unconsciousness and it is a major fire hazard when it comes into contact with it. When the chemical comes into contact with skin it can burn the skin and eyes, prolonged contact can cause skin rash, itching drying and redness. To control this a person will enclose the chemical, use ventilation and wear a face covering, if the chemical does come into contact with clothing or skin take off all garments run under water immediately and seek medical attention if the condition worsens.
Methanol-
A chemical that is used in thousands of everyday products including plastics, paints, cosmetics and fuels. It is water-soluble and readily biodegradable, its economic advantages make it an attractive alternative fuel for powering vehicles and ships, cooking food, and heating homes. Through the years the demand for methanol has vastly risen therefore making it more expensive, there are also thousands more methanol derivative products such as acetic acid and formaldehyde because the chemical is a base material. Methanol is a non-drinking type of alcohol meaning it is poisonous for human consumption, however, small amounts naturally occur in many living organisms as part of their metabolic processes, for example, the chemical does appear in many fruit and vegetables. Roughly 45 per cent of the world’s methanol is used in energy-related applications but can also be blended into gasoline to produce an efficient fuel known as methyl tertiary butyl ether which can have lower emissions than conventional gasoline. It is primarily used as an industrial solvent to help create inks, resins, adhesives and dyes and further to help manufacture important pharmaceutical ingredients and products such as cholesterol, streptomycin, vitamins and hormones. Despite all its uses and advantages the chemical also comes with its disadvantages and dangers. Burning methanol increases the emissions of carbon dioxide because it is made from natural gas and if made from coal methanol will double in carbon dioxide emissions even if efficiency remains the same, even if it is safer than gasoline it has a high amount of formaldehyde emissions. Methanol is highly flammable and toxic, it must be properly stored transported and used by people trained in its handling making it unavailable to use to everyone. It must not be ingested or inhaled by humans, it can be harmful if swallowed, absorbed through the skin or inhaled as it can cause irreversible injury to the nervous system, blindness or even death. Even minor exposure o methanol has consequences of the following; headache, weakness, drowsiness, nausea, difficult breathing, drunkenness, eye irritation, blurred vision, loss of consciousness, and possibly death. When using methanol a person must avoid prolonged and repeating of the methanol vapours and have proper ventilation to make safe working conditions. Using gloves and eye goggles limits exposure to the skin however if contact is still made a person must wash with soap and water for 15 minutes and seek medical attention if irritation continues; this follows the same with the eyes but excluding the use of soap. Ingestion of methanol is life-threatening, and if occurs take the victim straight to a medical professional and do not induce vomiting; the onset of symptoms may be delayed for 18 to 24 hours after ingestion.
Toluene-
A colourless, clear liquid that becomes a vapour when exposed to air at room temperature, it isn’t hard to distinguish if it is exposed as it releases a sharp, sweet odour. Toluene is used as paint, lacquer thinner, or a dyeing agent as it can help dry dissolve and thin other substances, but is also found in fuels. In a laboratory, it is used as a solvent for carbon nanomaterials including nanotubes and fullerenes and it can also be used as a fullerene indicator. The possession of the chemical is regulated in many jurisdictions and many of the products contain it because of the ability to use it for recreational drug purposes, making it harder for minors to obtain it. The chemical is also used in nail polish due to its ability to help dissolve other substances but in contrast, has also been used to enable nail polishes, hardeners and lacquers to be applied smoothly proving the many strengths of this chemical. Toluene is produced in the manufacturing of gasoline, it improves the octane ratings for fuel in race cars and other automobiles, the higher the octane number or rating the greater the fuel’s resistance to knocking or pinging during combustion. Because the chemical easily evaporates when exposed to the air, toluene can evaporate out of common household items such as glue, paints, paint thinners, adhesives, synthetic fragrances and nail polish into the air which is then inhaled. However, this can be resolved in future reference by using these products in well-ventilated areas and closely following the label warnings and instructions. When exposed to the chemical via breathing it in or contact with mouth or skin toluene can cause; irritated eyes, nose and throat, dry or cracked skin, headache, dizziness, feeling of being drunk, confusion and anxiety. If there is continued exposure the risks heighten and may lead to tiredness, slow reaction, difficulty sleeping, numbness in the hands or feet, or female reproductive system damage and pregnancy loss. If swallowed, toluene can cause liver and kidney damage.
Materials that are used in the Graphic Design Process
What are they used for?
Sign Vinyl-
There are many different types of sign vinyl used in graphic design; calendered vinyl, polymeric vinyl, transparent vinyl, matt vinyl, and gloss vinyl. It can be used in a range of eye-catching displays and advertisements and each one has its own separate use. Polymetric vinyl is resistant to most environments and has long durability so its perfect use is for creating banners as it uses plasticisers with large molecule sizes. Calendered vinyl film is used for short term application as it doesn’t have a strong resistance to harsh environments, it isn’t comfortable and doesn’t stretch well, their casts usually last typically from 3-6 years. This is because it is made of PVC material being squeezed between heated steel rollers to form a thin sheet of film. Most types of vinyl are manufactured differently making their durability and flexibility differently. Sign vinyl is a material much like a very large sticker, it is backed with an adhesive that can be applied to different surfaces, this can be to vehicles, windows, walls and a wide range of flat or curved surfaces. It can be an effective way to promote a business, sign vinyl can be cut in different ways to produce colourful and bright displays for advertisement making them stand out in any location. Solvent-based adhesives are best to use as they don’t whiten when applied wet and cold and they have great temperature resistance. The main reason most sign vinyl doesn’t have long outdoor durability is down to UV radiation being emitted by the sun. The UV radiation affects the colour of most vinyl signs and after a number of years, the sign will begin to fade.
Lino-
Lino printmaking is the method of carving a drawing into a soft linoleum block, rolling a thin layer of ink over it and pressing paper on top to transfer it. The prints look bold and can make a statement, they have hard lines, flat areas of colour and high contrast between paper and ink, but they can require patience to make. You can spend a long time carving to make just a simple design, but the printing is fairly fast so after you have created your initial design you can make multiple copies quickly and easily. Many artists find that working in lino can change their style and makes their work appear more powerful rather than drawings made with a pencil that can look tentative or flimsy. The tools needed for lino printing include; lino board, ink roller, carving tools, sheet for inking up (glass, plastic, a tile, another piece of lino, anything that is smooth, flat and non-absorbent), marker pen and a pencil. Lino was used as an alternative to wood by Artists such as Matisse and Picasso from the 1900s and became a popular process within the German Expressionist and Russian Constructivist movements of the 1910s and 1920s; the first British exhibition to feature Lino Prints was in 1929. By itself lino doesn’t look very inspiring, it comes in a dull grey known as ‘battleship grey’ and if cold can be hard to cut but with different sized blazed and experiment it can turn into something impressive.
Albumen Print-
Albumen paper was popular for photographic printing between 1850 to 1900 invented by William Henry Fox Talbot’s famous “Photogenic Drawing” process, disclosed to the world on February 21, 1839. it was coated in a layer of egg-white containing salt and sensitized with a silver nitrate solution. It would then print in the daylight under a negative, when a glass negative is placed directly on the paper and exposed to light, it forms an image on the paper, and the result would have a smooth surface with a fine sheen. Albumen prints could be toned with a gold solution which gave a rich purplish/brown colour which would reduce the risk of fading within the photo.nThe time floating o the albumen paper was around one minute and would then be taken into a warm loft for drying this is because it had a faster drying rate imparting higher gloss onto the paper. The albumen print became so popular because of its crisp, sharp image the best of its time. Very few have survived in their original condition. Approximately 85% of extant albumen prints suffer from the presence of a yellowish-brown stain in the highlights (nonimage areas), and almost as many exhibits overall image fading, with an accompanying shift in image colour from purple or purplish-brown to a sickly yellowish-brown.
Tools that are used in the Graphic Design Process
Chisels-
There are several kinds of cuts you can make with a wood chisel, a particular one may be more suited to perform a certain kind of cut than another. They can be made from numerous materials including chrome, vanadium, steel and forged steel. Brick chisels are specifically designed for cutting through hard materials, they feature a wide blade that allows for the effective cracking of wide surfaces such as masonry blocks. Masonry chisels are ideal for cutting bricks, cement blocks, cinders and can also be used for removing excess mortar. They are often attached to hammer drills or jackhammers and used in the process of demolition. Concrete chisels are most commonly used to make precise cuts through concrete, they commonly feature a handle and a strong bevelled edge blade that can cut through concrete with the force of a hammer or mallet. Cold chisels are made from tempered steel and are specifically made for cutting through cold metals, these will be metals that are not heated with heating torches, forges, or other devices. These chisels have a less acute angle to the sharp section of the blade than a standard woodworking one, this makes the cutting edge sharp but not as sharp. Cold chisels are made from steel and have 4 types; flat chisel, cross out a chisel, round nose chisel and diamond point chisel. The final type of chisel is the woodworking chisel, these can be used for a variety of purposes including the production of furniture. There are smaller varieties of this type of chisel for intricate crafting in woodwork, larger tools will be used for removing more sizeable areas of wood. These chisels feature 90 degree flat sides and have 3 different types; bench chisels, mortise chisels and paring chisels.
Stencil-
Stencil is used to create an image on a flat surface by allowing colour to reach the surface through the gaps. The idea of a stencil is that it can be used numerous times, the first findings of them were in Asia and Europe dating back to over thirty-five thousand years ago. There are many types of stencils such as; military stencils, graffiti stencils, utility stencils and printing stencils. Many armies throughout the world use stencils to mark helmets, vehicles and equipment as well as other common uses in the world such as objects, locations and usual vehicles. They can also be used in silk screening, a type of textile printing, where one colour can be applied at a time meaning that for multi-coloured silks there must be a number of silks colouring with a dry time between every colour.
Printing Block-
A printing block is used for producing repeat patterns on different materials like felt and leather. They are usually made of wood or metal or a combination of both. A design is drawn onto the surface of the block snd it is either engraved or carved, it is then covered with dye, ink pigment or a resist such as wax. It is then pressed onto the ground cloth and that is the end of the process of making it. Until the late eighteenth century ost blocks were applied by hand, but with new machinery from 1780 onwards machines were developed so that they could mechanically print on thousands of metres of cloth per day. It is the earliest, simplest and slowest method of all time, it is however capable of yielding highly artistic results, some of which are incomparably good to others.
3 Types of Protective Equipment (PPE):
Goggles- These protect your eyes in the workplace from flying hazards, liquids, dust, vapours and radiation. Different type of eye protection includes safety spectacles, goggles, face screens, face shields and visors. When graphic designers are using hazardous chemicals when printing this may splash and come into contact with a designer’s eyes causing consequences from burning in the eyes to blindness. To correctly use this piece of equipment a designer must ensure the eye protection chosen has the right combination of impact/dust/splash/molten metal eye protection for the task and fits the user properly, a visor alone would not effectively protect someone from chemical splashes.
Mask-These protects your lungs from oxygen-deficient atmospheres, dust, gases and vapours. Different types of masks include simple filtering facepieces, respirators and power-assisted respirators. In graphic design, masks may come in handy when cutting wood or using aerosol cans for spray paint. To correctly use this piece of PPE, you must be using the right type of mask for what you’re doing, using a thin paper mask is not as safe as using a round face mask that sticks closer to the skin as gases and vapours can still make their way into the mask and into the lungs.
Heavy Duty Masks
Gloves- Gloves help against getting scratches and cuts when handling sharp materials or something that may cause harm to the skin like chemicals. There are three different types of glove technologies: seamless knit, polymer, and cut and sewn. These come into use with graphic design in many ways, to simply stop paint from getting onto your hands or to avoid cutting yourself with metal or to stop chemicals from touching the skin in processes such as albumen printing. To correctly use this piece of PPE a person must assess the risks/hazards that may come with what they’re using to pick the correct type of glove to protect their hands based eg handling or operation of heavy equipment, and the most common risks are contacted with sharp edges or heavy abrasive areas, seamless knit technology gloves have become the glove of choice.
What is a RECCE?
A RECCE is an inspection or exploration of the desired place a person wants to do their scene or project to determine whether the area is suitable and safe.
A filming crew will do a RECCE to assess both personal safety for all involved and also the costs of the project and whether these work with the budget of the film. Without a RECCE your project may end up being more expensive as if you take your crew, cast, interviewee, equipment to your desired location and find out on the say it is unsuitable and unsafe your project would end up being delayed and more costly for wasted time.
It is important for health and safety as it uncovers any potential issues a crew might have shooting in the location and makes these avoidable or makes the crew aware of this and to take extra care to prevent serious injury. These can be for the following reasons such as lack of access for vehicles and equipment, unsuitable light levels or reflections, background noise, lack of space for the crew and equipment, and safety issues such as uneven floors or poorly maintained electrics. As well as this if serious harm or any kind of harm does come to cast or crew you are liable for this and may end up having an insurance claim on your hands by the end of it which could all be avoided by inspecting the area and doing a RECCE first.
As well as doing a RECCE for the purpose of health and safety a person may also do one to provide themselves with some inspiration and generate ideas from being in the location. Seeing what is actually in the location and the lighting in it can form different ideas for different shots and maximise the characteristics of a particular location, elevating the final work.
3 Risks and 3 Hazards relating to the print industry- what can be done to prevent it
A risk in screen printing is the effect of the UV light used to harden the emulsion onto the material you have printed on to, UV light can damage the skin and eyes when viewed directly or from reflected surfaces. A way to prevent this is to use specialist glasses to minimise the exposure of UV light to the eyes and to cover up the skin when screen printing.
In printing inks the main component is the pigment, black inks usually contain carbon black in comparison to white which uses titanium oxide, calcium carbonate, zinc oxide and clay. Coloured pigments can e organic or inorganic, inorganic coloured pigments usually contain metals such as lead, chromium, copper, mercury, iron and more. If this were to come into contact with the skin in a cut and enter the sin causing heavy metal poisoning. A way to prevent this from happening is wearing gloves and covering the skin also wearing a face mask will help to prevent poisoning by minimising the number of fumes inhaled.
Cleaning solvents, which can be used to clean equipment and the area before or after printing contains many hazardous chemicals that when inhaled can have serious consequences. Printing parts have to be regularly cleaned to prevent the accumulation of dried ink and paper dust, common cleaning solvents include kerosene, glycol ether, alcohols, toluene, hexane and specially formulated proprietary solvent blends. these can also present fire risks so it is also important to have either fire blankets or free extinguishers nearby. As well as this, it is also important to wear a face mask and to keep the place you’re working in well ventilated to vapours are blown away and become less likely to be inhaled.
Exposure to organic chemicals through inhalation and contact through the skin can include problems such as dermatitis, irritation and sensitization of the skin and respiratory tract. Long term health effects may include internal damage to organs such as the liver, kidneys and lungs.
Because of all the materials and chemicals that are used in the printing industry the risk of fire is high, being aware of your surroundings and being prepared in preparation for printing reduces the risk, keeping reacting chemicals separated from each other and having extinguishers and fire blankets always nearby.
Being experienced with the equipment you’re using or being around someone who is experienced helps reduce the risk of harm. Using chemicals or machinery you’re not familiar with or how to use can lead to multiple problems in the short and long term. Not only may you break a piece of machinery you may bring harm to yourself by not knowing what is hazardous and what isn’t.
Legislation in Health and Safety
The Personal Protective Equipment at Work Regulations 1992
Made 25th November 1992
Laid before Parliament 2nd December 1992
Came into force 1st January 1993
4.—(1) Every employer shall ensure that suitable personal protective equipment is provided to his employees who may be exposed to a risk to their health or safety while at work except where and to the extent that such risk has been adequately controlled by other means which are equally or more effective.
We need this legislation to keep people safe both short and long term when using equipment or chemicals that can cause risk, without this an employer runs the risk of hurting themselves or something happening to them further down the line. I believe this legislation is right to be enforced as every employer has the right to go to work and feel safe and should not fall under harm by just doing their job.
6.—(1) Before choosing any personal protective equipment which by virtue of regulation 4 he is required to ensure is provided, an employer or self-employed person shall ensure that an assessment is made to determine whether the personal protective equipment he intends will be provided is suitable.
We need this legislation to ensure that the right piece of PPE is worn to keep employers safe in the workplace, wearing the wrong type of PPE defeats the object of wearing it and continues to pose a risk to the employer. Without this, an employer can still come under harm, for example, if they are wearing the wrong type of glove for the materials they’re handling they still can come at the risk of cutting themselves. I believe this legislation is important as not only does it protect the employers it makes them have to be aware of their surroundings or what they’re using making them take extra caution to prevent harm.
9.—(1) Where an employer is required to ensure that personal protective equipment is provided to an employee, the employer shall also ensure that the employee is provided with such information, instruction and training as is adequate and appropriate to enable the employee to know—
(a)the risk or risks which the personal protective equipment will avoid or limit;
(b)the purpose for which and the manner in which personal protective equipment is to be used; and
(c)any action to be taken by the employee to ensure that the personal protective equipment remains in an efficient state, in efficient working order and in good repair as required by regulation 7(1).
This legislation is needed to provide training to an employer on how to effectively use PPE and what to avoid to keep them safe. Without this, an employer may simply not use the PPE provided as they will not be aware of the risks they run without using it. I believe this legislation is important as it forces an employer to be aware of the risks they take by not following the rules and risks laid out, they will take on some of the responsibility for their own safety.
Health and Safety Poster
Task- Using the health and safety hazards around the college, produce a poster.
To make my own health and safety poster, I began by researching different posters along the same lines that have been created and used before. I created a mood board of these ideas so when it came to making my poster I could come back to these for inspiration and them all be in the same place.
Following this, I listed some of the ideas I could base my poster off, these include:
- Moving swiftly through the barriers
- The wet floor around water dispensers
- Leaving space in corridors for people to walkthrough
- Remembering your keycard
- Always have your lanyard on
- Keeping open bottles and cans away from computers
- Not waiting around the barriers
I decided to use my idea of not waiting around the barriers and using your card as this isn’t a poster I have seen around my college and is something that I see as a problem. I began by opening the illustrator and using the ellipse tool to add the green to the top and the bottom of my page as this is the colour confetti is recognised for, I also added the confetti logo into the corner of my page to make it personal for the college. Moving on to the actual illustrations o my poster, I used the pen tool to make simple designs to show the actions of the orders on the poster. I needed to make an illustration of a hard and the barriers, I didn’t want to make these too complex and take away the meaning of the poster and become distracting. Filling these with plain colours but also ones that don’t match any skin colour also makes my poster inclusive and again doesn’t take away the message of this poster being serious, adding bright happy colours would make the poster look less serious. I added bold san serif font in black to contest on top of the white background and make it stand out as this is the most important of my poster and what I want to be seen most. This finished the look for my health and safety poster.
What I like about my poster is the simplicity of it, what I have included in my poster gets the message across clearly by being minimal and by keeping it as basic as possible means people won’t spend loads of tie looking at it and will do what it says on the poster, making it distracting would take away what the point of the poster is for in the first place. If I were to change something about my poster would be to add a smart catchphrase on it as when looking at other posters, it is something graphic designers will do to make their point more memorable and therefore more likely to be followed.
References:
- http://www.historyofpencils.com/drawing-tools/stencil/
- https://ohsonline.com/Articles/2014/11/01/Gloves-Are-PPE-and-More
- https://trc-leiden.nl/trc-needles/tools/design-transfer/printing-block
- https://uk.rs-online.com/web/generalDisplay.html?id=ideas-and-advice/chisels-guide
- https://www.biodiesel.org/docs/default-source/fact-sheets/faq–safe-handling-and-use-of-methanol.pdf?sfvrsn=1912c7dd_4#:~:text=Ingestionof
- https://www.chemicals.co.uk/blog/what-is-isopropanol-used-for
- https://www.chemicalsafetyfacts.org/methanol/
- https://www.labour.gov.hk/text_alternative/pdf/eng/GN_Printing.pdf
- https://www.osha.gov/toluene
- https://www.thesprucecrafts.com/an-introduction-to-lino-printing-2578530#:~:text=Linoprintingisaform
Website Design With Figma
What is Figma?
Figma is a free online application that allows you to create graphics and designs for websites, apps or general use.
The free app is something you may be interested in utilising from home as an alternative to Adobe Illustrator.
Example of Surf Shark
What I like about the design of this website is the way the designer has followed a colour theme to make all their photos blend and link into each other which makes the home page look appealing to the consumer’s eye and become more likely to click on further. As well as this I also like how they have used more photos than text for a minimalist approach, if someone did want to find out more they would have to go further into the website, a clever way to make your audience more hooked into your work. The shape that is used for the photos makes the home page look similar to an Instagram layout showing that the page is trendy and with the times not old fashioned luring in a younger audience because of the theming around it. They have made it easy to find their socials and how to guide the website with everything being at the top so it will be one of the first things you see as you enter the website following the rule of hierarchy as the most important stuff is at the top of the page.
My Initial Figma Layout
For my initial layout for my portfolio website, I used Figma to give myself an idea of where I would want things to be. I don’t want my home page to be filled with words but instead to be quite minimalistic, I have taken inspiration for this from the example I found of surf sharks with the images taking up most of the room of the page. However, what I have changed for my layout is I have placed my name in the middle of the page so it is the first thing that a person will see which is important as they will know whose work it is with the images spread around the name. I have put an ‘about me’ section underneath my name so it is easier to navigate and because I believe it is one of the most important parts of my portfolio website I have played it in the middle so it is more likely to be clicked and grab the readers attention. I have followed a near pastel theme as looking back on my work a lot of it follows through with these types of colours so by following this my page will look more appealing to the eye.
Creating Mockups
Starter- Colour Blindness Chart
By creating a colour blindness chart I become more aware of what colours to use to make my website more accessible and inclusive. I can work with these colours that I have made in my chart following what people with different types of colour blindness can see. By creating different settings people will be able to see work with colour and enjoy it more than if I used colours with the mindset that everyone could see them, it means my work isn’t reaching everyone properly because there are limitations of what some may or may not be able to see because of their disability.
Mockups
What are they?
A visual representation of what your design will look like on a product gives it a real-life form.
Why do we use them?
To show the consumer what your design will look like, it is also a better way to advertise your product or a way to show your prototype. They allow you to show your product with more of a professional presentation for a final design.
By creating your own personal mockup you remove the limitations that you may have using somebody else’s, you have full creative control with how your product is presented. These limitations can include, having to sign up to mockup sites using your email giving you unnecessary emails constantly which can become annoying, you can only get access to free mockups unless you are willing to pay a fee for more in detail mockups, going through multiple pages trying to find the mockup that is right for you which takes up your time. Finally, a limitation that you may encounter especially when in business or advertising is people using the same mockup which would look very good to a client who may have seen the same mockup somewhere else, by using your own mockup you are showing your originality and making your product look more appealing and new.
Creating My Own Mockups
To make my own mockups I found images that I could use to edit and turn into mockups. I began by opening the image in photoshop and using the ellipse tool to put a fitting shape around my image, after this, I turned this shape into a smart object. A smart object is a non-destructive layer in photoshop, any edits you make to the shape can be done or revisited as long as these edits are saved each time. I then transformed my shape so it would fit the image I am using, by holding ctrl t this opened the transform tool where I could edit my shape and by holding down ctrl I could edit my shape more precisely by moving the corners so it would fit into my image more closely and better. Then, by double-clicking my shape layer, my smart object layer would open up where I could edit, changing the colour of my shape and being able o write in it, which I did and then clicked save. This changed what my shape then looked like on my image layer and I could always go back and revisit that smart layer.
Using my own work I used an image of a book and turned it into a mockup for my magazine spread. This time I also had o use the warp tool to create the bending around the edges of the magazine, however one of the problems I have run into was my magazine getting squished into the spine of the book, I will improve on this when using the warp tool with smart objects in the future.
Prevent Poster
Run, Hide Tell
For my typography poster for the campaign Run, Hide, Tell, I wanted to use my lettering to portray the action of the verbs. For the run, I made my font italic to represent the idea of running when the body becomes slightly slanted, for hiding I made the letters gradually fade out to show the idea of hiding and a person disappearing. Finally, for the word tell, I wanted to try and implement the image of a speech bubble but incorporated this into the text without using the image, I did this by gradually making the letters bigger until finally, the last letter matches the font size of the other letters. Underneath finally, I put call 999 to give extra direction to who to tell in that circumstance when these orders need to be followed.
What I like about my poster is how simple it is and it shares the message directly, the poster isn’t busy and by using bright, bold colours that stand out it shows that the poster is serious and not just for decoration. To improve on this poster I would maybe change the background colour so the poster catches people’s eye more and doesn’t blend into a wall which in many places are also white like the background of my poster.
When comparing my work to a professional piece that is used in environments across the country, the contrast between the two colours of black and white make the poster simple and easy to follow but also attention-grabbing through the white standing out over the black. I would incorporate this into a future design of mine to grab attention using contrast as that is something I believe my poster does not do right now. Additionally, the poster provides a little more information than mine such as telling when to run, hide and tell, which mine does not which may come across as confusing when people do not know when to follow these orders.
Magazine Cover Spread- Final Design
The Brief
Graphic Designers have had to be able to mock up page layouts for decades, now it is your turn. This task will teach you how to make and break a grid system to incorporate graphics, text, photos and more into a page spread and magazine cover. You will develop your skills in InDesign, one of the leading industry-standard software for desktop publishing, to create a magazine cover and a 2-page spread for a fictitious/or real magazine of a topic of your choice. Your final design will be mocked professionally and showcased on your portfolio website.
My Work
For my final piece in my magazine brief, I have decided to base my magazine around the F1 driver Lewis Hamilton as there has been a lot of news regarding him and is someone I as a person look up to. To begin with, I started researching images I could use in my magazine and implemented these into a mood board. I annotated what I could use these images for and the pros and cons of using them.
By doing this mood board it helped me imagine my format for my magazine, how much writing in ratio to photos there would be. I decided I didn’t want my magazine to be too text-heavy and make people lose interest in the magazine but where there is writing still makes it look intriguing and not blocky.
Before beginning to make my magazine I did some research on past magazines made around Formula 1 and what codes and conventions they follow.
After doing this research I was amazed at the different layout styles used even though they were all based on the same subject. There were some that went with a very simplistic approach using lots of negative space and some that filled every bit of space there was to take. Some included a mesh of lots of colours and there were some with minimal colour or only sticking to one colour throughout. This showed that each brand of the magazine had a targeted approach and also how the design process has changed throughout the years trying to fit with the taste of the people of the times and making it more modern. People now prefer more minimalism as seen through a survey “In the last ten years, minimalism has become one of the biggest growing movements in the US and around the world”, for this reason, magazines have been seen to use fewer taglines throughout their magazines and loud colours as it is considered more ‘tacky’ to something that is more toned down with paler colours and more modern fonts.
With all this in mind, I began the creation of my magazine, I began to gather some images I would want to use for my front cover and double-page spread. For my front cover, finding an image was more complex as I wanted to find one which I could write around but still be impactful and eyecatching to the reader.
These were the first two initial photos I found that I thought would work really well with my magazine and give off the impression I wanted, Hamilton being a dominant and strong figure.
I moved on to making my double page spread and decided to leave my front cover until after I had finished the spread. For the first page of my spread I wanted to do a whole page of text surrounding an image of Lewis Hamilton, the reason for this is many readers are not fond of lots of text-heavy pages, doing one page with all the text you then have the freedom to space out your other pieces of writing on pages and not have to write as much keeping readers more interested in the magazine. Even though my page will have lots of text on it it will not appear like this as the text will be working around the outline of Lewis Hamilton keeping the page captivating and looking less text-heavy on the eyes. I did this by first picking out an image of Lewis Hamilton that I would workaround for the first page of the spread.
Within the three photos, I had found I decided that the third one with Hamilton in a standing pose with his racing suit on would work best and be easy to work with as well as keeping the page clean with the minimal colour in the image already. With the images decided I opened InDesign and began to set up my document.
To set up my document I clicked ‘Print’ when met with the options board when opening InDesign, I selected A4 and ensured ‘Portrait Mode’ was selected and made sure ‘Facing Pages’ was ticked. In the ‘Pages’ panel, I clicked the ‘+’ symbol twice in order to create my cover and double-page spread.
To create the guides for my pages I selected ‘Create Guides’ from ‘Layout’ I made my rows to 11 and the gutter to 3mm and made sure fit to preview was ticked, this would make working a lot easier as it would help make sure everything is in line and is spaced correctly. I placed my image into the page and dragged it out to fill it, by right-clicking on it I had the option to make it a high quality display, which I did. To start the process of making my text wrap around Hamilton I started by using the pen tool and drawing a rough outline around him and making the stroke to this line 1pt so I could see it clearly. From here I found the piece of text I wanted to use for my magazine, using san serif to make it appear less old fashioned and instead more modern. I drew a text box and clicked on the outline I had drawn previously and opened the text wrap window and selected the ‘wrap around object shape’ option, I raised the offset of this to 2mm and here I saw my text wrapping around where I had drawn my line. 
I turned the stroke of my line back to 0pt so it could no longer be seen and using the type and tables tool turned off the hyphenate option so none of the text I had placed would hyphenate. I also used the drop caps tool to make the first letter of my paragraph larger, something that has frequently been seen to be used across magazines for decades. To add a more professional look to my magazine I highlighted all my text and lowered the K number to 80, this made it look more like print than black. Finally, I added a title to the piece and this was my first page finished.
For my second page, I didn’t want to fill it with too much text and instead use more images. So again I gathered some that I would want to use.
I again found some text for this page and began experimenting with different layouts and using photos that were relevant to the text I’d used. One image that I thought would look really good would be the one of Hamilton and Verstappen facing with their backs opposite each other as they are each other’s biggest rivals so I went with this. However, I needed to do some editing to this image because of the background it included, I transferred this image into photoshop where I used a clipping mask to get rid of the background of my image without losing the information to it and transferred this image back into InDesign where I used it at the top.
I again used the pen tool and text wrap as I did for my first page to get the text to wrap around the two making it look more absorbent and less boring with blocks of text. I originally used two photos of Lewis at the bottom of the page with two questions written around them however later decided that an image with his future teammate looked better and neater. This finished the process for my second page in the double-page spread.
I returned back to making the front page for my magazine where I began to experiment with the images I had chosen before. After numerous experimentations with both images I just could not make them work or look right, when applying text to them the text either became really hard to read or there was simply not enough room to write around, I found this difficult as the pictures I had chosen represented exactly what I wanted but I was back to the drawing board to find a new picture to use for the cover of my magazine.
After spending some time searching around on the internet for images to use I found one that I believed would really work and I would be able to write and work with, unlike the other two previous photos.
With this picture, I was able to use the empty space to write my masthead and cover lines with plenty of room to work with and with the grey background my writing would be legible grabbing more attention from readers. I used pale colours to keep the cover minimalist so it wouldn’t take away the attention from the main image which is what all my writing would again be surrounding as I used the pen tool and text wrap trick once again, I wanted Hamilton to be centre with his eyes being the pulling cause making readers want to buy.
The majority of my fonts were san serif to keep a sleek and modern look apart from Lewis Hamilton which I put in san serif to stand out above the rest and show its importance as well as making it larger than everything else apart from the masthead and then the headline coming below his name in the hierarchy.
This is the finished design of my magazine placed on a mockup to show it in a real lie setting. I am really pleased with how this turned out and followed the ideas I had from the beginning with it looking minimalist and modern. Although it does not look as minimal as some of the magazines I saw, I don’t believe my magazine looks overbearing or text-heavy like some that I saw.
What I like about my magazine are the different layouts I used on each page and experimenting with different ways to layout text to separate all the text from being together in one big paragraph and not make it appear boring.
If I were to change something from my magazine and learn from it in future is finding different ways to add coverlines in more artistic ways rather than them being stuck in the corner as although they are not the most important part I don’t want them to be something that ruins part of the presentation for the cover.
Editorial Magazine Designs
The Sanahunt Times Case Study
A fantastically designed high-end newspaper/ magazine for a Kiev-based fashion chain. Art Direction and Design from design studio non-format emphasise luxurious, monochromatic layouts with impactful introduction rare burst of colour. They contrast enlarged typography with dramatic photography.
Kjell Ekhorn and Jon Forss are the type directors/designers/art directors of the Sanahunt Times. They have worked together as the creative direction & design team Non-Format since 2000. The Sanahunt Times is an in-store fashion publication for the Sanahunt Luxury Concept Store in Kiev, Ukraine with a firm belief in the importance of bespoke design solutions. They believe that ‘each and every one of their design solutions must balance the desire to connect with individuals on an emotional level with the need for direct, strategic and effective communication.’ The target audience for this magazine is women aged 20 through 30 of the socio-economic background of upper-class status. This is because of the simplistic look of the magazine with the expensive looks on the models such as their clothes, as well as this the majority of the models are female aiming the magazine towards women. Across The Sanahunt Magazine, there is lots of contrast with it being black and white with pops of red across it to keep the audience interested, making it look like an old fashioned newspaper with a twist. As well as this the magazine balances the use of photos and text, this helps it not look overwhelming with all the text and gives the reader an idea of what the section of text is about. They also use a lot of repetition of the red marker across the text which is effective in making the magazine distinguishable above the rest of the magazines. What I like about the magazine spread is the way it looks as if it has been stamped or drawn on with the read marker spread and dotted around the magazine as if it shouldn’t be there, it gives the magazine a more laid back feel and stands out above other magazines through its originality. What I don’t like about the magazine is the amount of text it uses in such a small font, as well as this all the font is the same size making it look more of a chore to read because of it being so text-heavy.
When comparing The Sanahunt Magazine with the Cosmopolitan magazine I have featured there are many differences between the two. In Cosmopolitan there are cover lines spread out across the front page leaving no negative space which is completely opposite to the minimalist approach we see to the front cover of The Sanahunt. As well as this in The Cosmopolitan, there is colour spread across the whole of the cover with baby pink being the background colour and complimenting colours blue and white also featuring across it also different from the simple two colours of The Sanahunt Magazine. The Cosmopolitan in my opinion looks like a more approachable magazine with it telling the reader what they will be getting from the magazine including tips and featured stories, unlike The Sanahunt where you have to know what the magazines forte is to know what it will be written about.
For my recreation of The Sanahunt Magazine, I have followed the ideas of red writing being patched across the magazine with the black and white theme to contrast. I have used fonts that follow the components of The Sanahunt Magazine, this being serif with heavy amounts of text and have separated the text with photos. When placing the photos on my double page spread, I used two kinds of placements, one which took up half the page and one which separated the page in half with a black ground to make my page appear more full which I have also seen in The Sanahunt Magazine use by researching more magazines of theirs.
References:
https://www.brandnewworld.ch/brand-new-salon/creative-minds/27556/kjell-ekhorn.html
https://www.commarts.com/project/19870/the-sanahunt-times
Keyframe and Animation Principles
Mat Voyce
Mat Voyce uses lines with thin strokes and vibrant colours against them to make the colours pop more, in this artwork in particular by using white on the front against the navy background it stands out further through the contrast in colours. Using a san serif font keeps the style informal and fun, the rolling smiley faces also contribute to this. By not having the rolling smiley faces rolling on the actual letters it keeps the spacing in the work looking neat and not overcrowded and overly busy.
Bark and Bite
Using a paper style of texture within the work creates the impression of the artwork coming to life from the page. The different shades of purple and the small use of yellow with the gloves and boots make the character in the centre not blend in with the background.
Who created the list of the 12 principles of animation?
The 12 Principles are:
- Squash and stretch
- Anticipation
- Staging
- Straight-ahead action and pose-to-pose
- Follow through and overlapping action
- Slow in and slow out
- Arc
- Secondary action
- Timing
- Exaggeration
- Solid drawing
- Appeal
Ollie Johnston and Frank Thomas in the book Illusion of Life: Disney Animation in 1981 outlined the key teachings for the professional animator.
The 12 Principles of Animation Explained:
Squash and Stretch
This gives your animation the illusion of Gravity and Flexibility.
This can be linked to the idea of a bouncy ball, it stretches when it’s being thrown but squishes when it hits a hard surface.
Stretching makes it thinner.
Squashing makes it wider.
Anticipation
This prepares the viewer for action, adding realism and physics.
Consider jumping, it’s hard to do without bending your legs.
Actions happening without any preparation, especially large/ heavy movements will look awkward and not realistic.
Staging
Very similar to composition when working with art/video frames.
Small animated elements can be used to help direct the viewer’s attention to something or show movement.
Think about a moving car, and how it could have small trails behind it to show that it is driving fast.
Straight Ahead/ Pose to Pose
Straight Ahead- For more fluid and realistic animators, draw each frame one after another.
Pose to Pose- For more control, draw key events (start, mid, end) and fill in the gaps where needed.
These can often be used together in many ways to get varied results.
Follow Through/Overlapping
Follow Through- When different parts of one object stop moving at different rates.
Think of jelly wobbling after being slid across a table.
Overlapping Action- The time difference (delay) between multiple objects moving at different rates.
Consider a hat with a feather flowing behind it.
Slow In/Out
Easing movement at the start & end can give them more life.
This is done by adding more frames at the start & end of animations in comparison to the main sequence.
Think about a bicycle, it starts moving slowly, hits its maximum speed and then slowly grinds to a halt when the brakes are on.
Arc
When working with animation it’s best to stick with the laws of physics.
Most objects follow an arc or path when they’re moving and your animations should reflect that arc.
Think of when you toss a ball into the air, it follows a natural arc as the effects of the Earth’s gravity act upon it.
Secondary Action
Secondary actions are used to support or emphasise the main action going on within a scene.
Adding secondary actions helps add more dimension to your characters and objects.
For instance, the subtle movement of your character’s hair as they walk, or perhaps a facial expression or secondary object reacting to it first.
Whatever the case may be, the secondary action should not distract from the primary one.
Timing
For this principle of animation, we need to look at the laws of physics again and apply what we see in the natural world to our animations. In this case, focus on timing.
If you move an object more quickly or slowly than it would naturally move in the real world, the effect won’t be believable.
Using the correct timing allows you to control the mood and the reaction of your characters and objects. That’s not for you to say you can’t push things a little (especially if you’re creating an imaginary world) – but if you do, you must be consistent.
Exaggeration
Too much realism can ruin an animation making it appear static and boring.
Instead, add some exaggeration to your characters and objects to make them more dynamic.
Find ways to push the limits just beyond what’s possible, and your animation will pop.
Solid Drawing
You need to understand the basics of drawing.
This includes knowing how to draw three-dimensional space and understanding form and anatomy, weight and volume, and lights and shadows.
While you can push the limits here, too, it’s important to remain consistent. If your world has wonky doors and a warped perspective, keep that perspective throughout the entire animation.
Otherwise, things will fall apart.
Appeal
Your characters, objects, and the world in which they live need to appeal to the viewer.
This includes having an easy-to-read design, solid drawing, and a personality.
There is no formula for getting this right, but it starts with strong character development and being able to tell your story through the art of animation.
Class Work
By opening up my already made animation of my box moving up and down, my plan was to give my box the squash and stretch effect. To do this, I began to edit my piece, first changing my composition setting and changing it from 2 seconds to 4. This meant my square had more time to move, making my shape not move so fast that you cannot see what movement the square is making. Despite me changing the time of the composition, the old footage is still the length of the old clip so I dragged my clips along to fit my new clip length of 4 seconds, however, I also could’ve used alt + ] to do this and snap it to the end.
To create the bouncing effect first you have to squash the shape you have made which is done by stretching out the shape and bringing it to the bottom, the keyframe will follow this shape as it will make the shape gradually turn into what you have made it at the second set.
How to Create the Bouncing Box
You then bring this shape back up to the middle at a different time creating a new keyframe, this will make your box start to have the bouncing effect when you play it back.

Then bring this shape back to the floor with the squash effect again at a different time after your last keyframe.

This is what my bouncing box came out looking like after following these steps.
Something I would change about this in the future however is the speed of the bouncing box to make it look like it actually has momentum. I would do this by editing the speed within the keyframes.
Own Work
When making my own moving box I tried to make it more complex than the bouncing box that I had made before. I attempted to use the 12 principles of animation whilst my shape moves around hitting the sides of the screen. These included squash and stretch when it would hit the floor, taking into consideration the timing for this and how long it would take to come back up and go to another wall. I also used arcs in my animation to stick to the laws of physics and to make my animation look more realistic which are used as a secondary action as well as the box moves around.

Finished Video

What I like about my video is the movement, my box is continuously moving and each time it hits a wall it squashes and the use of arcs allows my box to hit all corners around the screen letting me use all the space possible.
Something I would change about my animation is the speed, as it reaches the end of the video the speed of the box rapidly increases which is a consequence of me misunderstanding how to use keyframes which is something I need to work on in future when I come to using after effects again.
Primary Research-
The methodology that is used by researchers to collect data within the moment and not from the past means they then ‘own’ the data instead of using somebody else’s.
Secondary Research-
This is research that uses already concluded data, this can be from public libraries, websites and data obtained from already filled in surveys. It is more cost-effective as it makes use of already obtained data, unlike primary research where companies will hire a third party to gather data.
Image Editing
What is Image Editing?
Image editing refers to modifying or improving digital or traditional photographic images using different techniques, tools or software.
When selecting images to use you must make sure they are of high quality. When Google searching, hover over an image to find its resolution. 1000×1000 will not be of good quality, it is important to use good quality images so you will be able to feather and so your image will then also fit into other images without them looking out of place.
Task- Work on how to separate images using the pen tool
Tools to use; Pen tool, Layer Masks and select and mask
To do this I began by importing my image into photoshop and drawing around it with the pen tool, once completed I would I have the marching ants around my drawn shape around the image. By right-clicking I was given a list of different actions, I clicked ‘Make Selection’ and by doing this I was met with a box that gave me the option to feather the image and click ok, I clicked ok as I could continue working on my image as I would feather it after this. Using layer masks is like using an eraser for the background however unlike using the actual eraser it is a way that is less destructive as you will not lose all the information you had.
This box is the image I started with and using the pen tool and layer masks I was able to erase it from the background and place it in a different setting.
Using this method means I can easily and quickly place my image in different images/ backgrounds and still edit if I need to.
Extra examples with me using image editing.
In today’s lesson, I have learnt how to use the layer mask tool to erase unwanted backgrounds from around my image. With the new skills learnt I can take this into future projects I do to manipulate an image by removing it from one and bringing it into another one making it look like it was always there.
I can also bring the skills I have learnt today into my magazine cover and spreads by deleting the backgrounds out of images I may want to use to have plain backgrounds or if I want to give them a new background. Where I will want to place text around my images, it will look more professional them having no background rather than making it look overly busy with loads of images having different coloured backgrounds.
Empire Magazine Covers
Editorial Designs
The particular decisions are made about everything on the page, including layout, colours, text, and graphics, in order to maximise communication while maintaining a pleasing aesthetic appearance.
Consider it a design framework; these elements are in place so that the main ‘structure’ may fulfil its function.
Elements |
Management |
| Typography– Any use of text in your design- SIZE, FONT/TYPEFACE, SPACING
Colour– Choosing correct/ relevant colours- THEMES, CONTEXT, AUDIENCE Imagery– Any use of images in your design- SIZE, FULL BLEED, THEMES |
Consistency– Keeping things the same for the reader- REPETITION, MIRRORING, FORMAT
Time– It doesn’t have to happen all the time- PAGE BREAKS, SPACING, FACE Layout– How the page and content are arranged- MARGINS, SPACING, GRIDS
|
Task- Create your own front cover for Empire Magazine
Empire Magazine
Empire magazine is a popular media publication recognised for having very distinctive covers and campaigns that set them apart from all of the other magazines on the market/shelf, with a very specific readership of media-lovers.
They usually focus their covers on one piece of upcoming or popular media and theme their facing content around that.
They’ve also been known to run cover campaigns, where they sell different versions of the cover and encourage readers to collect them all, either to have all the variations or to create a larger image when the covers are combined.
The huge emblem at the top of the magazine’s cover is the only thing that never changes.


Empire Magazine Design
To create my rendition of the Empire Magazine I followed through with the idea of using The Amazing Spiderman as my cover talking about his return in the new movie No Way Home. Using Adobe InDesign I created a new document and page, from here I created an image where I could paste the image I had selected into, when it is in the frame I can still change it and its size or where it is placed.
After placing my main image into place I began using the text box tool where I could start writing my headlines and bylines. To begin I started with writing ‘Empire’ the name of the magazine and changed the font to the exact one the brand uses that I had downloaded off of the internet so I could match the originals as close as possible. I decided to change the colour of the masthead to the dark blue colour of the suit, I matched this with the ink dropper tool so I could get the most accurate matching of colour. I did this so all of the front covers of my magazine link in with each other and there are no random colours spread across, the way I have done it I believe makes it look neat and professional. I made sure that the masthead was the largest piece of writing on my magazine cover as it is the most important part with it being the name of the magazine, it is what you want the reader to see first to recognise and want you to pick it up in the moment and in future. When a reader is picking out a magazine they want to read, in a shop, they will scan their eyes on the tops of the magazines which is where the majority of mastheads are, the more you make yours stand out the more likely your eyes will be drawn to it and be picked out. I also made sure there was space around it so it had its own area of importance and is where the eyes are taken to first, however. I did add a byline underneath this in small writing including the date however I do not believe this takes away the impact I have given to the masthead with the space left around it.

For my headline ‘The Amazing Spiderman’ I used the original font that was used in the Spiderman comics, I did this because I thought it would bring in a wider audience, longtime spiderman fans would want to read this magazine because of the topic and also the inclusion of the font used all the way back in the beginning which you would believe to interest them more as it would bring them back to the days reading the comics. Aside from this, I liked the font anyway and believed it would be eyecatching because of the rigid lines around the letters, this makes it stand out above many of the other things happening on the front of this cover and I also placed it in the middle of the magazine on the chest of spiderman to catch the eyes and stand out above the red in the background as made the font white. To finalise making my headline, I added shadowing behind the letters so they blend into the magazine better, without this the writing looked misplaced and to an unprofessional standard. When I believed to be finished with this I wanted to add a bit of context behind my headline, I added ‘featuring the comeback’ to the top of this in smaller san serif writing to sow it wasn’t as important to be seen first however it just gave further guidance to the story in the magazine.
I finished my magazine by adding coverlines and additional coverlines across my page to fill negative space, I did this with relevant information that would be featured in the magazine and stay relevant to the topics this magazine brand regularly covers, upcoming movies in the cinemas and I decided to place the actors that feature in the movie to fill space too.
Overall, I am really pleased with how my rendition of the Empire magazine came out, I liked my attention to detail and trying to follow the codes and conventions that are regularly seen in the Empire magazines to make them as popular as they are. I like my experimentation with different fonts but each one has reasoning for them being used and sticking to a colour scheme throughout the creation of the magazine keeping a clean and crisp look to it.
If I were to improve something in my Empire magazine in future, I would like to use an image where I can overlap the head of the main image into the masthead, where Empire themselves have done it I believe it adds a whole new feeling to the magazine. It makes the characters look more interrogating and interesting as well as adds different dimensions to the magazine.
Intro to Editorial Design
What is Editorial Design?
Editorial design refers traditionally to the design of newspapers magazines and books but can also now include online publications.
A History of Magazines
Before the creation of the internet magazines were the primary source of finding out information and news regarding topics of science culture and many more.
Covers that have been viewed as iconic all have a common trait between them, they all have a strong use of imagery that can catch a reader’s eye and be impactful.
Magazines can be filled with text and information but it is the use of imagery coupled with words that can lead o powerful pieces and leave a long-lasting impression on the reader.
Definitions for Magazine Features
Magazines follow codes and conventions just like anything in life to keep things consistent.
Task- List the definitions for the terms linked to the anatomy of magazines
Masthead– The title of a newspaper or magazine, informs the reader what magazine they are reading and also creates a name for themselves.
Coverline– A headline on the front cover of a magazine advertising a story or feature inside.
Magazine Deck– One or more lines of text found between the headline and the body of the article can tell the reader the date or what the theming is of the magazine.
Headline– A heading at the top of an article or page in a newspaper or magazine and tells you what the main article of the magazine.
Kicker– A line of newspaper typeset above a headline usually in a different typeface and intended to provoke interest.
Byline– Tells the reader who wrote the story giving credit to the writer.
Negative Space– The portion of a page left unmarked, can be powerful depending on the image or can be left to prevent the cover from looking too busy.
Image– A visible impression obtained by a camera, it is the first impression a reader will get of the magazine and can grab attention if done right.
Image Caption– A few lines of text are used to explain or elaborate on published photographs.
Stand First– A brief introductory summary of an article in a newspaper or on a website, typically appearing immediately after the headline.
Pull Quote– A brief, attention-catching quotation taken from the main text of an article and used as a subheading or graphic feature.
Footer– Information about the author of the section, copyright data or links to related documents.
Task- Annotate pages from a magazine with the key terminology
The designer of this magazine has stuck with a colour theme matching the suit of the cover image which in this magazine is Andrew Garfield. They have done this so the colours don’t clash and make the magazine look tacky, doing it this way keeps the magazine looking sleek and sophisticated. They have also used both serif and san serif font, they have used the san serif font to grab attention and make it the larger font as it stands out above the serif as it appears to be loud. However, t keep with the sleek theming they have also used serif to also show the polished style the magazine is following to try and reach all audiences. As Garfield is pictured wearing a suit the designer has tried to stick with the theming around being businessman-like but uses big bold kickers to stand out above magazines hat will also be placed around the shelf near the magazine.
Project Organisation
Milanote is an easy to use tool to organise your ideas and projects into visual ideas.
By noting down the tasks that I need to do, it helps me stay organised and I am more likely to do them by getting a visual idea of what is yet to be done.
Creative designers will find millanote useful software to use as it keeps them up to date on what they have and haven’t done making it easier to meet deadlines and keep them and their client on the same page with how the project is coming along with the ability to share the page.
Style Frames
Story Board
A storyboard is a visual depiction of a film or sequence that shows how it will unfold. It sketches out the various elements of the video and how it will unfold shot by shot.
Mainly linked to the narrative of storytelling, it’s common for storyboards to be produced for animations. However, for short animations such as idents, storyboards are not necessarily required.
Style Frames
A style frame is a snapshot of a finished frame as it would look within a longer animation. It aims to capture the overall look and feel of an animated or live-action video but in a still image.
Style frames can be a great way to present a sample of the work that you intend to produce for client work, before getting into the time-consuming animation process.
An example of what style frames look like, taken from the opening titles of F1, shows shots from different angles and colours throughout.
Style Frame for my Ident
By using photoshop I have created my style frame to present my idea for my ident. By using a png online I imported this into photoshop twice and by using the eraser tool separated the two characters and using the transform tool rotated the one on the bottom so it could be beside the other.
In my final ident blog, I will talk about how I created my characters to be in half using the marquee tool here I will be talking about how I have sectioned my ident idea into three shots. For my ident, I want to follow the idea of my two characters being ripped in half with the name of the channel being in between this and dripping. This idea has come from the show these two characters come from ‘Rick and Morty’ these being the names of the two characters I am working with for my ident. The show uses gruesome and wacky ideas to entertain the audience so I want to carry this theme into my ident as it best resembles the show.
For the three shots in my style frame, I have minimised my ideas which follow through with what my ident will begin like, what it will look like In the middle of the sequence and finally what it will look like at the end. It will begin with my two characters separated at the beginning, them crashing into each other and then attaching each other at the end to be split in half and the brand name being in the middle.
With my style frame, I now have a rough idea of what my storyline/ sequence will run like making it easier for me in the production process as I will get to spend more time on actually creating my ident.
Animation Timeline
Different Types of Animation
Phenakistoscope

It is a disc that gives the illusion of movement through a spinning disc invented by Jonathon Plateau from Belgium in 1832. A Phenakistoscope was an early animation device, the disc had multiple drawings on it which would all be relatively the same but would have changed a little in each drawing so when the disc is spun, it creates the illusion of motion. The audience will see a small repeated action when looking on top of the disc as there is only a limited amount of drawings but in the day when this was created, this was a groundbreaking experience for the world of animation.
Zoetrope

Created in 1834 the zoetrope was a cylinder with vertically cut sides that a person would look through to see the moving imagery. By using a strip of card or paper and drawing the animations piece by piece, it would be slotted into this cylinder so when it was spun round it would create the fast illusion of the drawing coming to life and moving. The creator was called William Ensign Lincoln who was born in Trinidad and came up with the name zoetrope after the Greek words ‘Zoe’ meaning life, and ‘tropos’ meaning ‘turning wheel of life’.
Kinetoscope

The Kinetoscope is an early motion picture exhibition device designed for films to be viewed by one individual at a time through a peephole viewer window at the top of the device. The Kinetoscope was not a movie projector but introduced the basic approach that would become the standard for all cinematic projection before the advent of video, by creating the illusion of movement by conveying a strip of perforated film bearing sequential images over a light source with a high-speed shutter. The 35 mm film travelled continuously over a bank of rollers, each picture being viewed briefly through a narrow slot in the revolving shutter. First described in conceptual terms by U.S. inventor Thomas Edison in 1888, it was largely developed by his employee William Kennedy Laurie Dickson between 1889 and 1892.
The Kinetoscope was an early exhibition motion device created by Thomas A. Edison, born in Milan Ohio, and William Dickson, born in Le Minihic-Sur-Rance, in 1891. Inside it, a strip of film was passed rapidly between a lens and an electric light bulb while the viewer peered through a peephole. The idea for the kinetoscope was for films to be viewed by one individual at a time through a peephole at the top of a device, customers would pay 25 cents to use the machine to see a small piece of animation.
The Lumiere Brothers

The brothers, individually named Auguste Marie Louis Nicolas Lumière born 19 October 1862 and Louis Jean Lumière born 5 October 1864, were from Besançon, France and created the Cinématographe. To make this piece of machinery work, two pins or claws were inserted into the sprocket holes punched into the celluloid film strip; the pins moved the film along and then retracted, leaving the film stationary during exposure. The first movies were born through the cinematographe allowing people to have a large, new, shared experience of cinema. The first private demonstration of the Cinématographe took place at the Société d’Encouragement pour l’Industrie Nationale, Paris, on March 22, 1895. The Lumière brothers and their camera operators made more than 1,400 films of subjects all over the world from 1894 to 1905. The first public demonstration of the Cinématographe took place at the Grand Café, Boulevard des Capucines, Paris, on December 28, 1895.
Claymation
It is a form of stop-motion, characters that are constructed out of a malleable substance mainly plasticine are moved frame by frame and then played back in quick succession to give the appearance of movement. Will Vinton, born on the 17th of November 1947 in Oregon was the inventor of claymation, his work gained rapid popularity and ended up appearing in Michael Jackon’s music video Speed Demon in 1988. He ended up winning an oscar alongside several Emmy awards and Clio awards for his studio’s work. Vinton sadly passed away on the 4th of October 2018 in his city of birth. The oldest claymation film known is Long Live the Bull by Joseph Sunn in 1926. Claymation works by taking a shot frame by frame moving your malleable figurine moving it a tiny bit and taking another shot, this continues until you have finished the movement or scene you want, this is then sped up at the end when you have taken all your shots to end up with your finished piece. On average it takes around 3 years to do a well-animated stop motion film that is around an hour-long because of all the shots that have to be taken. An episode of Wallace and Grommit takes typically around 30 frames per day, their film curse of the rabbit took 15 months to make, this was with hundreds of people being in on this too. This is a children’s program that uses claymation from 1994.
Some popular films that have come from claymation include; Chicken Run, Coraline, Monkeybone, ParaNorman, The Boxtrolls and Wallace & Gromit: The Curse of the Were-Rabbit.
Stop Motion
Stop motion is an animation technique where static objects are photographed frame by frame, moving them in small increments and continuing to photograph these frame by frame. The first stop motion film was created in 1898 and was called The Humpty Dumpty Circus created by directors J Stuart Blackton and Albert E Smith bringing in the first works of stop motion then lead on to more mainstream and modern works with stop motion. It is incredibly tedious and difficult to produce because of the precision and requires filmmakers who have lots of patience because of the time it can take to make one scene. As technology has improved and years have passed, computer-generated animation is by far the more preferable method filmmakers prefer as they can do anything with much more ease. The film The Nightmare Before Christmas took three years to create, one minute of the movie took about one week to shoot and ended up having 110,000 frames in total by the time the film was finished being created. The film was shot at 24 frames per second meaning the crew had to arrange characters and objects 24 times for every second of the film, this proves the patience and skill a filmmaker in stop motion requires, however, the hard work paid off as the film made $91 million in the box office in 1993 and is still a majorly famous film in modern-day.
This is a scene from Tim Burton’s film Corpse Bride in which stop motion is used 2005.
Some of the most popular films made with stop motion include; James and the Giant Peach, Coraline, Fantastic Mr Fox, Corpe Bride and The Nightmare Before Christmas. Tim Burton is one of the most famous animators in the stop motion industry and it is what makes his work so unique, it is what makes his films stand out and gives the gothic look to them.
CGI
CGI (Computer Generated Imagery) is the application of computer graphics to create animation and VFX in films, television programmes and videos. John Whitney was a pioneer in digital art and animation in the 1950s, he collaborated with Saul Bass, a graphic designer, to create the animated opening sequence for Hitchcock’s Vertigo (1958). The first movie to use CGI was Michael Crichton’s Westworld in 1973, it was then a few years later when George Lucas used CGI in “Star Wars.” CGI has been improved vastly over the years and it began to be taken seriously with the release of Jurassic Park in 1993 when audiences were able to see lifelike dinosaurs on the screen before them. Following this, in 1995 with the release of Toy Story by Pixar characters like Woody, Buzz, and Rex blew audiences away. Pixar soon followed up with other CGI movies like “Monsters Inc.” and “Finding Nemo.” The 2009 film Avatar did something new, the film won three Oscars and became the highest-grossing movie of all time with its combined motion capture with facial capture. The result was stunningly realistic characters. CGI has also spread to other areas. It’s used in many television shows and video games today. CGI is made with different methods including;
- Using algorithms can create complex fractal patterns.
- 2D pixel-based image editors can produce vector shapes.
- 3D graphics software can generate everything from simple primitive shapes to complex forms created from flat triangles and quadrangles.
The movie Transformers is mainly made up of CGI with the movie being based on robots, in this scene, we see two of the robots Optimus Prime and Bumblebee fighting which we see the impressive use of CGI. The contact the robots make towards each other and the damage they cause makes it look extremely realistic and lifelike.
My Animation Timeline
Shapes and Tranformations
Introduction into Adobe After Effects
What is After Effects?
Adobe After Effects is a digital visual effect, motion graphics, and compositing application developed by Adobe Systems and used in the post-production process of film making, video games, and television production.
To begin my introduction into adobe after effects, I began by learning how to make a simple square move up and down.

Idents
What is an Ident?
A short visual image is employed between television programmes that work as a logo to locate the viewer to the channel.
What is the purpose of an Ident?
It is a way to introduce a movie or a channel to make it known what it is and who has made it. It is a way for the brand to make a name for themselves and something an audience can become familiar with and recognise through the ident.
MTV
To stay on brand, MTV creates cartoon characters that are dressed funky in vibrant colours dancing to a beat to show that it’s a music channel with upbeat modern music hence the vibrant colours will mainly appeal to the younger audience.
ITV
To stay on brand ITV uses repetition in their idents to keep consistency. Across their multiple channels, the brand keeps a clear white background and uses the dot in the ITV as the focal point of the ident. As it is the only point in the letter that doesn’t link together with the word so uses this to start off the animation. As there are 6 channels ITV also has an icon that brings all these channels into one as each channel is assigned a colour, doing this makes it clear to the audience that these channels are tied in together keeping it on brand.
Universal
Universal stays on brand by also using consistency and using this opening ident across every one of their movies. By doing this, the audience has become so familiar with the ident and watched great movies coming from universal that when they see this ident they are reminded of the great movies that have come from it creating high expectations when they see this ident.
Bauhaus
Health and Safety
For my recreation of well-known health and safety signs regularly seen inside or around buildings, I used illustrator, the shape tool and pen tool. By using the shape tool I could create the red circle that borders the instruction in the interior. To create the symbols on the inside of my circle, I used the pen tool and filled this in with only black so it is bold and stands out, giving a clear order. I put a red line through this to show a person that this is not what they should be doing, and to finalize this added one final box underneath my circle and using the text tool wrote out my instruction in white to make it stand out above the red. As I was creating three signs I copied and pasted my design so this design would repeat and not differ from the others, changing nothing but what I would have drawn with the pen tool and the instruction in the box underneath. This makes it easy to understand and recognise that actions with red circles and cross through them is what a person should not be doing, if there were be different symbols that came with all of these and signs with different designs it would not be as simple to understand and a person can get mixed up with this more easily.
Repetition–
The action of repeating something that has already been said or written.
Why is it important?
It helps transition a memory from the conscious to the subconscious and creates emphasis by drawing the eye forward to a focal point which helps when presenting customers with lots of information.
How can it speed up our process?
As our mind creates a subconscious to everyday things such as the shopping cart always being in the top right corner of a shopping website, it becomes easier for a person to do this and saves them time rather than looking around the page for it. Keeping something repeated, creates a sense of normality for a person and helps them understand things quicker, from a young age a child will start to understand that red signs mean ‘DO NOT’. Therefore, not only does repetition help an individual it helps the collective of people work together by making them all be on the same page with simplistic ideas because of repetition and it becoming a subconscious to them.
What is Bauhaus?
Bauhaus was a German art school founded on the 12th of April 1919 By Walter Gropius in Weimar Germany. The movement encouraged teachers and students to pursue their crafts together in design studios and workshops, its creators believed in bringing artists and craftspeople together for utopian purposes. Painting, typography, architecture, textile design, furniture-making, theatre design, stained glass, woodworking, metalworking were all things a person could pursue at the Bauhaus as there was no special distinction between applied and fine arts. In 1930 following the increasingly unstable political situation in Germany the Bauhaus had no option but to relocate to Berlin, where it operated on a reduced scale, the Bauhaus was ultimately shattered in 1933.
The movement followed a geometric, abstract style featuring little sentiment or emotion, its aesthetic continues to influence architects, designers and artists. The most common characteristics of Bauhaus consist of; functional shapes, simple colour schemes, industrial materials, balanced asymmetry, holistic design, san serif fonts and minimalism. Places, where Bauhaus is still most commonly used and recognised, is the Swedish furnishing brand IKEA.

The brand continues to use the components of the Bauhaus movement keeping its designs minimalist with simple colour schemes. This shows the success of the Bauhaus movement and the impact it still continues to have in modern society with its recognisable approach to art and furniture both then and now.
Using illustrator and the pen tool, I created my own pieces of furniture following the rules of Bauhaus, simplistic, san serif font and balanced asymmetry. What I like about my recreation is my use of shadowing, using different colours to add dimension and realism to my furniture. If I were to change anything about my piece I would not only add more different pieces of furniture but also make the background to my poster brighter with different opacities to make the piece more eye-catching.
What I like about the style of Bauhaus is its simplistic design and how clean it can look, it does not make things look messy or overwhelmed but instead tidy and organised.
Transferable Designs
What Does It Mean If Something Is Transferable?
Transferable- If something is transferable, it can be passed or moved from one person or organization to another and used by them.
Brand designs will often transfer to lots of different products to remain ‘on brand’ this meaning they carry the same tone of voice and often the same design elements will be carried as well including colour, patterns, font etc.
Why Are They Important?
They are important as they make a brand stand out above the rest, keeping designs consistent make them recognisable to the customer and easy to find above the rest, if you make your design visually appealing people will be more inclined to buy it. Your design is the first thing a person will see when they buy the product so you need to make a good first impression, if the consumer likes this product and you use the same design the customer will feel more inclined to buy it because of their good experience with the brand before.
Apple is a great example of this, they have a sleek design that is recognisable without a logo because of their consistent transferable branding over the years.
Task- Create a logo for yourself made out of your initials
My Logo
To make my logo I wanted to use a retro-style font that linked my letters together, after browsing for different I found a font that I liked and believed suited the brand identity I was going for. A problem I ran into however is my letters did not link in together so using the pen tool I began to draw to link these letters to each other. To begin with, I had to find a way to link them into each other making it look like it was all done with one line, this meant I had to move the letter D downwards a bit so the line that goes through A would directly link into the top of D. Here is where I began to use the pen tool to fill in the awkward gaps where my letters showed that they were not meant to join in the way I had made them, I filled the outlining of my pen tool shape in black and my letters now appeared to slot into each other perfectly. Finally, as my logo was looking a bit bland I decided to add some white lines into my letters to add more character and make it more unique, many other people could have ‘AD’ as their logo but this would help in making my logo more ordinary and distinguishable above the rest.
Task- Download some mockups and apply the logo you have made to them
Using mockups I had found off the internet I attached my logo to them to see what my logo would look like in the real world and attached them to different materials. This gives me a better idea of where my logo is best suited, the size of the font I’d use on different objects and if I were to change anything if I were to place it on different things.
T-Shirt Initial Design

My Own Design

For my t-shirt, I have included these ideas which I would like to incorporate into my own design. The stickman logo is what I have created myself as I will have the front of my t-shirt be more of a minimalist design with my logo in the corner of the top in the chest area and have a more colourful and extravagant design on the back. I will have ‘The Future’ as my tagline on the back of my top as,y main audience is young adults, with this, young adults are who will be in control of the future as they are the future generation, with my t-shirt they can make this known to people too.

I spent some time researching different fonts all following the theme of graffiti and a grunge look, this being because graffiti is associated with wrongdoing and I wanted to use this as irony and almost mockery as elders usually associate younger with always doing wrong. By having ‘THE FUTURE’ on the back of their shirts it lets people around them make people know they are self-aware that this is the reputation they have labelled onto them. As well as this, I like the style of streetwear this design falls into, the bolder style for people to wear that can go with many other articles of clothing.
T-Shirt Moodboard
After researching different styles of t-shirts and gathering multiple images, I created a mood board where I would group these different shirts into categories. I made four different groups which I believed my shirts would fit into, these included; edgy, happy, imaginative, and playful.
I made the category edgy as when I looked through my gathered photos I found that a wide majority followed this, this being because of the graffiti look on some of the tops and almost like handwritten designs. I believe what makes them look edgy is the rushed look that is given to them, something that is considered a crime, graffitiing a wall onto a T-shirt and sticking tape and splashing paint onto the shirt as if it weren’t meant to happen. What I really like about the edgy style is it is something that shouldn’t work but does, 50 or so years ago if you were seen to be wearing something like this you’d probably be considered a ‘tramp’ but now it’s a style that can really express a personal style and in some cases spread a message through the design as well.
I made the category happy as some of my T-shirts I had found I saw conveyed a positive message or contained bright happy colours. Colours like yellow baby blue and green are used across the T-shirts which can be considered happy colours because of their bright appearance and eye-catching tones. On one of the T-shirts, there is a grinning person that takes up half of the shirt which radiates happiness because of the persons’ emotion and as well as this the smile on the person is what stands out the most because of the duller colours against the bright white teeth of the person. There are also on the other T-shirts that contain positive messages like ‘feel good’ or ‘feeling fresh’ which when people around them will read this not only do they understand that the person wearing that top is probably having a good day this rubs onto them too when reading it reminding them to feel good. Finally, on one of the T-shirts we see a children’s cartoon character eating cereal, childhood mainly being associated with happiness and good memories links into this theme as well as showing a person’s playful side.
I made the theme playful because of the artists creating these particular tops were clever with their art and used already popular designs and added their own spin onto it. On one of the tops, we see ‘The Great Wave of Kanagawa’ being made to look like a dinosaur walking, this is a creative way of thinking of this piece of art and a way to give the piece a whole new meaning.
Arts and Crafts (RESUBMISSION)
Task- Using pen tool & shapes on Vectr / illustrator recreate the below image
Using the pen tool I have created my own floral design, I have used different gradients of green to make the image appear more realistic as all leaves in a plant are not the same colour in real life.
To further this design I then grouped my design over and over duplicating it to create a reed garden. when doing this I placed the plant at different distances from their duplications as well as overlapped some of them to create an overgrown effect and make the design all link together instead of them looking separate.
Key Elements of the Movement
- Popular throughout 1860 – 1920
- William Morris was the creator of the movement
- Revolves around different textiles, designs and repetition
- Mainly seen now in modern wallpaper
Task- Make a mood board with inspiration & annotation inspired by the arts & crafts movement
Task- Create your own wallpaper design inspired by the arts and crafts movement
In my recreation of the arts and crafts movement, I made my own wallpaper using the ideas of leaves and connecting these with dots. What I struggled with in making this wallpaper was making it symmetrical, the red dots included are not all symmetrical however with the leaves I was able to copy and paste these making them in line with each other. In the future, I would use a different method or design to prevent this.
What I like about the arts and crafts movement is how it has been able to move with the times and been able to have been turned into something modern and we still use it every day either in art or to decorate our homes.
Soda Packaging- Final Design
The Brief
Graphic Designers have to be able to evoke visual representations of flavour and smell with specific target audiences in mind while also adhering to legal packaging requirements. This task will allow you to explore the expanding field of bespoke and short-run beverages. You will also develop your skills further in Photoshop and Illustrator to create at least one functional and UK consumer-ready soda package with the intent of it being rolled out to UK supermarkets. Your final design will be mocked up on a can to enhance the packaging designed and will feature on your portfolio website.
My Work
For my soda can design I wanted to follow with a design with merging colours, by using a colour picker I found colours that fit the same theme and weren’t too different from each other. I brought these into my photoshop document so I could use these colours in the shapes I’d be using to create my design. I started by placing my assigned coloured circles into each corner of the screen making them overlap each other. I then used the smudge tool to merge these colours together to create the effect that they’d been mixed into each other, I also ensured within this process that there were no white gaps left. Following this, to add the name of my drink I had originally planned for it to have a yellow background behind the name, to do this I added a yellow square in the middle of my pre-existing mixed paint design, again, I used the smudge tool in an attempt to blend the square with the rest of my colours. Finally, I added the name of my soda drink on top of this with a font I had found when making my mood board, I decided to stick with this font as I believe it represents my can well with the idea of it being relaxed and easygoing.
This is the product that came out of my initial design, I didn’t like the way it looked, I believed it looked bland and the yellow in the middle looked out of place, in an attempt to fix this, I tried adding in brighter colours over the pre-existing colours to try and lighten the image, I also added white lining to were my colours met each other and added white scribbles underneath my text, this was the result of me trying to fix this.
Still, I was not happy with this design concept, I believed it looked busy and didn’t portray my soda business the way I wanted it to. After numerous attempts of me trying to fix the yellow background I came to the conclusion that it just wasn’t working and neither was the extra coloured lines I had added, the only thing I liked from my new additions to my design was the white scribbles behind the name on my can. I went back to my pre-save of my background and started again. I added a white scribble within the middle of my mixed colours and placed the name on it with the same font from before. This was the result of my new update to my design.
Even still, after these further adjustments, I still wasn’t satisfied and felt like something was missing. I went onto my mood board research and found I hadn’t added my tagline or any ingredients so using the same font, I tweaked the original idea of the tagline I had originally created and added this to the top of my design as at the bottom I wanted my ingredients and alcohol percentage in the same place and my tagline did not correspond to this. So using the same font but in a smaller pt, I added these adjustments. I made my tagline slightly bigger than my ingredients and how to drink the drink even smaller and my alcohol percentage being the smallest. I did this because it shows the order of hierarchy and what I want the consumer to see first when looking at my design. This is what the result of these adjustments came to be.
Just before I was about to bring my final design into my mockup, I decided that I wanted to make the middle of my image with the name of my product bigger to clearly show that it’s the most important part of my can and what I want the buyer to see first. To fix this I made the scribble behind my text bigger and higher the pt of the name, finally after these adjustments my design was finished.
With these additions made this is what I believed was going to be my final design for my can.
When reviewing my final product I started to think about the future of my brand and how I would make additions to it and expand it. I found that I had made it difficult for myself if I were to make different flavours it would not be clear to the consumer what flavour this would be as my colours would not correlate to the flavours and would all be random colours. To fix this, I went back into photoshop and began to change the background of my design to two colours that would blend into each other and correlate with the flavours. For example, I made the flavour strawberry and grape have the colours pink and purple blend into each other making it clear to the customer when having all varieties on the shelf that they are different to each other and already give them an idea of what these flavours may be. By making this change I would not run into a problem of what colours I should use when making a new flavour for my drink.
Final Comments Of The Finished Product
In the end, after many adjustments and changes, I really like how my design for my soda can ended up, I believe it suits my brand and what it stands for, being carefree and relaxed. It doesn’t look too busy but it also doesn’t look too bland exactly the look I was going for. I like how much I critiqued my design and kept going back until it ended up looking exactly how I imagined it too. I like how my design isn’t too bold and vibrant but still finds a way to catch the eye because of its different colours and hand-drawn design. If there were to be something I would change about my design I would attempt to make my drink suitable for all audiences, this would mean making an alcohol free range in an attempt to reach younger audiences who cannot drink my drink as it contains alcohol.
Gathering Data
What is Primary Research?
Instead of relying on data collected from previous studies, primary research aims to collect data directly. This method allows researchers to analyze the data in order to identify areas of concern.
What is Secondary Research?
This method involves gathering and analyzing existing data. The data collected is then summarized and analyzed to improve the overall effectiveness of the study.
Quantitative- The process of collecting and analyzing numerical data
Which of the following do you prefer…
What is your age…
Which of the following are your favourite…
Qualitative- Involves collecting and analyzing non-numerical data
What do you think about it…
What is it like…
How would you…
- What supermarket are you most likely to shop at to buy a can of soda?
- How many fizzy drinks do you drink in a week?
- Of the drinks listed below, which would you feel most inclined to buy?
4. Do you prefer bolder more artistic packaging or a plainer more simple look to the packaging of a soda can?
5. What is the most you would pay for a can of soda?
6. Do you prefer processed flavours in soda cans or natural flavours?
The link to my conducted survey featuring the questions from above:
https://www.surveymonkey.co.uk/r/NT2JBFC
Art Deco
Different genres and styles are used to reach different consumers, this is why style is critical as it is dedicated to the aesthetic of the work.
• Style from the 1920s-30s
• Seen in fashion, decorative arts & architecture
• Successor/reaction to the Art Nouveau movement
• Inspiration from cubism, seen in geometric patterns
• Imagery based on plant forms
• Drew from the modern architecture of Bauhaus
• Use of gold –luxury glitz & glam

Photoshop Brushes and Textures

Using photoshop I was able to create my textured photograph, I did this by pasting my texture into photoshop and using numerous tools. By clicking FILTER>OTHER>OFFSET I moved around my image creating separate sections to which I then have to blend. By using the healing tool I was able to go over the clear line where the image of my bricks had been sectioned off, by using this tool, this blurred out that line however it was still clear to see there was a line that separated my image. I used the clone stamp tool to take a sample of one part of my image and use it on the part where the image had been sectioned, this blended my bricks together making my image look like it hadn’t been edited in the first place. I then saved this image into my patterns so I could use it in the future. Following this, I found an image of a woman taking a photo which I used to go with my brick texture, I pasted this image on top of my brick layer, spreading it across my document. I then used the blending option tool and clicked on pattern overlay to incorporate my pattern into my image, I lowered the opacity to this so it didn’t completely take away the photo of the photographer.
Another example of me using this tool:

Soda Can Mockup

By using a mockup I was able to create my own design with my name on a soda can. By replacing the mockup that was already on the can, I replaced the background and font to put my own style onto the can.
Soda Research


The design of the AriZona cans was inspired by the Southwestern decor of their creators’ childhood home, which was decorated by their mother. It is
known to be an affordable but stylish brand with it selling cans for only 99c
a can. It moves with the times, the company now moving to packaging that
is 20 percent lighter and packs nearly 350 bottles into one palette, which
translates into a truckload that carries more than 7,650 additional bottles,
yet weighs more than a thousand pounds less. I really like the design packaging of AriZona tea and I often drink the drink myself, what made me want to drink it was the packaging that made it stand out from other drinks that were on the shelf. Each drink is different and follows a retro look with vibrant colours and reflective materials.
Target Audience Profile
My Target Audience For My Can
Age – 18-26
Gender- Female
Hobbies- Relaxing, Summer Holidays, Adventuring, Carefree
Personality- Someone who is carefree looking for a tropical refreshment


My Moodboard of Different Soda Can Designs

Pyschology Around Colours
What is Colour Psychology?
A popular area of colour theory is colour psychology, it assigns emotional and psychological connotations between colours and emotions. Many questions whether colour really does have an impact on our day to day activities and the short answer to this question is yes. There are multiple studies that support the theory that colour can impact our decisions. The same colours can also have different meanings that can be dependent upon a person’s upbringing, gender, location and values as well as a variety of other possible factors.
Primary Colours
Red- It is considered to be a strong colour and has the capacity to trigger physical responses from human beings, this can be through an example of a light going red at traffic lights making a person stop. The colour red can stimulate many feelings in a person from love and passion to anger and power. People tend to associate red with negative and danger bearing emotions, this being because it is the colour of fire, blood and sometimes dangerous animals. Across cultures, people tend to associate the colour red with the concept of anger this may be because it is the colour a person’s face goes when they have increased blood flow when they become angry, this is where the expression ‘seeing red’ comes from being based on these characteristics. However, the link between someone’s face turning a shade of red can also be because of someone having; elevated blood pressure, enhanced metabolism, increased heart rate, increased respiration rate which all can be linked to excitement and energy. The colour red is also linked to the thoughts of passion and desire; it is a colour that is consistently rated as more attractive to the opposite sex seen through research from 2008. A final thing red can represent although it can be linked to many more emotions, a popular linked emotion is the feeling of power. The red carpet that is rolled out for the most prestigious celebrities almost shows a sign of hierarchy and importance therefore the higher amount of power a person will feel when on it, as well as this a red tie is seen to be a ‘power tie’ when worn by businessmen. The association red has with power and wealth is a reason why women and men find the colour red so attractive.
Blue- The colour blue is favoured by many people and is often viewed as the most non-threatening colour as it calls feelings of calmness and serenity in the mind.Businesses that want to project an image of security often utilize blue in their marketing strategies, trying to appeal to their audience as calm and controlled. The colour can often create feelings of sadness, famously shown through Picasso’s work during his ‘blue period’ therefore some people tend to avoid this colour and to some the colour is one of the least appetizing and weight loss plans advise to eat food off a blue plate. In opposite ways to this, blue can lower the pulse rate and body temperature because of its calming attributes and the connections it has to be a ‘cold’ colour.
Yellow- It is the colour that is the most noticeable to the human eye. The radiant colour promotes happiness and optimism in a person more than any of the other major colours. Positive attributes to the colour red include; increased mental activity, heightened awareness, increased energy levels and an increased metabolic rate. However, as well as this, because it is such a strong and bold colour it is the most draining and fatiguing colour to the eye which can lead to agitation in the observer. Some negatives of the colour yellow include; increased irritability, increased anger, heightened levels of aggression and a heightened level of agitation. The colour yellow is regularly seen in logos and advertisements because of its eye-catching colour, this is most recognisably seen in the McDonald’s logo and the badge of the famous superhero of Batman.
Secondary Colours
Purple- In colour psychology purple is considered a royal colour and is connected to power, nobility, luxury, wisdom and spirituality. People often describe the colour as mysterious, spiritual and imaginative. It is a symbol of royalty and wealth, in ancient times, creating dyes to colour fabric often required a great deal of effort and expense. Because the colour purple is less common in nature it was harder to create dye with the colour, therefore, making it more costly. The colour purple also represents wisdom and spirituality, because of its rarity it gets connected to the unnatural, supernatural and divine. However, using too much colour is seen to cause frustration in people as some perceive its overuse as arrogant.
Orange- It is a colour that can be very strong and energetic, it can be very attention-grabbing which is why it is frequently seen In advertising. Orange is described as being a colour that makes people feel happy, uplifted and spiritual but as well as this, much like purple, tends to be a controversial colour it tends to be either loved or hated. It calls feelings of enthusiasm and excitement to the mind because it is a high energy colour, because of this it is regularly seen being used in sports teams’ uniforms, mascots and branding. A 2018 study published by Frontiers in Psychology discovered that the colour could increase energy levels and make it more difficult to engage in tasks such as studying and another study found orange was associated with feelings of playfulness and vibrancy. Other studies have found that orange is considered a highly stimulating but friendly colour and its attention-grabbing qualities is its reason for often being used in traffic signs and advertising. Orange is the colour of bright sunsets and foods such as oranges and tangerines so the colour is associated with the beauty of sunsets and the refreshing taste of citrus releasing the emotion of happiness. In the United States, the colour orange is associated with prison uniforms meanwhile in other countries is linked to religion and spirituality. The colour is often used in spiritual practices including medication and compassion, in Southeast Asia Buddhist monks wear orange robes that symbolize simplicity and letting go of materialism.
Green- The colour green is associated with balance and harmony, it is a great balancer of the heart and the emotions of a person. For many people, it has strong associations with nature bringing the idea of grass, trees and forests refreshing the mind because of their tranquil colour. Green is a cool colour because of its shorter wavelengths, in colour physiology colours that are made up of longer wavelengths are considered arousing or warm and colours with shorter wavelengths relaxing or cool. Our eyes need to adjust to colours that have longer wavelengths but those with shorter wavelengths do not need to and this is the same with the colour green, making it easy to look at with the eye. Other common associations with the colour include money, good luck, health, envy or jealousy.
Black and White
Black- A popular colour in retail, black has the symbolic meaning of mystery, power, elegance and sophistication; in contrast to these, it can also evoke emotions such as sadness and anger. Some brands use black and white photos to keep consistency in their brand and the colour is seen to be used across multiple fashion retailers’ logos. It isn’t a primary, secondary or tertiary colour as it isn’t on the colour wheel or even considered a colour at all. Black absorbs all light in the colour spectrum, it is also all colours on the colour spectrum. For some, black evokes positive associations including attractiveness and elegance; it oozes sophistication and is the reason why so many wear the colour when attending a fancy event. It’s also why high-end brands like Tiffany & Co and Chanel utilize black in their logos. Despite this, the colour is also used to symbolize all things negative. In history, the sombre colour has been tied to death, anger, fear, aggression and anger. It has been associated with many negative actions and events such as; Black Monday, Black Plague, Black magic, Blackhole, Black-hearted, Blackmail, Black market and a Blackout.
White- The colour that represents purity and innocence, a bride wearing white is often thought to convey to brides virginity yet blue was once the colour worn to symbolise her purity. Designers often use the colour white to make rooms seem larger and more spacious as it can create a sense of space or add highlights. However, the colour is also described as cold, bland and sterile and whilst a room painted white can make t seem more spacious it can also make a room feel empty and unfriendly because of its lack of warmth within it. Hospitals and hospital workers use white to create a sense of sterility because of its brightness and cleanliness. Positive meanings behind the colour include; cleanliness, freshness and simplicity because of its blank slate the colour can symbolize a new beginning and fresh start. On the negative side, however, is the colour can also come across as stark, cold and isolating. In one study on adults’ colour preferences out of the 18 colours white only ranked fifteenth as the overall favourite colour yet was ranked first for evoking moods of quietness and concentration.
It is important to consider colour psychology when creating a design as by using a certain colour you can portray emotion through the colour you choose. However, by choosing any random colour you can also portray the wrong emotion for example using the colour black when trying to evoke the emotion of happiness when a more suitable colour for this would be yellow.
Planning for Drinks Brand

Brand Name- Golden Glazed
Slogan- Glaze your senses in luxury.
Target Audience- Over 18s, alcoholic drink
Victorian Style (RESUBMISSION)
Victorian Style
- Victorian Age (Queen Victoria Reign 1837-1901)
- At the latter end of the Industrial revolution
- Extravagant Typefaces with serif and bold fonts
- Warped text
- Heavy use of symmetry
- Detailed floral patterns
- Use of intricate borders
- Floral inspired
- Some injections of flat strong colour
Task- Design new packaging for a confectionery product inspired by Victorian style

Kinder Bueno is the brand I will be redesigning to show my recreation of Victorian Style.
With inspiration from Victorian-style confectionary, I created my own wrapping for a famous chocolate snack and took the modern look to it back to a Victorian one. I made sure all my empty space was filled with patterns as this is a theme we see in Victorian packaging and I used a serif font to give it an older style look.
I decided that I could make this packaging better and more Victorian, so using a different brand is what I did.
I began by looking at the packaging we know now as mentos so I could follow this and stick to its main components in the brand that make it known for example its main colour is blue and the name of it is large and central.
To follow the Victorian style I have used intricate borders with black and white, keeping the theme of white elements around the packaging to match the idea of mint as well as the colour of the gum. For my font, I have used serif to keep with the style as well as keeping it all bold and extravagant just like the codes and conventions in the style with bold colours and making words stand out further with the stroke feature. For the background colour, I have kept with the colour blue as this is the main colour of the brand however I have slightly faded this as in the Victorian ages there were not these strong dyes that could be used for packaging so using this colour makes the packaging look more realistic to the times.
Bauhaus

The Creator of Bauhaus- Walter Gropius (1883-1969)
Who was Walter Gropius?
Walter Gropius was a German American architect and educator who was the director of the Bauhaus movement (1919-1928). His work exerted a major influence on the development of modern architecture, he worked on projects such as school buildings and faculty housing at the Bauhaus, the Harvard University Graduate Center, and the United States Embassy in Athens.
What was The Bauhaus?
It was founded in 1919 in the city of Weimar by German architect Walter; its core objective was a radical concept. The idea was to reimagine the material world to reflect the unity of all the arts and Gropius expressed this vision for a union of art and design in the Proclamation of the Bauhaus. The Bauhaus combined elements of both fine arts and design education, it was all-inclusive with the students coming from a diverse range of social educational backgrounds. Following the interests in Bauhaus theory, students entered workshops that included metalworking, cabinetmaking, weaving, pottery, typography, and wall painting.
What were the main characteristics of the Bauhaus?
Qualities of Bauhaus design usually include:
- Plainness
- Straightforward simplicity
- Being conducive to mass production
- Retaining the integrity of craft materials (as in materials should be used in their honest and natural form and not altered)
- Streamlined aesthetics
- Modernity
Bauhaus favors pragmatism and practicality over beauty for the mere sake of beauty.
Herbert Bayer Artwork Recreation
Examples of his work:

My recreations of his work:

Product Mockups
What are mockups?
Mockups are a great way to demonstrate how your product will look when applied to a real-world context.
They add a layer of professionalism and help to sell the viewer on the utility of the design, not just the design itself.
What is their purpose?
They allow the person to give themself the first idea of what their final design will look like when final details are applied. They are a simple and easy way to bring a design to life and can be worked around to show their client their design, if adjustments needed to be made they can be and simply be reapplied to the mockup.

By using a playing card mockup I was able to present my design on an actual set of cards as my mock design. It shows the front of one of my cards within the set and the back of the card and its pattern. As well as this I also changed the background colour of this image to fit with the theme. In the future, I would also make an example of my box design to go with my mockups so the audience would be able to see the whole package of what they’d be buying. I would use this skill again as it is a great way to communicate with the consumer and allows me, the designer, to see what my product looks like in a real-life setting which I found extremely helpful within my playing cards.
Playing Cards


Safeguarding
Wider themes- Safeguarding
An Ofsted report conducted in schools across the UK revealed statistics around the extent of sexual harassment on and offline. It is seen that sexual harassment is now commonplace amongst school children and young people, therefore they felt as though they did not need to report this because of it being such a common occurrence. Of the schools that were reviewed it showed that:
Nearly 90% of girls and nearly 50% of boys have been sent explicit photos or videos of things they did not want to see or this has happened to their peers also.
92% of girls and 72% of boys said sexist name-calling happens a lot to either them or their peers.
This review showed a severe lack of reporting of these incidents and was happening in schools without their knowledge.
The issue of this problem was students felt it was the norm for them or their peers to be sexually harassed and therefore did not see it as an issue, this shows that they have not been educated properly on the extent of sexual harassment and been told where to go if this was to happen to them or one of their peers. From this, the schools have become unaware that this was happening to the children in the first place and have not treated it as a problem.
To solve this issue a school can provide children with help to understand the components and problems of sexual harassment, how to try to avoid this and what to do if it does happen to them. Schools should provide a safe place for students to be able to go to which is private and confidential and issues shall only be shared with people higher if a person is at risk. By creating a private place for students to go to, they will not feel judged or worried that their story will be told amongst everyone and therefore making the school a safer place as teachers will have a deeper understanding of how to prevent these things in the future for the children.
Brand Toolkit
What is Brand Identity:
- A brand is not what you say it is, it is what the customer says it is.
- Logo, colour palette, website, communication, brochures
- A brand is what customers think and feel about you.
Brand Identity is the visible elements of a brand such as colour palette, design, typography, and logo that identify and distinguishable the brand in customers’ minds. This can be seen through brands like Mcdoands and Adidas which do not need a name against the logo for the majority of customers to distinguish the brand.
A Brand Kit is a resource that goes over all the details of your brand identity in one place. It contains the important visual elements of your brand when it comes to marketing.
- Logo
- Alternate logo
- Colour palette
- Possible typography
Brand Toolkit for my Playing Cards
For my brand toolkit, I have decided to follow a glitchy theme with bright neon colours pink and blue. I have decided to take this route as I think it will contrast with my drawings which will be more old fashioned following the ideas of Tim Buton and adding a digital effect to this will make these designs my own and add something new to them.
I found making the brand toolkit helpful as it gives me a guide for the theming of my playing cards and would use it in the future again to get my ideas on paper as a visual for myself.
Colour Theory
The Colour Wheel
Colour Theory- The use of colours or a mix of colours to achieve a result of colour/colours that works well within your graphic.
Hue- The attribute of visible light which it is differentiated from, the term is also used to refer to colours that have no tint or shade.
Saturation- Refers to the intensity of colour in an image, as it increases the colours appear purer as it decreases the colours appear to be more washed out or pale.
Value- It is the gradation from light to dark across a form, the higher the value is the darker and more black it appears, and the lower the value is it appears lighter and more white.
Primary colours- Colours that cannot be made however can be used to make any other colour. These three colours are red yellow and blue.
Secondary colours- These colours come from the result of mixing two primary colours together, eg green orange and purple.
Tertiary Colours- The result of mixing equal amounts from the primary colours and secondary colours. Examples of this are teal and violet.

Colour theory is important as it helps us understand what colours work and complement each other and which do not. These colour schemes are necessary to know what should be used to create an aesthetically pleasing piece of art for example red on the green would not be anywhere near as eye-catching on red on top of white. You would want to be aware of the colour wheel and colour theory as it can either help build up your business or by not using it make it look disorganised and unprofessional. An example of this incorrect use would be using red for marketing a baby brand as the colour evokes emotions of anger and danger, a more suitable colour would be white or pink to show purity and cleanliness.
Illustrator 3D Transform Effects
There are three main 3D effects in illustrator:
- Rotate- Takes your vector art and allows you to spin it to any 3D angle you want
- Extrude & Bevel- Converts and vector path with a 3D object, with appropriate highlights and shadows.
- Revolve- This allows you to create a 3D shape by only drawing one-half of it in 2D.
To create this chess piece and make it 3D I used the pen tool and the revolve tool. By drawing out half of the chess piece and connecting the top to the bottom half. By clicking on effect<3D<revolve I was able to create the 3D effect to the chess piece.
To create my 3D heart I used the pen tool to draw my outline of the heart and by using the extrude and bevel tool I turned my shape to the side to make the left edge of it appear to be in front.
I would use this tool again to create more dimensional shapes and to easily add highlights to them. Of all these tools I prefer the extrude and bevel tool the most as I found it the easiest to use and found the outcome of using it, to me, the best.
Pattern Creating
To create my pattern I used the shape tool, by using the fill tool for the shape I clicked Libary<Patterns<Basic Graphics and was given a choice of lines, dots, or textures to work with. To edit these patterns and change their colours I used the edit pattern tool and clicked on either a singular dot or line and changed the colour of it whilst also changing some more of either the dots or lines to create a pattern within itself. I did this numerous times within the shapes to create an array of different colours, I decided to stick with a neon theme throughout my pattern. Overall, I used about 4 shapes to create my pattern in total, copying and pasting these shapes across my page in similar places as patterns consist of the same design across the page or whatever is being worked with, an example of this being wallpaper.
What I like about my design is the continuous theme of neon and the effect of a tv screen losing signal/buffering. I also like how I only stuck with the theme of lines and not dots as this helped with my idea of the tv screen buffering progress. Something I would change about my pattern or improve on in the future is making my pattern look more dimensional, adding more shading to almost make my pattern look 3D.
In the future, I would use the skills I have learnt to create backgrounds for artwork or in closer to the future work, use this skill to create a background for my playing cards.
Playing Cards- Final Design
The Brief
Graphic Designers have to be able to work within very tight constraints to make unique but functional designs that impart information quickly and efficiently while also being a collectable item. This task will allow you to explore the balance of functionality and style while developing your skills further in Photoshop and Illustrator to create 4 playing cards, 2 numbers, 1 face card, and the ace of spades, with the intent of it being proof of concept for a Kickstarter campaign to raise funds for a full print run. Your final design will be mocked up with flair to enhance the style chosen and will feature on your portfolio website.
My Work
For my playing cards, my idea was to use artwork from a favourite filmmaker of mine, Tim Burton. To get some inspiration for what I could do with my cards I did some research on the internet and made a moldboard to place all my ideas in front of me.
With the images gathered I had decided that I would draw out the characters on my cards with a Wacom tablet to make the illustrations my own but still make them look as similar as possible to the originals. I also decided I would use a glitch effect on my cards to contrast the older fashioned effects with a new digitalized modern effect.
I began my drawings by opening photoshop and clicking on paint, I looked for a paintbrush that looked closest to a pencil, I used a thin pt and made it very light so I could get closest to the ordinary illustrations in The Nightmare Before Christmas. I started off by drawing Sally so I looked through previous illustrations of her for inspiration.
I began drawing my own Sally, however, I only wanted a headshot of her and not her whole body. After finishing the drawing I wanted to add the glitch effect to my playing card, I did this with the blending options and adding extra layers, each layer I would use I would take away a channel colour each layer. Next to create the actual glitch effect I moved the layers, one left and one right, which brought up the different colours I then used the select tool to pick out different parts of my drawing, when I moved these it would move the big of the drawing I had selected, creating the glitch effect. For the border around my card I used the line in the ellipse shape option and changed the effect of these to be split, I added a noise effect to this so it didn’t stand out as much compared to my character and also fitted to the glitch theme. Finally, I decided to make this card the queen of hearts so using the pen tool I made a heart and added lines around this to create a stitch effect.
I used a glitch font to fit with my theme and this finished the creation of this card.
I then moved on to making Jack Skellington, again I researched different photos I could take inspiration from.
Using the same method as I did last time I made my drawing and copied over the border I had made previous, I made the card to this a Jack as it is Jack Skellington and used the pen tool to make a spade.
This was the result of my Jack Skellington playing card.
Next to make was my Victor card, I struggled to find images of drawings of him online so I did this freehand. Once again I followed the methods from before and this time using the pen tool I drew a club and made the card a diamond.
This again finished the design for this card.
Finally, had the dog Zero to make which I used inspiration from this image.
For this card I used the final one left the clubs, this one was the hardest to draw with the pen tool.
The final result of my card.
For the backs of my card, I used a pattern I made which followed the colours I had used in my designs fitting with my theming still.
This is the final result of my cards, I placed one in a mockup to see what it would look like in a real-life setting.
What I like about my cards is my use of actually drawing out my cards, even though this was a more time-consuming process I gained more skills with using a Wacom tablet and becoming comfortable with it and it gave my card a more personal touch.
Something I would maybe change about my cards in the future and learn from is trying to add gradients or more colours into the backgrounds of my cards, in my mood board, I featured loads of cards that used metallic backgrounds, something I maybe could’ve featured in mine just to give them that extra touch.
Playing Cards Ideas
Playing Card Facts
Traditional suits in cards:
- Spades
- Clubs
- Diamonds
- Hearts
There are 52 cards in a total deck of cards.
9 total numbers in a suit as well as an Ace, Jack, Queen and King.
Styles of decks:
- Ambigram– Something that can be flipped and still be read and often done with words for effect.

- Bicycle Cards– The most common card brand renowned for its quality, they come in a variety of editions and themes.

- Stylized– Black decks often with gold and silver holographic features adding a futuristic twist onto an old fashioned style.

- Themed– Often tied into a theme or culture, this style of playing cards will add unique visual styles to match the chosen theme with the numbers and suits.

Playing Card Specification
Dimensions of playing card
Height-88m
Width-63mm
Must indicate a number and a suit
Could be an ambigram
Must be double-sided
Have a visual style
2 Number Cards, 1 Face Card, 1 Ace of Spades
Moodboard Ideas For Playing Cards
For my playing cards, I have decided to follow the routes of one of my favourite artists Tim Burton, therefore I did some research on his artwork and drawings and included these into my mood board. As well as this, I included some images of playing cards other people have made including Tim Burton’s designs for inspiration, some following themes of old-style vintage cards, and some looking more futuristic. I continued by finding a colour palette I would like to follow and the colours I would like to include in my work, followed by researching different fonts in which I chose a more gothic and victorian style of font approach. For my approach to the playing cards on first ideas, I would like to follow the gothic style of drawings Tim Burton had made and recreate these making them look more digital adding a modern approach to them as well as making the design on the card itself look original making it a seethrough type of plastic. As these are my first ideas the approach to this may change when it actually comes to creating my cards.
Typography Poster- Final Design
The Brief
Graphic Designers have to be able to understand different symbolism and uses of different fonts. They have to play with what is being said and what is being shown through imagery. This task will allow you to explore the interaction of words and images while developing your skills further in Photoshop and Illustrator to create a 2 colour poster print with the intent of it being framed and displayed in someone’s home. Your final design will be mocked up and will feature on your portfolio website.
My Work
For my typography poster I wanted to follow the idea of advertising a brand in a way that hadn’t been seen much before, I decided to use the brand Nike for this. My idea was to use a shoe from the brand and use catchphrases from the brand as the lining of the shoe, to show my idea in a visual effect I created a mood board.
In this mood board, I featured examples of the idea I wanted to follow that had been done before however I only found two of these. I also found an image of the show I was going to use as it has bold lines and lots of angles that I will be able to work with. I also found some fonts that I would want to use, I gathered these from the retro section as this is the theme I want to follow, I also experimented with different colours I would want to use. I kept these colours to a beige/ nude theme, I have included one in purple to see if this would work by adding pops of colour in places I wanted to stand out more than others in sections of the shoe.
To make my shoe I used Adobe Illustrator using an A4 document in the landscape layout, I pasted in the outline of the shoe I would be using and lowered the opacity of it to 50 so I could still see it but I would also be able to work around it without it being too distracting, I was only using it to guide the shape of the shoe.
From here I began to use the fonts I had chosen and decide where I wanted them to go on each part of the shoe. I wanted the bolder ones with more to them to go on the outside and be the main outline of the shoe and be a part of the famous Nike ‘swoosh’ and the others to be part of the smaller linings in the shoe.
For making the outline of the shoe I used the text box tool and pasted my text into it, when placing this onto the shoe I realised that the shoe had bends in it and it would not work with pasting in my text in straight lines. With the direct selection tool, I was able to change the direction of my letters as I was changing the anchor points to them and making them move in different ways.
Moving on to the other parts of the shoe with different fonts I continued using the direct selection tool and transform tool to make my letter fit into the original shape, I experimented with different things, in the top corner of my shoe I used lots of overlapping with the word ‘Air’ to fill the space and used different transparencies so the purple colour didn’t become too dark and messy, this also made it look like a different use of tones of purple in the corner and made it not require and outline with the pen tool with it.
There were some parts that I didn’t want to use text for and instead used the pen tool, this is because I didn’t want too much overlapping happening in the shoe as it would make it appear messy and too busy and hard to recognise what it was.
In the end, I didn’t end up following the nude theme and instead reversed it into using more bold colours and made the ‘swoosh’ a nude colour in an attempt to make it stand out more as it didn’t fit in with the other colours used.
I did a look back at my shoe thinking I was finished but thought the lines that I had drawn looked out of place so I experimented with a few different styles of lines with the pen tool and settled with a pen drawn effect as I believed it fit with the fonts chosen and looked less blocky like the ones I’d used prior.
This was the updated version of my shoe, I believe it looks improved and liked the new effect of the streaky paint. This finished the process of making my typography poster.
What I like about my poster is my attempts to use the direct selection tool to make my test fit the shapes of the shoe without me having to use the pen tool, when looking at it you can very easily show what shoe this is which shows this has worked well.
To learn from in future and something I would change is starting to add shadowing and different shapes to the poster, I would like to bring in different tones to add dimension and show my different skills learnt in digital illustration.
Like in this poster for the video game Firewatch we can see the different tones used and layering to make it look more interesting and give that real-life effect, although I am not sure how I would do that with my shoe now it is something I would like to think about in the future.
Expressionism/ Fomal Element- Tone
Formal Element- Tone
Tone is an essential element in graphic design and is defined as different shades of colour by adding neutral tones or altering the hue of the colour. Using tones can make a basic palette more interesting and aesthetically pleasing.
Task- Create a tone technical sheet using a logo of choice
Disney plus uses tone in their logo to show the action of the plus falling into place like a star which is a clever way to use it and add different colour tones to the logo. By looking at the different colours in the line you are almost drawn to follow it down as the colours change which shows the way the logo is grabbing and intriguing something a logo must be to interest customers.
Expressionism
This movement started in the late 1800s- early 1900s and takes inspiration from Cubism, Surrealism and Dadaism. Its main focus is on the expression of emotion, meaning and experience. It was particularly popular in Germany, and Berlin (post ww1) and was communicated through distortion, fantasy and exaggeration. It uses a variety of textures and tones, a build-up of brush tones to make texture and the use of shapes and lines to make recognisable figures. Color, in particular, can be vivid and non-naturalistic in expressionist art; brushwork is often loose, and paint application is abundant and textured. Expressionist art is often emotive and mystical in nature. It can be considered a continuation of Romanticism. It may be said to start with Vincent Van Gogh and then form a major stream of modern art embracing, among many others, Edvard Munch, fauvism and Henri Matisse, Georges Rouault, the Brücke and Blaue Reiter groups and the neo-expressionism of the 1980s.
Task- Produce your own expressionism inspired illustration using software
For my recreation of Expressionism I have decided to use the landscape of the Statue of Liberty as my place to produce my illustration. I began by placing my image into photoshop and lowering the opacity, I then added another layer which would be the layer I would be using to paint. Using a wacom tablet I began to paint over the image using the ink dropper tool to get the most accurate colour match and then using different tones of these colours to blend in and follow the codes and conventions of expressionism. After placing these colours in roughly I then used the smudge tool to blend all these colours together to give it the look of a real life painting.
I continued to do this with all of the other sections in the picture and when finished, attempted to smudge all the colours of the sky together. For the Statue of Libery I did not smudge it around as it was the piece that is made to grab attention and be the ‘centre piece’ despite it not being in the middle it is the thing that is supposed to stand out the most above everything.
Typography Moodboard
By doing research and exploring different fonts, I have created a mood board for my Nike typography poster. I have decided to use a retro font to try and display the original days of Nike and use the idea of placing my text inside of the shoe to create the shape of it through words.
Catergorizing Fonts
Balance and Swiss Posters
Infographic Illustrations
By using the shape tool I was able to create my own first aid and danger sign regularly seen in the works of Health and Safety.
Swiss International Style
The main ideas behind the swiss style movement are simplicity, objectivity and readability. The movement was formed in Russia, Germany and the Netherlands during the 1920s and 30s and is a culmination of Russian constructivism, arts and crafts, photography, De Stijl and the Bauhaus. The style can be easily identified by its bold headlines, stark composition and minimalist approach.
Swiss Style design includes:
- Grids
- Asymmetric layouts
- Sans-serif typography
- Precision
- Geometric abstraction
- Simplicity
- Objectivity
- Photography
The Swiss Style Movement believed that art should be balanced and precise. The first image shows what the style would not have approved on and the second shows what they would have as all the circles are the same size and lined up equally unlike the first where all circles are different sizes and spread unequally across the page with no order.
By following the rules and components of the Swiss International Style I created a poster advertising the Confetti College. By using a san serif font to keep it simple I spaced out my text and lined it up so it looked organised, not crammed together making it look busy as this would not follow the rules of the style. I used colours that similarly blended together and only used minimal colours to keep it minimalist. By using the shape tool I created a border around my confetti logo for my asymmetric layout as I only did this on one side of my poster. I chose a minimalist font to make my headline bold, doubled up on the text lowering the opacity on top of each other to achieve a bold yet simplistic look.
What I like about my take on the Swiss International Style piece is my use of trying to use all components that the style follows and keeping it as minimalist as possible whilst also making the poster look fascinating. If I were to change anything, I would try to find other fonts that are also san serif that represent the college better eg; more modern and digital.
After researching and experimenting with this style I really like how clean the results are after using it. It shows that even by using minimal colour and adding lots of effect to a poster, a message can still effectively be shown and grab the consumers attention.
Pathfinder and Expansion
What is typography?
The art of arranging letters and text in a way that makes the copy legible, clear, and visually appealing to the reader.
It can include:
Font, Type, Size, Scale, Colour, Contrast
Typeface- The actual name of the text family you are using.
Font- The variation of typeface you use.
Serif typeface- Has little ‘kicks’/’feet’ at the edges, considered classical.
Sans-serif- Clean, simple/ geometric letters, considered modern. Is considered to be easier to read.
To create the avengers’ logo I used the pathfinder and expansion tool to be able to create different layers and make shapes disappear into each other creating a transparent effect in other areas of the shape.


Text Hierarchy
Hierarchy-
Size
Weight
Placement
Spacing


Project Management
Project Management
Choosing the right methodology for project management is important as it defines how a person will work to their best standard. It provides structure to a person leading to their successes or failures so it is important for a person to do plenty of research to find the method that would suit them best.
Methods:
Agile– Collaborating to iteratively deliver whatever works. Described as a flexible, iterative build process.
Pros- Collaborative and frequent responses to peers’ work allow for changes to be made promptly whilst still maintaining the project given.
Cons- A consistent team is needed, a weak link in that team may result in wasted time and money and result in the project being weaker.
Scrum– Enabling a small, cross-functional, self-managing team to deliver fast. The goal of scrum is to improve communication, teamwork, and speed of development.
Pros- Scrum methodology helps teams deliver quickly and effectively and works best for fast-moving development projects. The team gets clear visibility of the project in scrum meetings and divides large projects into manageable sprints making it less stressful for the team, allowing them to produce their best work.
Cons- If a team member were to leave in the middle of a project it will have a huge impact on the rest of the project as a part of it will be left behind. If individuals of the team aren’t committed or cooperative the chances of project failure become high.
Kanban– Improving speed and quality of delivery by increasing visibility of work in progress and limiting multi-tasking. Light on the process, flexible and don’t have prescribed roles.
Pros- Kanban is very easy to understand and approach, making it practical for the management and company to apply to this effect. It promotes continuous and sustainable improvements in the company, it makes the whole team work together and collaboratively. This method stands out above others as it highlights process issues and solves them, it engages the company’s existing systems and makes to order which decreases carrying or holding costs.
Cons- There are no timeframes associated with each phrase, this can be disadvantageous as some people in the team may take advantage of this and not complete their work for the project set. The Kanban approach assumes that plans are stable and consistent to a certain level if not then this method does not work for the team and will end up disadvantaging them.
Scrumban– Limiting work in progress like Kanban, with a daily stand-up like scrum.
Pros- This methodology is great for splitting large projects into chunks for the team to work best and enforces transparency. Through planning, the team can achieve objectives avoiding confusion within the team.
Cons- By using Kanban can make projects and teams more difficult to track and monitor progress, there is also little documentation on the success of kanban as it is a relatively new method. Also by using this method there is less control for team management which can be considered as both positive and negative.
Lean– Streamlining and eliminating waste to deliver more with less.
Pros- Refining workflow means productivity sapping issues and tasks that don’t advantage the project can be ironed out. By doing this the team can also further focus on those projects that are valued. By cutting out tasks that do not add value you’ll be able to commit more time to those that do, making a higher quality product for the customer proving their value to the business.
Cons- Lean methodology requires more planning and time upfront, this may include tracking things over a certain amount of time. You will also need to encourage the team to meet regularly to discuss the work that’s been completed. Whilst all of this may better the team it can be very time-consuming and may eat into time that can be going into completing the project. Some organizations get so focused on the lean tactics they lose sight of the bigger picture.
eXtreme programming methodology (XP)– doing development robustly to ensure quality
Pros- This methodology is a fast-paced work environment with no wasting of time, instead of a couple of years like some software development methods, extreme programming only takes a company several months to complete. This allows the team to work on more projects and get more work because of completing their projects quicker, therefore making this method more money efficient. Everyone works on individual tasks but with regular meetings held development within individuals is recorded and acknowledged the improvements made. The team and developers work hard to accomplish goals within tight deadlines whilst supporting each other through the project, this creates an efficient but supportive workspace for all.
Cons- The focus of XP methodology and programming is in the coding rather than the design, however, the design is typically what sells the application so this may end up in the customer being unhappy with the end result overall. There is also a lot of pressure working with tight deadlines, this and working within the tight deadline the team will undoubtedly get stressed and this may affect their work and allow them to get stressed within the project, not allowing them to work to the best of their ability.
Waterfall– Planning projects fully, then executing through phases.
Pros- When being compared to other methodologies, waterfall focuses the most on clear and defined steps within a project. Each of the projects that use waterfall methodology goes through these steps:
- Requirement gathering documentation
- System Design
- Implementation
- Testing
- Delivery/deployment
- Maintenance
The team must complete an entire step from the bulleted list before moving on to the next step, this means there will be no half-finished projects that will be pushed aside and left. This also means that individuals will not feel the stress of being left behind as everyone will be at the same step.
Cons- Because of the strict ruling with the steps, the waterfall methodology leaves no room for unexpected changes or revisions within the project. a sudden change to the work within the project could render much of the work an individual has made and become useless, throwing off the entire timeline. As well as this the waterfall methodology focuses very little on the end-user or client involved with the project, the main purpose of this methodology has always been to help internal teams through the phases of the project.
PRINCE2– Controlled project management that leaves nothing to chance
Pros- The entire framework of PRINCE2 methodology is so flexible that it can be incorporated in any type of project. By using this methodology teams can communicate better and have better accountability, it focuses more on outputs and continuous support for improvements within the team.
Cons- PRINCE2 uses excessive documentation to track work and progress within the team, at every stage, there is lots of documentation to maintain and update which takes up necessary time that could be going into the designing of the project. There is a lack of involvement and time in the senior management, this inevitably slows down the project.
PMI’S PMBOK– Applying universal standards to Waterfall project management
Pros- PMBOK works well for projects that have clear requirements and little chance for change. Forecasting can be done throughout the giving the customer an understanding of scope, cost, and timelines.
Cons- Poses a challenge for projects that are complex with constant changes as costs and such schedule impacts can be significant. Integration is often done late in the process which could cause difficulties if assumptions are wrong or there are unknown issues.
Setting Targets for Project Management
Why do we set targets and what are they for?
Targets provide direction for people and where they want to go, what they want to achieve. When you set goals and think about what you want to achieve, you break out of autopilot and start living with a conscious mindset of your actions. Instead of letting other people direct you on what to do, you take charge of your own actions and what is going on in your life. As well as this, you can keep a measure on what you are doing and how to improve, by setting milestones you can have something to work towards and gain new skills along the way. Things are created twice; first in the mind, secondly in the physical. The mental creation happens when you bring your goal to mind, the physical creation happens when you bring your goal to life, without the mind you don’t get the physical. By setting goals you become more focused, they give you laser direction to where you need to be and what to spend your time and energy on. It also makes you accountable to have goals, rather than just talking you are now obligated to act upon them. For people who are not in a good place in life, goals help to motivate them and give them something to work for, they remind you of the things you love and to strive you away from the negative obstacles. They help to achieve your highest potential, by default a person makes a routine of activities that makes you feel safe and comfy every day, but by doing this it stops the person from taking risks and achieving their uttermost from life. For example; set a time limit makes you work faster and setting a weight loss target helps you know if your actions have been effective in losing weight. Setting a goal ensures that you are not settling for less than what you planned for in the first place.
- Set Goals (Where are you going? + When are you finishing?)
- Breakdown Tasks (Bridge the abstract and the concrete, Create a plan of action, tools, and materials needed for these goals, collaborate ideas, and divide up the roles for the ideas)
- Implement Strategies (What can you do to best help yourself and the people in your team?)
- Monitor and Adjust (Monitor the progress and address problems people may be having, solve these problems, experiment with new ideas, and re-examine goals)
Different Resources
What different resources can be used in project management?
A resource- A material or immaterial entity exploited for the realization of a task.
These can be divided into 4 following categories;
Human resources- team members
Material resources- raw materials and machines, tools, equipment, resource management software
Financial resources- project budgets
Time resources- Project plan, project schedule, time invested
Resource planning is one of the factors that lead to the success of a project. *
What is a budget/why is it important?
Budget- An estimate of income and expenditure for a set period of time.
Managing your money well is a key factor that plays into the part of a successful project, it is easy to let the spending get out of control if you do not have a limit on how much money can be spent. Laying all of your expenses out clearly will help you plan better and highlight areas where you may be able to save your money and make savings that can go towards something else. Having a budget always helps you save and be prepared for the unexpected if something were to go wrong you will not be overspending and left with no money by the end of it as you had money spare to fall back on.
Asset Management
Open-source digital asset management
Open-source digital asset management tools are software solutions, they allow you to store, operate, track and share your digital assets in one place. These types of apps are usually cloud-based and have different specific functions depending on what you’re working with. According to Globe New Wire, the size of the DAM market has rapidly grown through the years and in 2018 presented a share of $1.24 billion. Digital asset management is the safer way to work and your creative files are much more organized therefore making you work faster and more efficiently. Because of DAM businesses save significant amounts of money and time. With DAM you do not have to organize your own files and name those files and so forth, the system works in a way that necessities you to have your digital media assets organized.
4 Components That Are Important
Storage Concerns-
Storage concerns are important when storing work as it depends on how much data a digital component can hold.
Backup of Files-
The backing up of files is important as if one file is lost on a piece of software and that is the only place you have saved it that piece of work will be lost forever. By backing up this work, especially on a cloud file, it is less likely you will ever lose that work if it corrupts in one storage area as you will always have a back p of your work.
Logging of Process and Files-
By logging the process of your work as you go along, you can revisit the part in your work before maybe a dramatic change was made to it. As well as this, it becomes easier to make multiple renditions of your work without having to remake the same thing over and over.
File Format-
The file format of your work is important as if you only save your work as one file, say this was a jpeg, you can no longer revisit this work as it has been saved as an image format, not a format that can be revisited. As well as this, saving your work in the wrong kind of format can ruin the quality of your work and make the evidence for your work look really poor because of its image quality.
Copyright Consideration
What is copyright?
Definition- Copyright is the lawful right of an author, artist, composer, or another creator to control the use of his or her work by others. Generally speaking, a copyrighted work may not be duplicated, disseminated, or appropriated by others without the creator’s permission. The public display or performance of copyrighted works is similarly restricted.
When creating pieces of work there are risks and limitations that come with taking inspiration from another style/piece of work. You may use copyright-protected material if you have permission or license from the copyright holder prior to posting, however, if you do not you may land yourself a hefty fine. Some may argue why copyright is necessary, it protects an artist in the case of graphic design from having their work being taken and being used in the name of someone else, in many circumstances this wors in levels of money too where people that are using others work are making revenue from this, with copyright this can be prevented. A copyright owner has the exclusive right to:
- reproduce the work by making copies of it
- dispute copies of the work to the public by sale, donation, rental, or lending
- Prepare new works derived from the original
- Publicly perform or display the work.
Anyone who does any of these things without authorization of the copyrigt=ht owner can be liable to the copyright owner for damages, in some cases the owner can recover statutory damage of up to £30,000 up to £150,000. Copyright can also be a crime resulting in a fine or imprisonment so it is extremely important for an artist to do their research on work before using it or asking for permission from the artist first.
What is Production Documentation?
Product documentation describes the product that is being developed and provides the instructions on how to perform the various tasks that are in it. It includes requirements, tech specifications, business logic, and manuals. In total there are two types of project documentation.
- System Documentation– represents documents that describe the system itself and its parts. It includes documents, design decisions, architecture descriptions, program source code, and FAQs.
- User Documentation- covers manuals that are mainly prepared for end-users of the product and system administrators. User documentation includes tutorials, user guides, troubleshooting manuals, installation, and reference manuals.
Product documentation is often an afterthought as developers primarily focus on creating their product and therefore they use minimum documentation resulting in them ignoring their user’s point of view. For a developer or writer trying to bridge the developer-customer gap with effective documentation, important things to note to get across to the product user are how you document your information, structuring, planning, writing, and delivering this.
An example of what a development document may look like, it gives a clear roadmap for what needs to be achieved and when.
Development documentation compromises documents created in course of software engineering processes, there are only two main types of these, coding documentation and testing documentation.
Anatomy of Type
What does Anatomy mean?
It is the branch of science concerned with the bodily structure of humans, animals, and other living organisms.
What is meant by Anatomy of Type?
The use of typefaces, their fonts, and font families can affect the brand identity of a company, each of these components makes up the anatomy of type and typeface.
Definitions
Ear – The small stroke that projects from the top of the lowercase g.
Stem- The main vertical portion of a letterform.
Bowl- A curved portion of the letterform that encloses a counter. The exception is the lower curved part of a lowercase g.
Ascender- The portion of a lowercase letterform that ascends above the x-height of the typeface.
Descender- The portion of a lowercase letterform that descends below the baseline in a typeface. In some typefaces, the uppercase J and Q also descend the baseline.
Counter- The negative space of a letterform. A counter may be either fully or partially enclosed.
Open-counter- The open space in a fully or partly closed area within a letter.
Serif- Small decorative lines added to the end of a letterform’s stem and stroke. Serifs improve readability by leading the eye along a line of type.
Terminal- The end or termination of a stem or stroke with no serif.
Tail- The stroke or loop at the end of a letterform such as the tail of an uppercase Q or the stroke of an uppercase R.
Link- The part of a lowercase g that connects the loop to the bowl.
Baseline- The invisible line upon which a line of the text rests.
X-height- Is the body of lowercase letters of a typeface, excluding the ascenders and descenders. It can vary considerably among typefaces with the same point size which is based on the width of certain uppercase letters.
Spur- The projection that extends the endpoint of the curved portion of a letterform; it is smaller than a serif.
Spine- The main portion of the letter s, both upper and lowercase, that curves left to right.
Counter
By using the idea of a hula hoop representing the idea of the letter o I filled the negative space inside of it with the image of the actual space as a play on words.
Baseline
Using the letter L I used a play on words again with the term Baseline being where a letter rests therefore I made the letter L a deckchair to rest on the line.
Descender
By mimicking the letter J with the lower handle part of an umbrella, I created a line for it to sit on as the J descends underneath the line.
Album Redesign- Final Piece
The Brief
Graphic Designers have to be able to adapt and update designs for modern audiences while still appealing to the original fan base of the design/product. This task will allow you to explore different methods of photo/image manipulation in photoshop to then develop and design a reworking of an album cover of any band/artist which will feature on your portfolio website as a demonstration of technical skill, ability to use your imagination and style preference.
My Work
The album I decided to redesign is Blond by Frank Ocean.

Fillmore Poster Design
What is Fillmore?
Fillmore auditorium was opened in 1965 by Bill Graham and was a legendary music venue, epicentre for rock n roll. To advertise they used iconic psychedelic gig posters to show their acts such as Jimi Hendrix. Each concertgoer was given an iconic poster when leaving a gig, they were a visual representation of the music that was played at the Fillmore.
Task- Create a mood board for inspiration that contains 3 Fillmore posters with annotation.

Task- Pick a music artist and create a Fillmore-inspired poster.
For the creation of my Fillmore poster I have used the artist Tyler The Creator, I have chosen this artist and this album because he is a modern artist and I wanted to use the same colour scheme from the original album cover and convert his into a retro Fillmore poster.
To begin with, I used the pen tool to outline the subject of the image which in this case was Tyler, after this, I removed the background so I was left with a blank canvas to work with left only with the subject of my poster. To make the background I use the smudge tool to blend the colours I had added to create a swirling motion starting at the centre behind my main image. I used the ink dropper tool to get similar colours that are already used in the original album cover so I could stick to the original theming but add a Fillmore twist. Finally, for my font, I used an array from san serif to serif, for the name of the artist I made it the largest piece in serif so it would be the first thing to grab attention and add a mixture to the poster showing a bit of craziness. For the location of the concert, I changed the font to san serif to show its informality of it and used a font that looked like a handwritten pen to add more to the mixture. As well as all of this, I made the colour of my fonts neon colours and colours that contrasted between the fill and stoke so they didn’t blend into the background as well as also following the codes and conventions of Fillmore posters.
What I like about my poster is me still trying to keep to the original theming and use the colours from the original to show the process between that and Fillmore but if there were something I were to change in future is I would fill the negative space in my poster. In the original, there is no negative space and there is something happening in every corner and space however in my conversion to the Fillmore there is lots of negative space, something that isn’t seen a lot in other Fillmore posters.
Colour Tones and Hierarchy
H//S//B– Represents somethings colour, its intensity and its value
Hue– What colour something actually is, identifiable by a number
Saturation– How colourful something is, desaturated means no colour
Brightness– Can also be called lightness or value
To experiment with saturation I duplicated my image three times and made each copy a different saturation value.
The first image has a saturation of +100 the second 0 and the third has a saturation of -100
By using photoshop, I experimented with saturation in 3 different images. By using clipping masks I was able to edit these images separately without them affecting each other.
Following this, on the same images, I used the black/white tool to change around these images and make parts whiter and blacker.
Colour Tones– CMYK, RBG, Greyscale are all composed of tones
Monotone– A colour palette using only 1 tone and its saturation levels
Duotone– A colour palette using only 2 separate tones simultaneously
Tritone– A colour pallette combining 3 different tones together
Task- Create an album cover using Duotones
To make my photo with tritone I first had to open my image in photoshop and make it greyscale. By clicking on IMAGE<MODE<DUOTONE when the options menu came up for this I could add more colours to alter, I added an extra colour to make my image tritone so I could experiment further. I used three colours to get my green like a filter to cover my image like the green mixes into the colour scheme of the show this character is from.
Using the Pen Tool

Dadism Design Principles
Hierarchy
Task- Create 2 versions of a poster featuring information on how to make a cup of tea & a cup of coffee
Version 1 uses hierarchy to make the tea more important
Version 2 uses hierarchy to make the coffee more important
To demonstrate the use of hierarchy, I created 2 posters featuring instructions on how to make a cup of tea or coffee. I did this by making what was most important on each poster larger than the other, for example in the first poster the cup of tea is more important, therefore the image and the font are both larger than the cup of coffee and vice versa for the other poster. Another way I demonstrated the hierarchy is using different fonts, my more important image would have a more interesting font to grab attention whereas the other one has a boring san serif font and is a lot smaller making it a lot less interesting to look at.
Hierarchy is important as it gives you a guide on how to lay put your work, whatever you want to grab the reader’s attention first you will make larger and more eyecatching, it adds different dimensions and depths to your work keeping people intrigued rather than everything being the same size and people not knowing where to look first.
Dadaism
Dadaism was launched around 1916 during the end of WW1, it is also known as Dada and is linked to surrealism. It shows its rejection of the ‘norm’ and instead focuses on humor and absurdity. Traditionally it incorporates methods such as collages, cut-up imagery, and photomontages/manipulation.
Early Dadaism Pictures
Task- Utilise Dadaism to create 3 edited pictures
I used an image of Boris Johnson for my Dadaism work as he a public figure who is not liked by all and therefore easy to work with and “make fun” of because of all the stories of him in the news. I used the same image across all three pieces and by using a clipping mask was able to manipulate the image to make it look like he was holding he shouldn’t be. Using the pen tool I outlined the hand and made this a clipping mask which I could then use across all my images. I gathered pngs from across the internet that I could use in one of my images as well as gathering a font that had the style of graffiti following in the style of Banksy placing political messages across walls. In another one of my images, I used more recent and relevant digs such as Boris Johnson’s handling of the Covid-19 crisis. I did this as many Dadaism artists have followed doing stuff like this where they take political leaders’ words and use them against them in their own work, I wanted to do this in one of my pieces so used a news article and placed it inside the hand clipping mask.
What I like about my interpretation of Dadaism is my use of using such a public figure and using relevant mockery around them taken with inspiration from modern dadaism artists. Something I would change about my work is being more experimental with the software instead of placing my images in the same place of images, I could have used the pen tool or ellipse tool to make my own shapes to push myself further.
Album Redesign Ideas
Before creating my final design I created ideas for what I may want to do. By using photoshop I designed the following ideas;
By adding another layer, I duplicated the main image of Frank Ocean so I could rotate it and if I needed to go back to the original image to change the background without changing the main image, I could. Still focusing on the main image, I used the blur effect to create the shaken image effect and to make the image less distinguishable. Finally, on my main image, I used the noise effect to add grain to my image and to make it look more distorted.
To create this design, I created another layer of the main image again and on the duplicated layer of the main image, I did an outline of Frank Ocean with the paint tool in pink to contrast with the green hair. As well as the pink paintbrush, I also used the colour green paintbrush to do the hair, however, I only did a rough outline and fill with the paint on the hair as I used the smudge tool to create texture for the hair. To finish I used the blur tool again to make the image less distinguishable, as well as this I then moved the paint layer to move it away from the body of Frank Ocean so it doesn’t completely hide the outline of his body in the original image.
Ben Marriot Styling
Ben Marriott is a freelance motion designer and illustrator, he uses a noise effect across a lot of his illustrations as well as gradients. In examples of his work, we see experimentation of different colours being used together as well as different mixing gradients of colours. He has worked with brands on projects such as Google, Adobe, Dropbox, Twitter, Emirates, Converse, Coca-Cola and RedBull.
Examples of his work
Task- Create designs with noise gradients
By using both illustrator and photoshop I was able to create my edited version of the male and woman toilet symbol. Firstly, by using InDesign I was able to use the pen tool to create the image of the man and woman, I also used the curve tool to achieve this. To create the line between the middle of the man and woman I used the rectangular shape tool. To finish in illustrator I filled my shapes with black and then saved this as a ai. document. When opening photoshop I opened my file as a smart object meaning I’d be able to edit my design. I started by using the layer style tool and putting a gradient on the top of my design, however, I only used two colours to spread throughout my design, by the top of my design the colour has spread to an opacity of 0%. To finish I used the Noise tool by clicking onto filter in the top left of my screen to add the blurry looking effect on top of my man and woman, I did this to a percentage of around 30%, I did this because although I did want the noise effect in my image I didn’t want it to look as though it were to be a bad quality image. This finished my process of creating this design.
To create my second design I followed the same steps as when I created the toilet sign however I created a new object to work within my design. By using the pen tool in illustrator I was able to create a new design inspired by the artist Ben Marriott.
Something I would change about my design is adding shadowing and highlights as my image appears quite dark and does not have much depth to it.
I enjoyed recreating the styles of Ben Marriott and really like his work, I like the idea of using gradients and noise, in my opinion, it looks similar to using spray paint to make an image however this has been done digitally.
In the future, I would use Ben Marriott’s styling again when making posters adding it into different things apart from “characters”.
Typography Album Cover
To start with I chose the album I wanted to make a typography design with, however before going straight into designing a typography response to it I did some research into it and listed the emotions it made me feel. This helped me as it gave me an idea of what fonts and colours I could use I’m my typography poster.
Album Research

Born To Die Paradise Edition was released on the 9th November 2012.
The genres of this album are labelled as;
Alternative, pop baroque, pop indie pop sad, core trip, hip hop. In an interview, Lana explained she was more interested in telling her story rather than making money from the album.
When listening to this album I feel many different emotions because of the different tempos and lyrics each song differs from in the album. Some songs feel empowering whilst some are heart-wrenching when Lana talks about losing the person you love. The album overall covers all emotions a person can feel from sadness to excitement, your emotions change to the songs when listening to the album throughout.

This is my finished typography design, I used a mix of song titles and lyrics from the song which I spread across the page. Whilst making my design I listened to the dark paradise album which helped me decide which font, colour and style to use for my different titles, I was inspired to do this by the expressive fonts lesson from previous weeks. I did this by using different tools across photoshop such as the distort tool and rotate tool. I added a single leaf behind ‘DARK PARADISE’ and wanted to show that clearly so used a simple small image to do this as well as putting that in the middle of my poster.
Layer Masks and Adjustment Layers
What are Layer Masks?
Layer masking is a reversible way to hide part of a layer, it is useful for making image composites, cutting out objects for use in other documents and removing backgrounds to images or permanently deleting layers.
By using the clipping mask I was able to erase the background of the characters and put it on a new background. I did this by importing both images of my original picture and my background picture into photoshop.
By clicking on my original image layer I was able to add a clipping mask to this, this layer mask will be revealing what is below it, which in this case was my forest background. Following this, I made sure that I was painting in black and working in the layer mask and not the raster layer to delete my background from my original image. By clicking EDIT>FILL I opened my fill options so I could fill my layer mask with the imagery I wanted, I changed my contents to black. The reason why I used black is that white reveals the layer whereas white will conceal my layer, I only used white when I had used black over an area where I wasn’t supposed to and I needed to reveal back my image.
This skill would be useful to graphic designers trying to change their image around may this be giving it a different background or trying to place their background or own image onto an already existing layer. The areas where this skill could be used are endless as it can be extremely helpful in any area when you have come to terms with how to use it.
When in the process of creating my album cover I can use my newfound skill with layer masks to place my image onto a different background and give the album a completely different theme.
In the future I will use layer masks again to manipulate the background of my images may this be erasing them or changing little bits of them, I found this an easy and simple way to do this. To improve on this skill in the future, I would like to use more difficult images that this skill can be applied to give myself a further challenge.
Album Annotations and Moodboards
What Makes an Album Cover Iconic?
Iconic- If something is considered to be iconic, they’re very influential, recognizable and revered.
To make an album cover iconic it must be remembered for decades that come after it and something the majority of people are knowing of. There may be a rule of code an artist may have broken in making the album making a difference within the time or something people have looked up to and followed. Examples of iconic albums are:
Pink Floyd The Dark Side of the Moon

The image of the white beam splitting the prism stood the test of time because of the laws of science, transcending the music and becoming an icon in its own right.
The Beatles Abbey Road

The final album The Beatles made before their split had the location of them crossing the road of Abbey Road attract thousands of fans to come and visit it every year because of its simple easy to reach location.
Sex Pistols God Save The Queen
This album became iconic because of its found mockery of the queen who is expected to be respected by all but because of her lack to the country during tough times found less positive remarks made about her, this album is one of them which was the led to it all.
Who is James Reid?
A British Anarchist helped to define the rock punk scene in the 70s in Britain by his style of art mimicking ransom letters.
Who is Jonathon Barnbrook?
An abstract artist who became a frequent album designer for David Bowie in his later years leading up to his death creating abstract pieces.

Album Research
I chose to annotate three Kanye West covers to show a journey on the different styles he has experimented with within his music career. I annotated the albums to show the different graphics and colours that were used and why these specific colours may have been used and what they are trying to show through them. By annotating these albums, I have been given more of an idea on how to redesign my album and how to show a story through one.
I have chosen to use the Blond album by Frank Ocean because of its blank space, it inspired me to add colour to it and make it look more eye-catching. I collected images that correlate to the songs in the album; eg the ivy represents the song ivy in the album. Making a mood board for this makes me easier to come up with ideas and start to create my first ideas for my album cover. I want my album to have a dark night theme with a retro filter.
Futurism
Futurism Design Movement
The movement launched onto the scene in 1909 and is an expression of modern life with elements of cubism. It uses a bold, abstract style with contrasting colours, focusing on progress and modernity. It uses urban landscapes and new technology, this being along the lines of trains, motor vehicles or mobile phones. The futurism design movement is a movement that focuses on the future, expressing this through the different designs in the work.
A piece of futurism art in the early days of the movement, there is minimal use of colour.


More modern days of futurism showing a motor vehicle, there a range of different colours.

Certain trends that occur along futurism work is linked to cubism, using blocky styles of illustration and different gradients throughout the design. Through the art, the impression is trying to show the ways of modern life throughout the year’s changes but comparing the early days of the futurism art movement to modern-day there is a jump in colour.
Technical Worksheet of Contrast
Task- Make a technical sheet showcasing your understanding of contrast
In terms of graphic design, contrast refers to the presentation of two or more objects within the design in different ways. Graphic designers find it useful as it creates a focal point or a spot where the eye is naturally drawn because of its vibrance. Examples of contrast include; black and white, big and small, fast and slow, thick and thin. The more different these aspects are to each other the easier they become to compare and become more contrasted with each other.
Task- Make a piece of digital illustration reimagining something in futurist style
For my modern take on the futuristic style, I used a new model of the iPhone as my centrepiece. By using the pen tool, I was able to outline the exterior of the phone and use a 0.5pt stroke as I needed a thinner outline. I decided to stick with the colour purple and to contrast, this colour with orange for my background, as well as I shadowed my phone multiple times with different shades of purple in squares to follow the blocky technique of the futuristic style. I added an orange gradient behind this design to create the contrasting effect that the futuristic style movement follows.
If I were to do this piece again however I would use more of the orange colour in my piece and try to use other contrasting colours within it as well my piece I believe does not look as vibrant as I believe it could be. What I do like about my take on the futuristic style is my use of shadowing and repeating my shapes as it is a great way to show the phone is the main part of the piece.
When comparing my work to another piece someone has made taking a modern take on the futurism movement, their work is a lot cleaner and shows how simplistic the piece can be whilst also being futuristic which is what I really like about it. I will take inspiration from this piece for future work when using the futurism style.
What I like about the futuristic art movement is how abstract you can be with it and experimenting with different colours. It is a great way to bring something modern and use a style from the past and combine the two to show how the object may have been viewed and advertised in the past.
Expressive Fonts and Legability
Expressive Fonts
We explored the different fonts that can be linked to different themes and why we would link these together. By the use of different fonts and styles of font they can express different things eg; bold being loud.
Legibility
By using illustrator I was able to create my own style of ‘DONT MISTAKE LEGIBILITY FOR COMMUNICATION’. We did this to show that you don’t have to explicitly show something for someone to understand that thing. I showed this through expressing the message in words but making it really messy, however, it is still readable and still communicates what I’m trying to express.
What I like about my poster is my use of only two colours but still switching the two colours of their stroke, it creates a contrast in my piece and still makes my writing look legible despite the work poster being very busy. Something I would change or do in the future with this style of work again maybe changes some of my words to appear backwards to further portray the point of ‘Don’t mistake legibility for communication’
Scaling, Rotating and Anchor Points
This is the product coming from my experimentation with resizing and scaling different letters. It is a great way to give character to your word and to make it mean something, it is still legible and is more eyecatching than if the word were to just say ‘EARTH’.
From the word earth, I kept the letter ‘R’ and discarded the rest. By using the direct selection tool I was able to move around the anchor points of my letter and skew my image. To add further anchor points to my letter I used the ‘add anchor point tool’, this made me able to make my letter look more dynamic with the extra points around my letter.
Finally, to add extra effects to my letter I used the eraser tool and added small dotted holes around my letter. I then used the knife tool and cut two lines across points in my letter which made the small holes I had dotted beforehand become black in some areas creating contrast within my letter.
In future, I would use these skills when trying to find a font that would express the emotion I am attempting to portray in my product. As well as this I would further experiment with David Carsons ‘Don’t mistake legibility for communication’ as I really liked the design that came from it, the fact that it was a busy piece buy you can still read it made it different from other typography posters I had seen before.
Patterns and Selections
By using the pen tool and the anchor point tool I was able to recreate the face that was assigned. To start I used the eclipse tool to make a circle, following on with the anchor tool, I was able to stretch the circle into the shape of a face and filled the shape with the colour blue. Following this, I used the pen tool to add the features of the face such as the eyes and nose. I changed the colour of these lines by changing the colour of the stroke and changing the weight of this line to make it stand out above the darker blue of the face.
Key Words- Graphic Design Terminology
Line- Two Connected Points
Shape- 2D Confined Area
Texture- Surface Detailing
Form- Presence of 3D
Space- Distance Between Stuff
Colour- CMYK / RGB Value
Value- Lightness and Darkness
Task- Create your own Andy Welland- style art/graphic
Some Examples of Andy Wellands Work


My Recreation Using Andy Welland’s Style
With inspiration from the artist Andy Welland, I created my own piece by using shapes and clipping masks. To create my clipping mask I added random shapes onto my page, all of these of them overlapping each other; the final shape that would go over these would be the shape for my clipping mask. Clipping masks are good for removing or highlighting certain areas of designs. As well as this I also used the knife tool to split some of my shapes in half so not all shapes would be the same and there would be some variety. To finish my design, I used the eraser tool to add different lines and designs on my shapes, followed by me adding any other shapes on my already made shapes. After finishing my design I checked over to make sure all my shapes overlapped as this follows the style of Andy Welland.
Something I would change about this design I have created when looking back on it is the colours I have used. In future, I would find colours that suit each other better to make my design look more presentable and give it an aesthetic instead of it looking more random. Something I believe I have achieved well in this design is adding different designs inside my shapes so there is more to look at and make it appear less boring, I believe it is a great way, when used properly, to convey a message within clipping masks.
I would use clipping masks and the style of Andy Welland again when wanting to create a background for a piece of my work as I believe it can be simplistic and not too distracting but also stylish and eyecatching to the design at the same time.
Digital Illustration- Final Design
The Brief
Graphic designers have to have a foundational understanding of image creation even if they do not possess the ability to draw. This task will allow you to explore different methods of image-making in Illustrator to then develop and design an illustration of any theme/style which will feature on your portfolio website as a demonstration of technical skill and ability to initiate and complete a personal project.
My Design
For my final piece of work in digital illustration, I wanted to display the skills I have learned by using the pen tool. To portray this, I used the cover image of a Netflix show called Sex Education. By using the pen tool I outlined the characters and the key assets of their outfits. I did this by pasting in this image and doing my outlines over the top of it.
As well as using the pen tool, I also used the shape tool to create the image of the cubicle doors and by using the eyedropper tool copied the colour from the original image and dropped this into my shape so the colours matched. By using the type tool I wrote out the title of the show and tried to match the font knowing it was bold, san serif and white. I centred it where it should be and for final touches, I used the pen tool again to put graffiti on the walls to try and match this to the original cover.
The reason for me recreating this cover is to attempt to give it a more simplistic look and to show the skills I have learned over a couple of weeks of experimenting with it. A thing I would change for my final design is to add colour to the outfits of the characters, however, I did not know how to do this so have left this as a skill to develop for the future. Something that I like from my final piece is not outlining the facial features of the characters, I believe this would have made the piece look too busy and taken away my idea of it looking simplistic.
The skills I have learnt from the digital illustration workshops have been extremely helpful in learning the basics of photoshop and adobe illustrator and converting these skills into things more complex like creating a whole poster as I have here. I will carry these skills through my further workshops and anything I may do in the future with these pieces of software as they are necessary basics to know and will come into use if someone were to make a movie poster or a greetings card or many other things that these skills can be used for.
Logo Sketching and Designing
Advantages of Sketching– Sketching helps you extract numerous ideas quickly and be creative, experimenting with different ideas before entering into a graphics editor starts designing the official look and feel. Presenting your ideas helps you by saving time in the long run, especially with client work.
Today I was given the option to use different brand names and create my own logo, I chose a brand called Blue Turtle. I made 3 design sketches of what this logo could look like and used various ideas to portray the energy drink brand.
Sketch 1
With this image, I like that I have kept with the theme of water and the repetition of the water droplets as these are associated with a turtle and it is in water. Despite this, I wanted to include a turtle into my work and have this as what the customer associated my brand with and its name, not just the water droplets.
Sketch 2
With my second sketch I incorporated a turtle lying on its front and put Blue Turtle in the inside of it, what I like about this design is the turtle takes up the majority of the image. However, what could be improved in this idea is the placement of the text and the position of the turtle as the name of the can is very small and doesn’t stand out which wouldn’t help with catching a customers eye and making them want to buy it.
Sketch 3
With my final sketch, I changed around the placement of my text which I like and the positioning of the turtle to the middle so it is the first thing the consumer will see when picking up the can. With this sketch, I tried to bring in the idea of placing cans around the turtle as I wanted my drink to have the tagline of it being environmentally friendly, however, by the end of me drawing this, it came across that my can looked as if it were portraying this in the opposite manner so I decided not to use this idea in the end.
By sketching out my ideas I could maximize my knowledge of what I wanted my final design to look like and how to make it look most interesting. After sketching my three designs I went into Adobe Illustrator to start designing my logo digitally and start to add colour. In the end, I incorporated my first and second sketch and the placement of my title in the third together to create my final design. I wanted to use a colourful background so when on a can the logo stands out and looks fun making people want to buy the drink, it helps it stand for what an energy drink does, gives you energy.

To create this design I used the gradient tool to create my multicoloured background and used the colour bar to edit the colours and where they would fade into each other. Adding another layer, I put a water droplet effect on the top of my multicoloured background and added a turtle on top of this to represent the turtle beach. Finally, by going on defont I found the font that represented the name ‘turtle beach’ the best. I wanted to find a handwritten font that looked grunge, after doing this I spread the font in half so I would not have any empty space. I changed the name to Turtle Beach as this is what I believed suited the name of my brand better. Finally, I added a teal stroke around my text of 0.5pt to finish my design.
German Object Posters
German Object Posters were originated in the early 1900s around Germany and were called ‘Sachplakat’ or ‘Plakastil’. The posters followed the theme of having large, flat colours making them easy to produce, and by having bold typography they were easier to read by passers-by. German object posters were one of the main reasons that colour advertising started to boom and why we have it in our advertisements today.
A German War Poster from 1900 promoting a matching business.
A modern-day poster promoting staying safe from Covid-19 using the style of the German Propaganda Posters
Task- Create your own German Object Poster and develop it with features such as typography, colour and extra detail
After taking inspiration from the German propaganda posters from WW2 I made my own poster promoting Pepsi with a witty slogan. I made this within illustrator using the pen tool to make my logo, I traced over the original making my design process easier and making my stroke bold to grab attention. For the background of my poster I used red and blue as these are the main colours of the Pepsi brand, I blended these colours into each other using the gradient tool and used bold white typography for easy reading when passing by.
What I like about my recreation is the detail and accuracy I used with the pen tool, I would continuously go back to the direct selection tool to make angles of my line the most accurate they could be. However something I would also improve on this piece of work is making sure all my lines attach to each other, I couldn’t figure out how to resolve this in such early stages of using illustrator but in future, I would want to improve on this.
German Propaganda Posters in my opinion are very effective for grabbing attention and getting a message across without using words but instead with colour and imagery, they can be applied to modern problems from today to also convey a message which proves how well this style works.
Depth, Strokes and Shapes
Depth– The perceived distance between the background and the foreground of a composition.
Strokes– The configuration given to paint by contact with the bristles of a brush.
Shapes-An element of art that is two-dimensional, flat, or limited to height and width.
An example I created with the idea of depth, using different shapes from different angles and points to create depth.
Atmospheric Depth: Aerial perspective, also called atmospheric perspective, method of creating the illusion of depth, or recession, in a painting or drawing by modulating colour to simulate changes effected by the atmosphere on the colours of things seen at a distance. https://www.britannica.com/art/aerial-perspective
Randy Otter Graphics
Line- Two connected points
Shape- 2D confined area
Texture- Surface Detailing
Form- Presence of 3D
Space- Distance between stuff
Colour- CYMK/ RGB Value
Value- Lightness and Darkness
Task- Create your own Randy Otter-style scene/graphic
To create this I took inspiration from the artist Randy Otterman. By using the ellipse tool I created a circle and by adding extra anchor points to the circle I was able to create the shape of the avocado. I used the pen tool to create the features on my avocados such as the legs and arms, to finish I added colour to my avocado and pip by using the fill tool and the colour guide to using colours that would complement each other. As an addition at the end, I used the paint tool with an opacity of 10 per cent to add darker lines in the stomach of the avocado to add depth and to show that the pip had escaped out of the stomach.
Today, I created my own Randy Otter Graphic using illustrator and the ellipse tool. Taking inspiration from the artist’s work, I used shadowing to create realism and the pen tool to add body features. I added text on top of one of my characters to add humour which is what Randy Otter does in his art too.
When comparing my art to Randy Otter’s own art it gives me ideas in which I could improve my own art. He uses different colours and gradients to make the shadowing look more lifelike and also adds highlight which makes it look even more dimensional. Finally, I like the noise filter Otter has added to his work, it stops the negative space from looking too static and keeps every part of the work interesting.
From this lesson, I have learnt about how to use depth in my work with shadowing and lighting and how this can add character to work.
In the future, I would use these skills to bring shapes to life and how to use them to create stories, and how they can be more than just a single shape on a screen.
8 Bit Designing
8-bit graphics literally means that every pixel uses 8 bits for storing the colour value so only 256 options. Today, modern systems use 8 bits to store each colour channel so every pixel uses 24 bits, this is how resolution works and has adapted throughout the years.
To begin with, I researched previous designs which have used 8 bit, this being famously from the original days of Mario. I found that some 8-bit designs are more detailed than others, for example in the first years of 8 bit when it was starting to be brought into games they would use minimal colour and make the pixels bigger to cover more space with that one colour, however as 8 bit has adapted to modern technology, people use smaller pixels and a larger array of colours to create images of scenery and more detailed characters.
By using Adobe Indesign I created my own 8-bit heart by using the rectangular grid tool and the live paint tool. To start with, I had to convert my document into 500 pixels x 500 pixels and change the colour into RGB. By holding CTRL R T turned the viewing on my document on illustrator into a ruler format and by right-clicking onto this ruler, making sure it was in the category pixels. I then added the rectangular grid tool onto my document and put the height and width to 500px and keep the division of pixels by 50 and added a stroke line of 0.25px and make the grid an opacity of 33%. The grid will help me add colour into the squares and give it the pixelated effect and make it easier to replicate my image of the heart. Following this, I added a new layer so I could paste the image of my heart, I dragged this new layer under the grid layer and dropped the opacity of this heart to 33%. I locked the grid layer and fitted the heart into the grid so the pixels aligned with the grid as close as possible. I returned the opacity of the heart back to 100% and created a set of squares at the side to match the number of colours I have in my heart image.
By using the ink dropper tool, I selected the different colours I had in my heart and placed these colours into the squares and did this until I had every sample of each colour in the squares. I then dropped the opacity of the heart back to 30/40% and the grid layer to 100%. I then began to use the live paint tool and by hovering over the colours from my squares I could fill in the squares from my grid to match the image of the heart I had pasted in, I was able to do this with all the colours until I had coloured the whole of the image. I then locked the grid layer and unlocked the heart layer to remove the image of the heart underneath; I unlocked the grid layer and removed the stroke. By right-clicking the heart, I then selected ungroup and selected the grid and deleted it. This is how I created my final piece of work of the 8-bit heart.
In the future, I would use the skills I have learnt by making this 8 bit-heart to make my own designs. I found using the grid layer very effective and helped to guide me on where to use colours and how to be more precise. In the future, I would like to adapt to these skills and make my own landscape using 8-bit art. The only thing I found frustrating from creating my heart was how many steps there were, including unlocking and locking layers and constantly changing the opacity of layers.
Shadows and Highlights
The Importance of Highlighting
We are impacted by lighting on a day to day basis and when creating your own graphic without highlights and shading it is very noticeable to see that that is not there as the image appears very flat, as seen by the beginning of my design below.
Task- Create an emoji and bring it into photoshop for post-processing
To create my image I used adobe after effects, the pen tool and the shape tool to create my emoji. I opened up illustrator and has to make some adjustments to my document making the width and height to 500px, making the colour mode RGB and ensuring the raster effects were on high. It was important for me to do this now and in future work, as the raster effects are the quality work will be in, for this piece of work I am working with 300ppi which stands for pixels per inch which is the standard for work in illustrator. The colour mode is important if you were wanting to print your work off, if you were to print off your work in RGB the colours would appear bright on the computer screen but print to look washed out, If you were planning to print something off you would change these settings to CYMK as these are the ink settings a printer is programmed with so your picture will print in the same vivid colours you will have designed it in. Finally, before starting my work I changed my workspace to essentials classic which simply changes the tools you have on the left side of your document, this workspace works best for the work I created.
Beginning to create my emoji, I used the ellipse tool and removed the stroke outline from this before drawing my circle, with my already formed knowledge of this tool and shapes I created a basic emoji and filled these shapes with different colours simply by using the fill tool.
At this point, it is clear to see that the face has no dimension and no lighting or shadowing. To resolve this I imported this image into photoshop to start experimenting with the paint tool to change this. I did this simply by following this process, FILE > EXPORT > EXPORT AS > CHANGE SAVE TYPE TO PHOTOSHOP (PSD). Before bringing this image into photoshop I checked my photoshop export to make sure my colour model is RGB and the resolution is on high, as well as this on photoshop there is another setting compared to illustrator where I have checked for write layers instead of a flat image, this means I can edit my piece
I created a clipping mask for each facial feature for example “paint_eye” this meant I would be able to draw over the eye area and it would not draw over any other layer on the face and would focus on only that bit. I used darker colours of the original colour to create shadowing and went for a lighter colour to create a lighting feature look on the emoji.
In today’s workshop, I learnt the importance of using highlights and shadows, without using these the image you are using appears flat like my first attempt at creating my emoji.
In the future, I believe I would use this skill in future work as it adds more character and dimension, however, I would also want to improve on this skill before using it again. Something I would have changed about my design is the neatness of my shadowing as, to me, it looks as if the top of the face is dirtier than shadowed.
Graphic Design Roles and Associated Practices
What does a graphic designer do?
Graphic designers use a variety of design elements combined with art and technology to communicate their ideas and creativity. They develop layouts and designs for advertisements, magazines and corporate reports, they will do this by sketching rough illustrations either by hand or using a computer program. Graphic designers will often collaborate with other graphic designers for projects which will have an array of other specialities such as; digital marketing specialists, art directors and web designers. They will often need to communicate with their clients to develop designs that portray their intended message and the consumers’ needs. As well as this they will also need to be able to present their ideas and take on feedback may this be good or bad to better improve their work, this means that a graphic designer will create many drafts to get to their final finished design.
What are the responsibilities and skills of a graphic designer?
- Meeting with clients or art directors of their project to determine the scope of their ideas.
- This means a graphic designer will have to be confident and be open-minded when communicating with their client so both they and the graphic designer themselves get the best outcome possible with their project.
- Determine the message the design should portray.
- Graphic designers must be decisive and sure of themselves when creating their work, although they also need to be open to ideas they must also be self-assured otherwise their work will take longer than needed as they will waffle and take forever to make up their mind, not making a good impression to their client.
- Create designs either by hand or by using software packages.
- To be a graphic designer the person must understand the digital software they are using and also have a somewhat good hand for drawing, for some this may need practice which will test the patience of some. As well as this a graphic designer will need to be creative and use their initiative to make their design/project ordinary and stand out from other people’s designs so consumers are more inclined to look at their design than others.
- Incorporate changes recommended by the clients for the final design.
- To achieve the best possible outcome for both the client and the graphic designer, the designer must be patient and not too self-critical on themselves, understand that they are working for a client which may have different ideas for what they want to fill their needs in what they need in the product. By being judgmental of themselves the designer knocks their own confidence and takes away their passion from their work.
- Review designs for errors before printing or publishing them.
- Graphic designers must be self-aware of their work checking through and seeing what can be improved and if they have met the needs for what their client wants, being conscious of their own work creates a good impression of themselves to a client and shows that they are invested into their project to get it done to the best standard.
There are many strands of job roles to role of being a graphic designer these include the following;
- Creative Director- These manage a creative team through the production of advertising campaigns and product branding that the visuals are created for.
- Visual Image Developer- Create images through photography image editing and 3D modelling, designs are also created through these.
- Multimedia Developer- Applying their knowledge of graphic design to sound and motion.
- Web Designer- Creating graphics, layouts and pages for websites.
Email Marketing Designer
What they do
They strategically design and create emails that resonate with their business’s target audience. They are responsible in part for the extension of the company’s brand identity.
Working Hours
Depending on the time zone of the business and when their working hours are on, 8 hours a day.
General Responsibilities
Research up to date and emerging technologies in the design field and implement this into their work.
Qualifications Needed
A./B.S. in Marketing, Business, Graphic Design, Web Design. Communications, or related field
Starting Wage- Average Income
£25,000-£53,588 a year
Availability
Why You Might Want to Work Freelance
Freelancing in some circumstances allows you to have your own time schedule, so if you have a busy family or children to look after this can be an even bigger benefit. As a freelancer you have your own freedoms to who you can work with, meaning you don’t have to work with people you don’t get along with. As well as this, being a freelancer allows you to gain your own independence and build your own skills. Freelancers can demand more money for the job they are doing for a client, unlike employees who have a set wage and may only get a small increase every year.
Being a freelancer also comes with its disadvantages such as in some circumstances working alone resulting in becoming lonely. As well as this, as a freelancer, you become your own manager of your admin meaning you have to be doing all your own admin work, including chasing invoices and business finances. Although you may get more income than regular employees, you find that the income is irregular and some months will be worse than others, there is no steady wage.
Questions to a Freelancer
How do I get into the freelance business and make myself recognizable?
What are the disadvantages of making your own money?
What do you do from day to day at work?
What are the advantages of choosing your own employees?
References:
https://uk.indeed.com/Email-Marketing-Designer-jobs?advn=4716877536531905&vjk=78049d6ea1329460
Early Target Setting
Things I want to achieve by next year
By next year I would like to be more sure of what job I would like in the future.
I would like to gain more skills in graphic design and find out if it is something I would like to pursue further in the future.
Character:
I want to feel more comfortable in my new surroundings as I am not the best person to handle change, meet new friends and become more confident through this.
Qualifications:
To stay on top of all work set meaning I do not fall behind and become stressed, by doing it when needed I will be giving myself more free time. I want to be able to use the software needed in graphic design more confidently and become more creative. I would like to understand how to use adobe after effects, I would like to achieve his by Christmas time.
Career:
To get a part-time job and start earning my own money.
Moodboards
Definitions of Abstract and Literal
Abstract- The use of shapes, colours, forms to achieve the end product. Abstract art allows you to give your own meaning to your piece.
Literal- Taking words in their literal sense without exaggeration, the most basic stripped-down version of something.
What is a Mood Board?
A mood board (or inspiration board) is a physical or digital collage of ideas. Mood boards help to build a foundation during the early stages of design.
Task- Making mood boards based on the theme given but being sabotaged between each round
The first mood board I created consists of ideas that first came to mind when I thought of the word ‘football’, I looked up images on google and moved them onto a photoshop page to bring all my ideas together.
For my second mood board, I did not use simple ideas such as using images of just footballs, I was made to think more abstract and use images that did not immediately relate to football.
For my final mood board, I had to think even more abstractly and use images that wouldn’t immediately correspond to football and could be linked to different things completely. For example, a football is a sphere so therefore using an image of a sphere, made me think more out of the box for this task. This is the task of mood board sabotage that I found most difficult as I was made to strip down to the very literal basics of football, the shapes and colours that you may see, it became very tempting to add more in than would have been allowed like crowds cheering.
Initially, I found mood board sabotage quite easy as it started off as finding images that linked immediately to football, this being the basics that you get to know within life for example stadiums, football and the players etc. However, as this went on it became more difficult as I was having to think more abstract into these things and thinking of the shape of the football and the colours you may see and the shapes that correspond to the sport.
I believe I would find myself using this skill again if I were to plan an abstract piece corresponding to something as it helps to make you think of the basics around a topic.
History of Design Styles
What is Adobe Photoshop?
Photo manipulation and editing software
What is Adobe Illustrator?
Digital graphics/ art & design software
What does the term ‘Graphic Design’ mean?
The art or skill of combining text and pictures in advertisements, magazines or books
Design Style Examples:
Victorian
Psychedelic
Kitsch
Bauhaus
Task- Design a history timeline using images and colour and create a custom finish.
This is the timeline of graphic design through the years I created and annotated. In my personal research through the internet, I read about the different eras of graphic design and how all of the different styles have led to the style of graphic design we have in the modern day.
Illustrator
What is Illustrator?
Illustrator is a vector graphics, art, and graphic design software package developed by Adobe.
Raster vs Vector
Raster Graphics: Pixel-based, will lose quality when scaled (lossy).
Raster images are generally what a person is to think of when they think of an image. This type of image is the one that will be created when scanning or photographing an object, they are images compiled using pixels to create the image.
Vector Graphics: Path-based shapes that can be scaled indefinitely (lossless).
A vector image is a type of image that is defined through connected lines and curves. They form shapes based on precise mathematical equations.
Task- Create Shapes and symbols with the pen tool
Example of a shape I made during the pen tool.
To make this, I opened a new document in Illustrator and began by clicking the pen tool on the side of the screen. I drew a 3 point shape with curvy outlines, I then clicked onto the direct selection tool allowing me to move points around that I have drawn. When I had finished making my shape it came to export it, to do this I clicked FILE<eXPORT<EXPORT AS this is where I was met with a PNG options board where I made the background colour of my image white and have a resolution of 300 ppi.
This is the attempt I made at drawing the Mini logo using the pen tool and text tool on illustrator. I made the stroke of the pen line to 3pt as well as my text to match the mini logo and also makes my logo stand out more and makes it more legible to read from a distance.
I found the illustrator easy to use with the pen tool after coming to terms with how it worked and found it useful when creating shapes and needing to add curves to these shapes. I am optimistic about using illustrator more in the future.


